

Available for the following WhatsApp providers: 360Dialog, Meta, and GupShup.
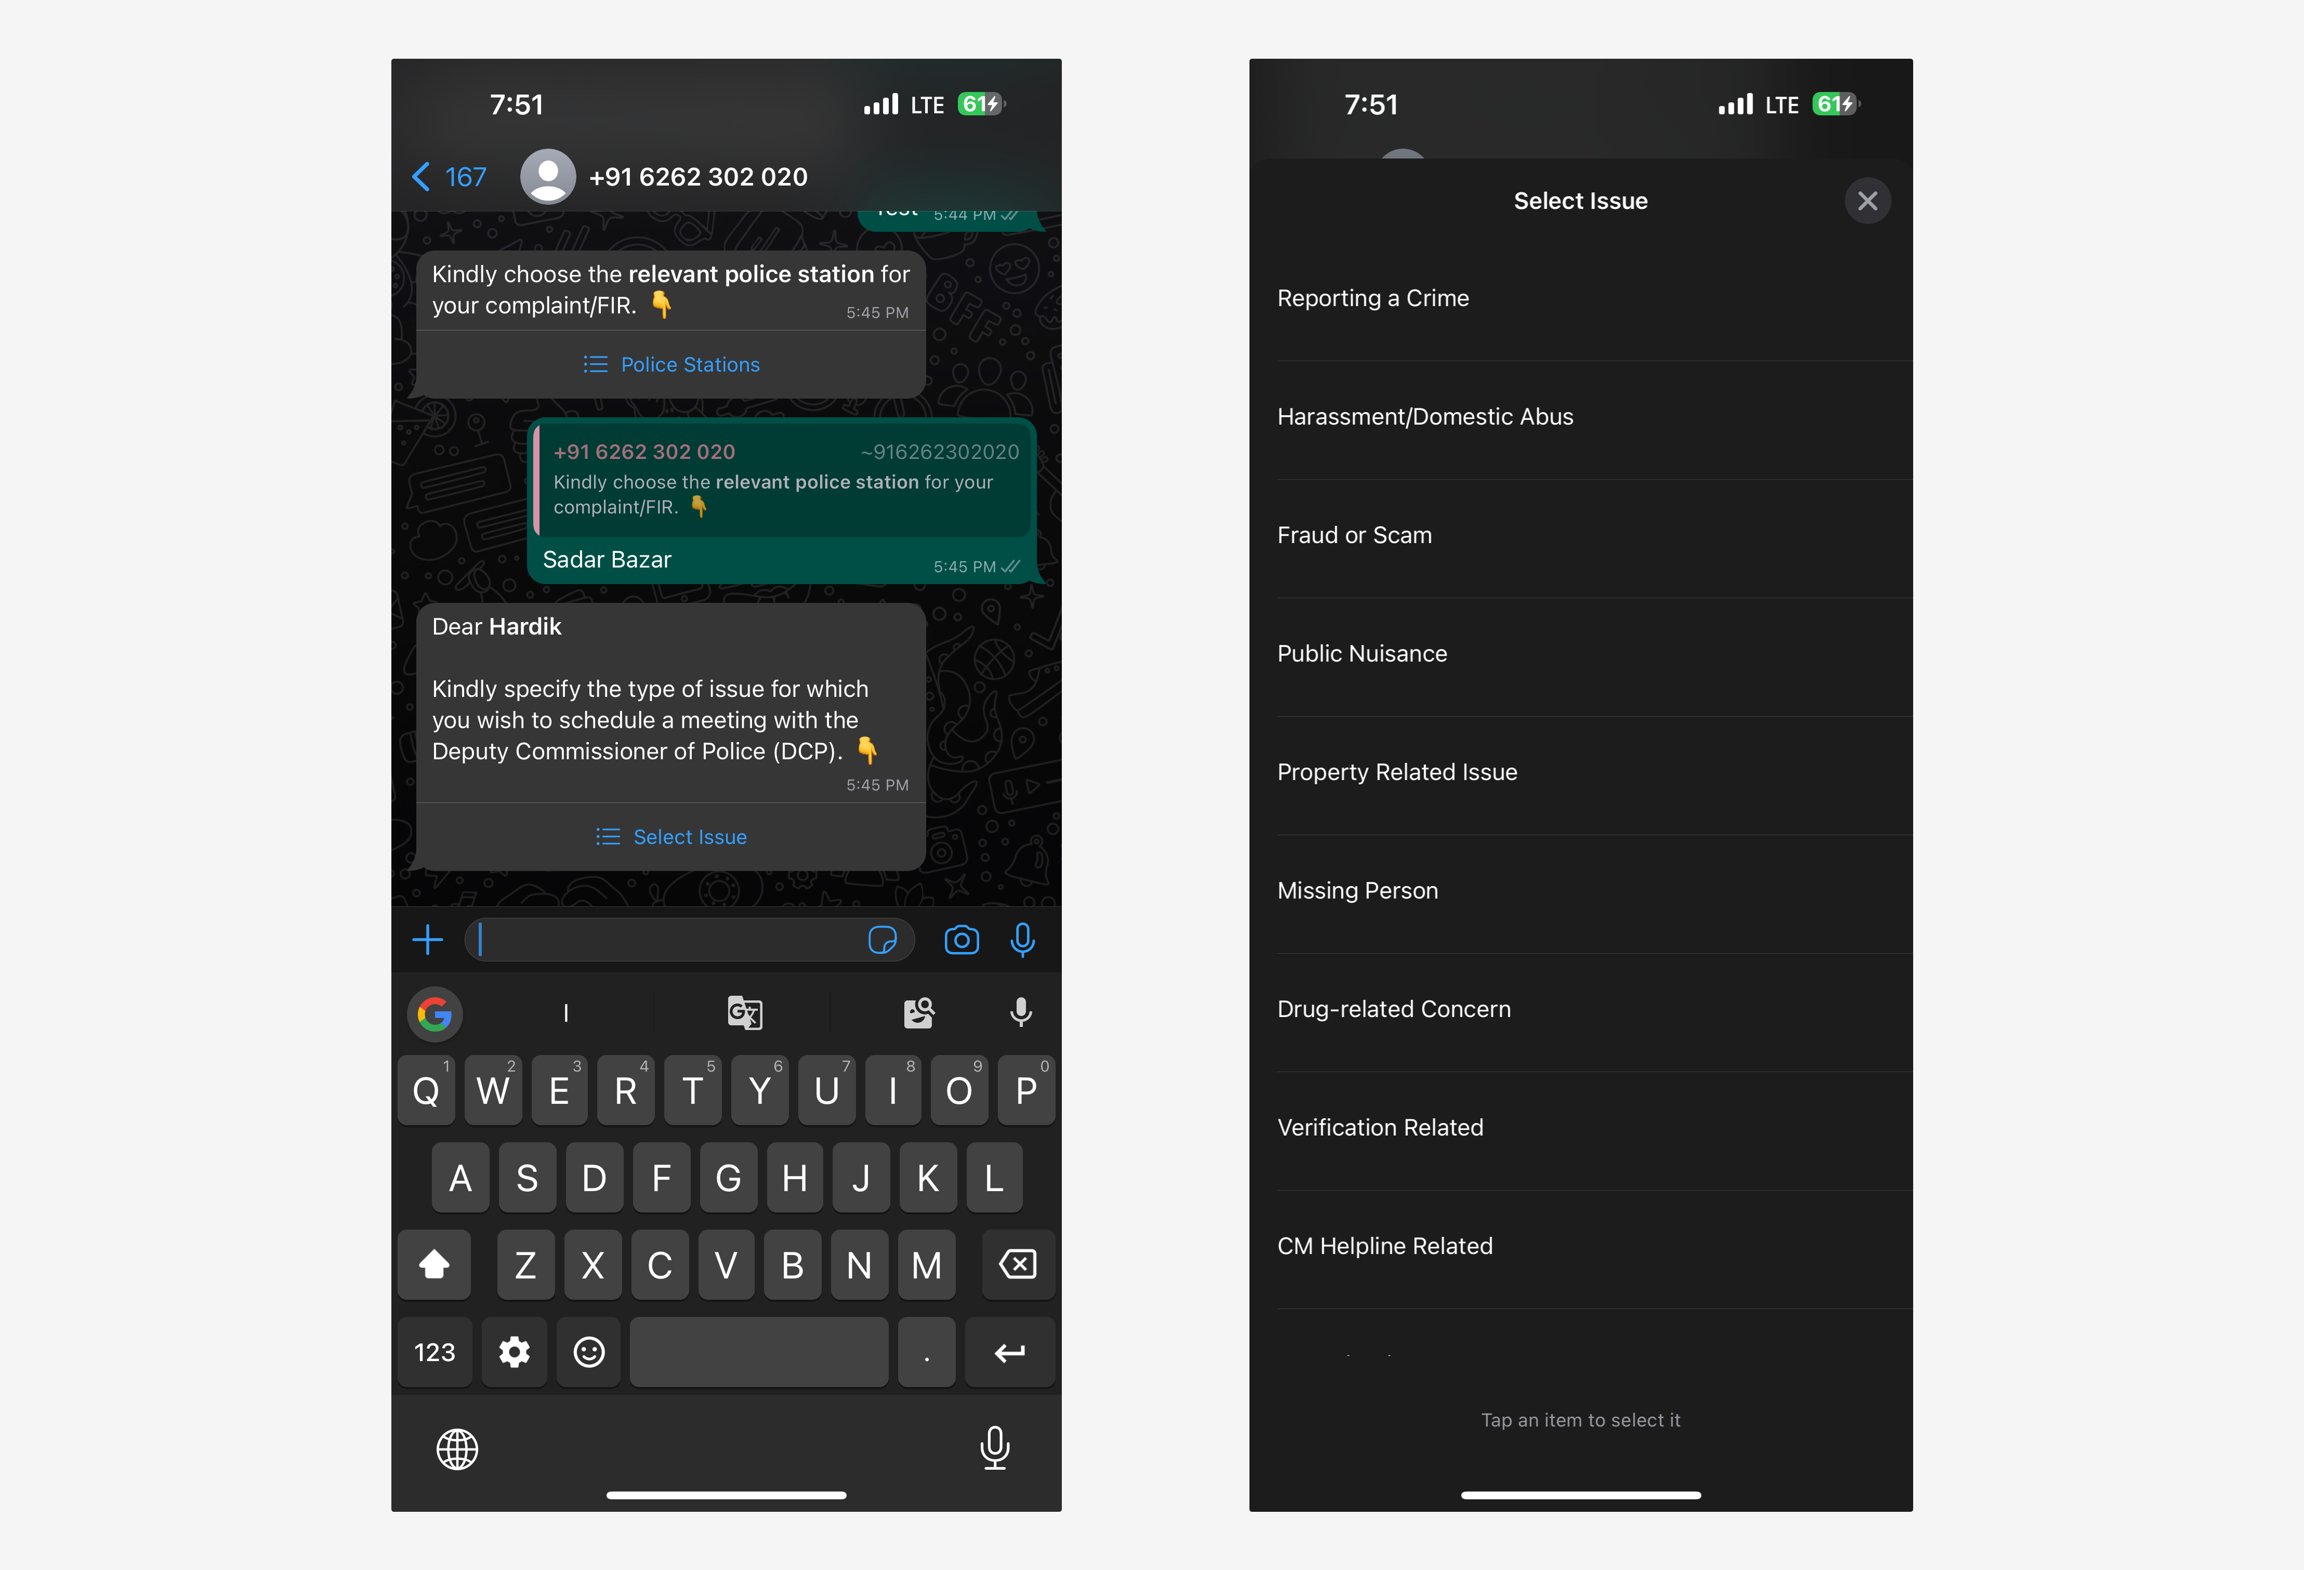
Using the List block
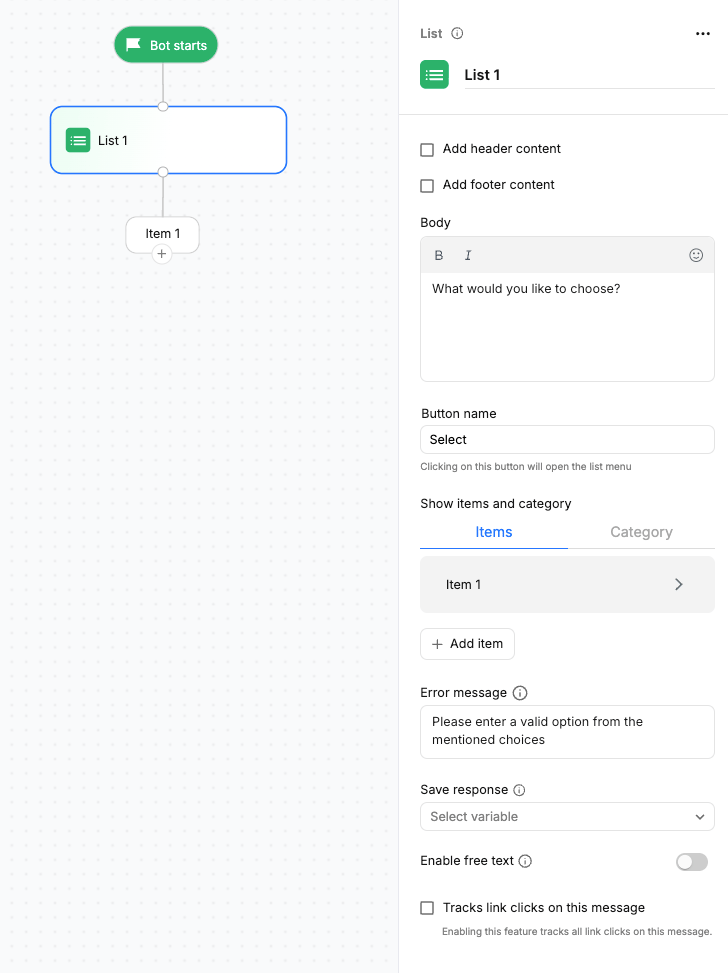
1
Add the List block
Drag the List block onto the canvas and connect it to the previous block.
2
Configure the message
Add the optional header and footer content, and enter the question or message you want to show in the Body field.
3
Configure the list
Enter the Button name and add the items and categories that you want users to choose from.
4
Configure the response
Enter an Error message and select a variable in Save response to store the user’s selection.
Configurations
Header
Shows the text in a bold format — making it look like a title. It is an optional field.Footer
The text is displayed in a small grey color format. Mostly used to display a disclaimer to the user when selecting the option from the list.Body
The text will be the question associated with showing the list of options. For example, “Select the service you are interested in”.Button Name
Along with the above, a button will be displayed, on click of which we will show the list of options in a drawer format. You can write the button’s name here, such as ‘Choose’, ‘Select’, etc.Items & Category
All the items that are to be displayed in the list are defined here. Each item contains the following information,- Item name — Name of the item
- Item description — A short description of the item
- Category — List of all categories created. It is optional.
- Button payload — Button payload is like a hidden label you attach to each item in your list.
A maximum of 10 items and categories can be created.
Error Message
Enter the message that is shown when the user’s response does not match a valid list option.For e.g.: Please enter a valid option from the mentioned choices.
Enable free text
By enabling “Enable free text” option, users can either choose from predefined buttons or type their own response in the chat input. Also, on the canvas a new “Free text” node will be added, which can be connected to an AI agent action block for AI-generated responses. This allows for more natural, two-way conversations, and any free text entered can be handled by an AI agent for dynamic responses.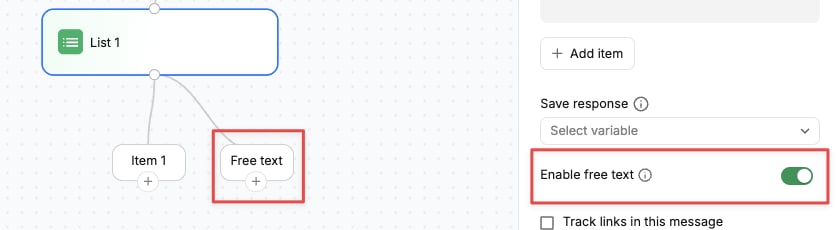
Button payload
When the user clicks an item, this hidden label gets saved using the “Save button payload response” option. This means the bot remembers which item the user selected. Later, in the Condition block, you check this saved label (payload value) to decide where to send the user. Example:- You set the button payload as “cart” for Item 1 and Item 2
- The user clicks Item 1 → the bot saves “cart” because of “Save button payload response”
- In the Condition block, you check: “If saved value = cart → go to Cart Flow”