

Available in all channels except Voice.
Using the Collect file block
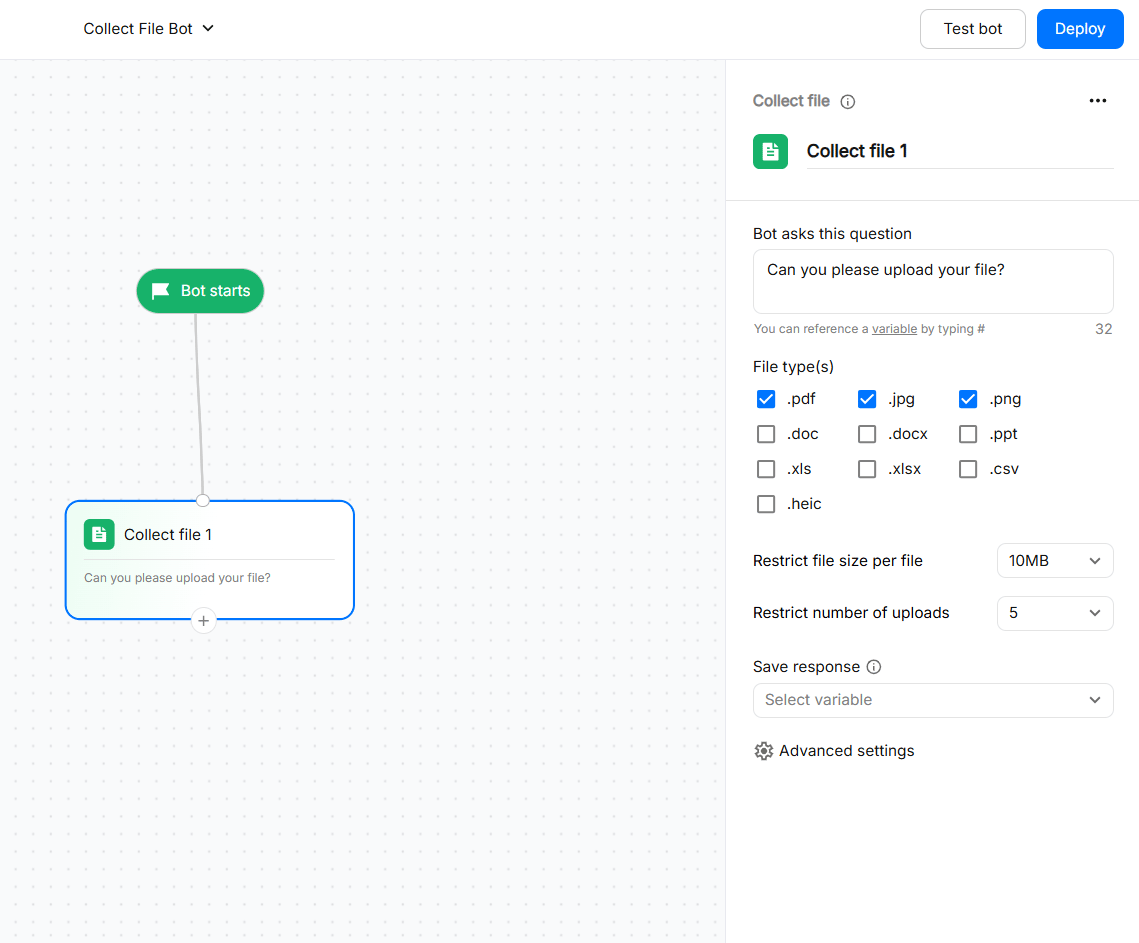
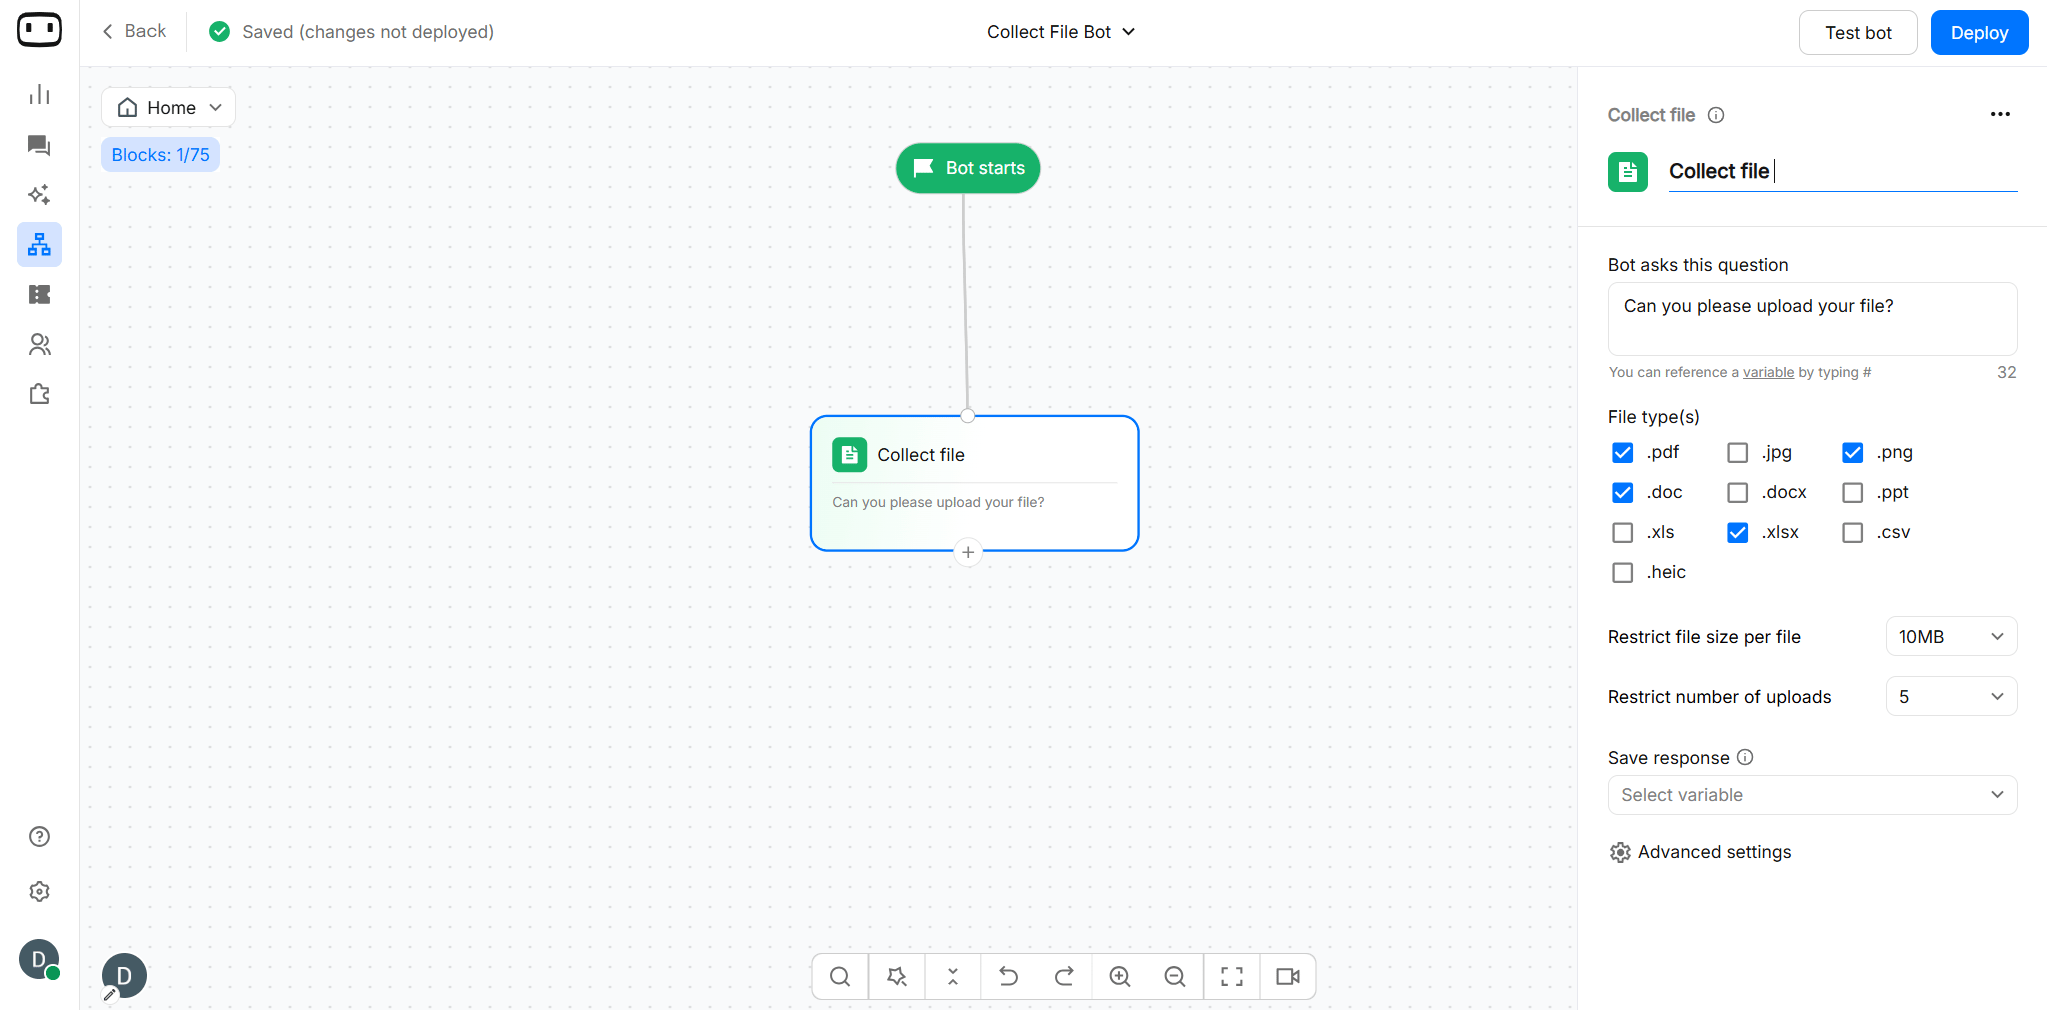
To collect a file from a user:- Drag the Collect file block onto the canvas.
- Configure the allowed file types and upload limits.
- Select the variable where you want to store the uploaded file information.
1
Set the file size limit
Under Restrict file size per file, select the maximum file size allowed for each uploaded file.
2
Set the number of uploads
Under Restrict number of uploads, select how many files the visitor can upload.
3
Save the response
Under Save response, select the variable where the uploaded file response should be stored.You can use this variable later in the bot flow or pass it to another action or integration.
Configurations
Question text
Enter the message shown to the user asking them to upload a file.Allowed file types
File extensions types that users can upload. Supported file types are :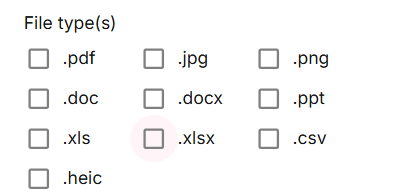
File size limit
Set the maximum file size from 1 MB to 10 MB that a visitor can upload from the drop down list.
Number of files
Set the maximum number of uploads from 1 to 10 allowed for the visitor. You can choose the number of file limit from dropdown.
Save to variable
Select or create a variable where the user’s uploaded file will be stored. This variable can be referenced later in your workflow.The uploaded files are stored on WotNot’s cloud server, and a publicly hosted file URL will be stored in this variable.

Validation message
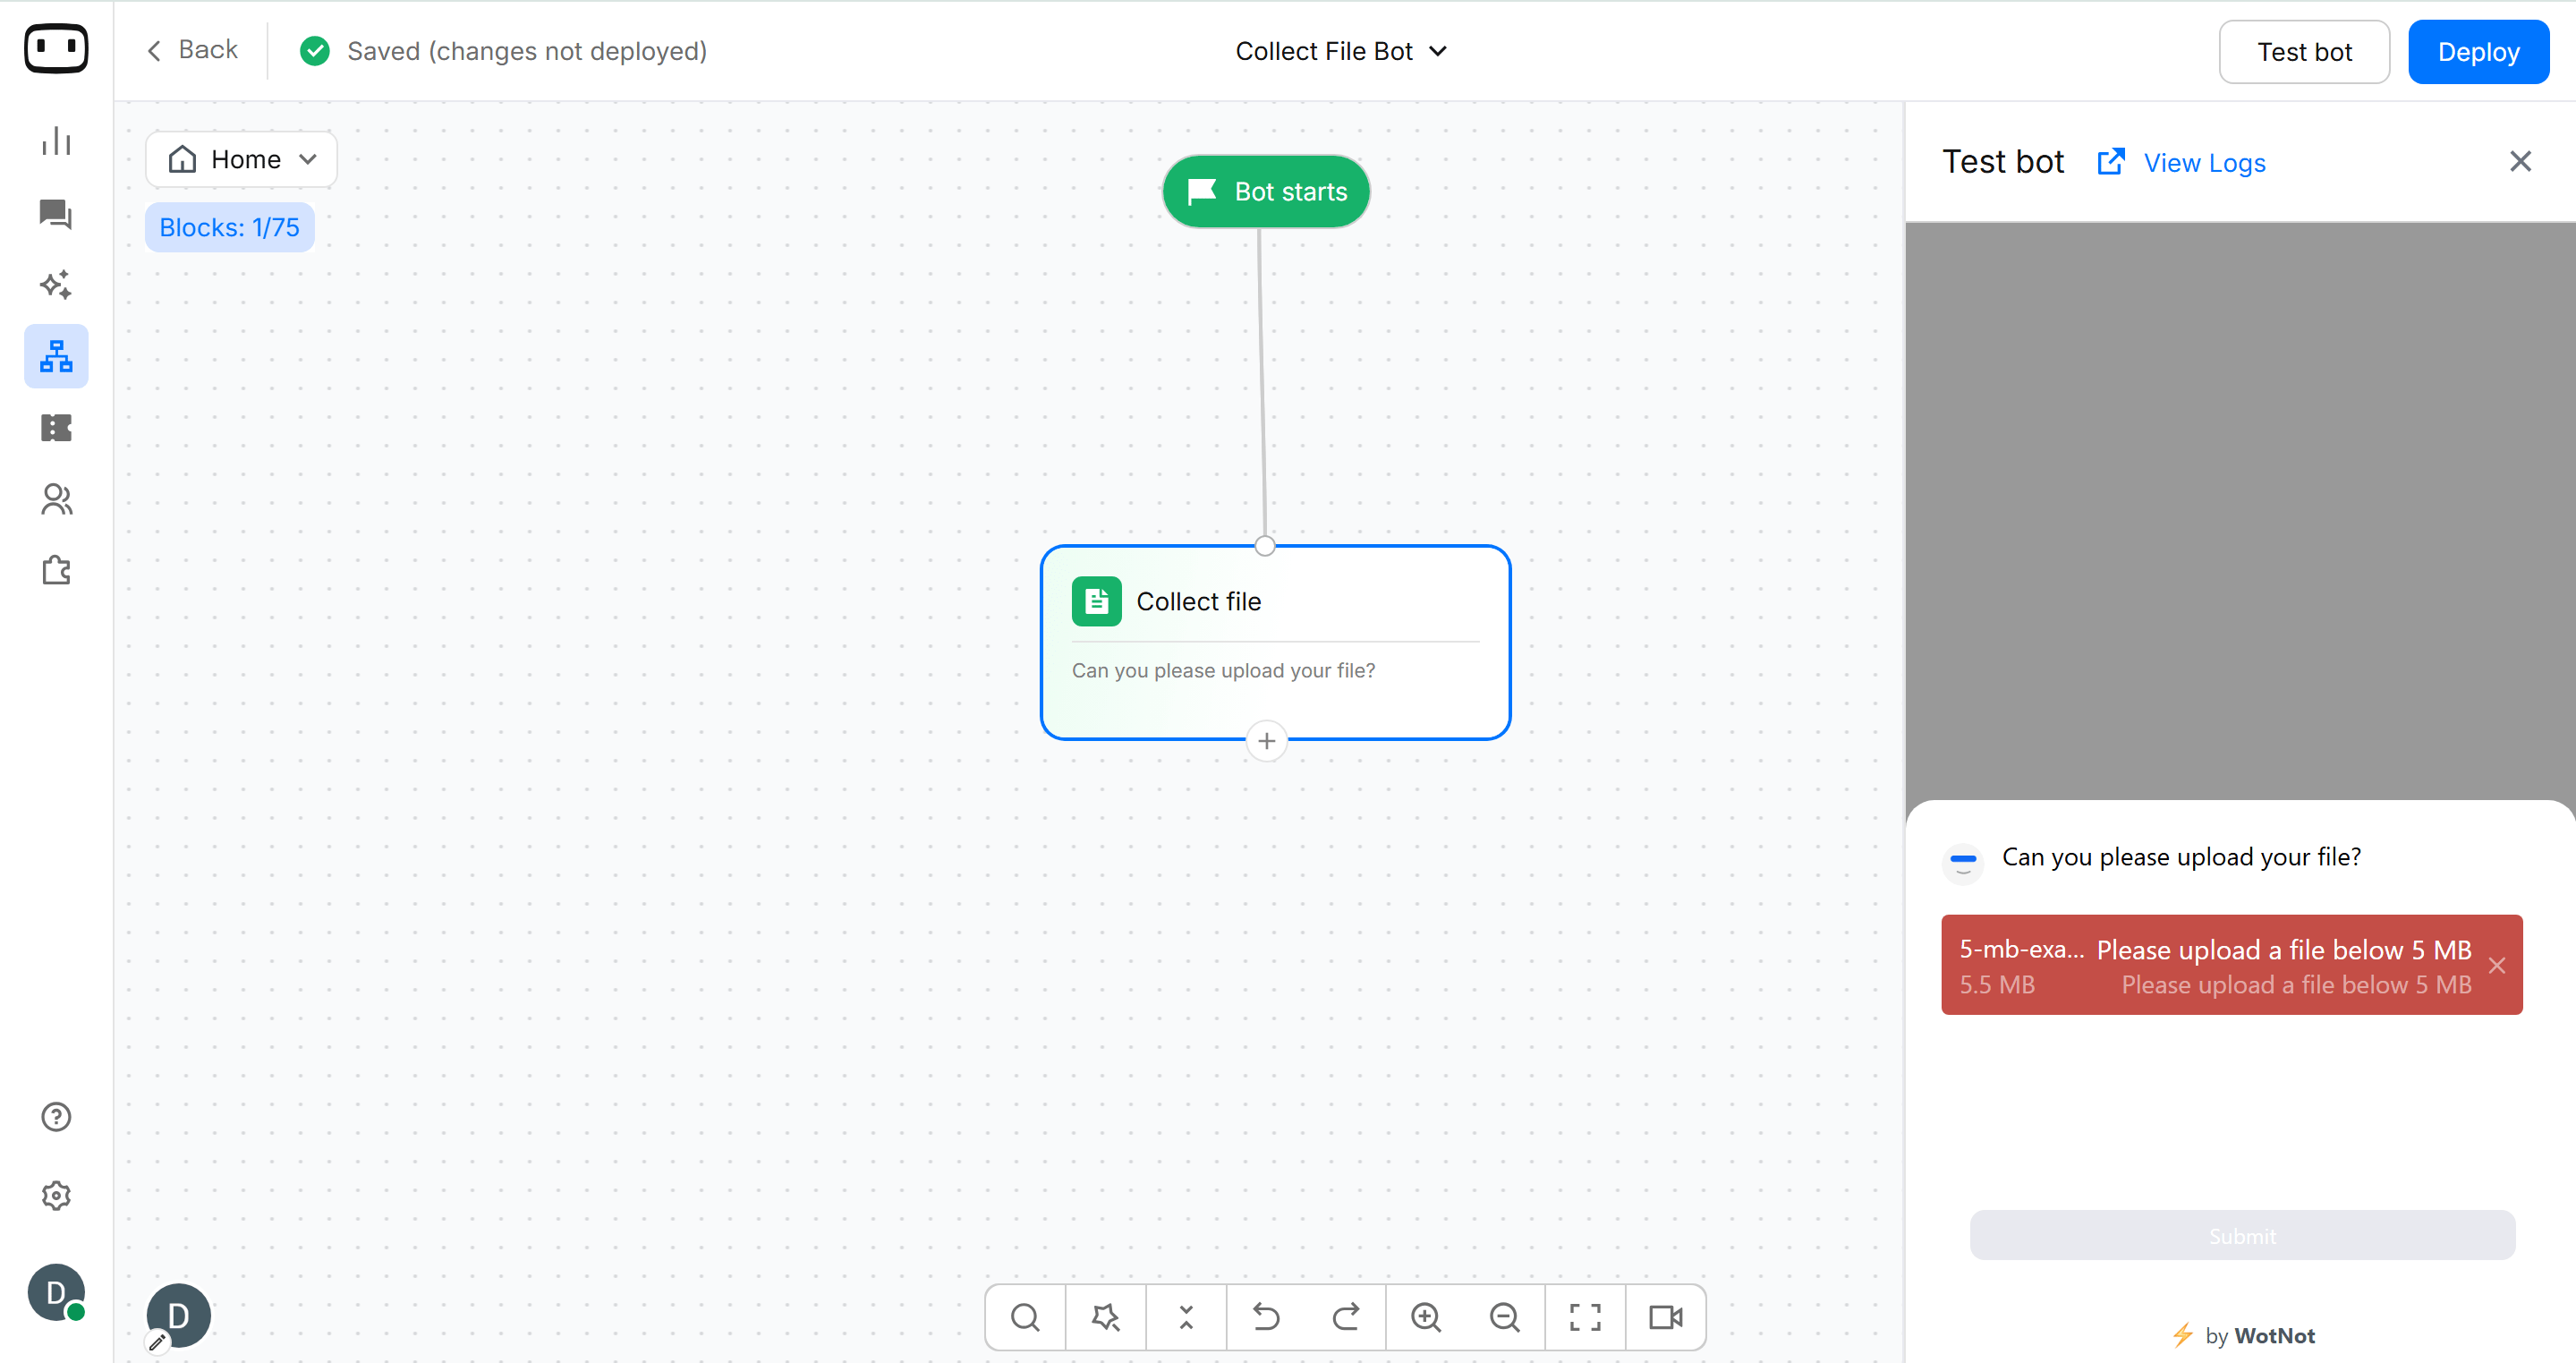
Sets the maximum file size allowed for uploads. If the uploaded file exceeds the configured limit, the system automatically displays the validation error message.- Example: If the file size limit is set to 5 MB and a user uploads a PDF larger than 5 MB, the system automatically shows the configured error message.
Other configurations
It is the additional option available for the block. Send message as info title: Enabling this will compress the message description and show the title as defined. It appears as a tooltip that can be expanded to see the information.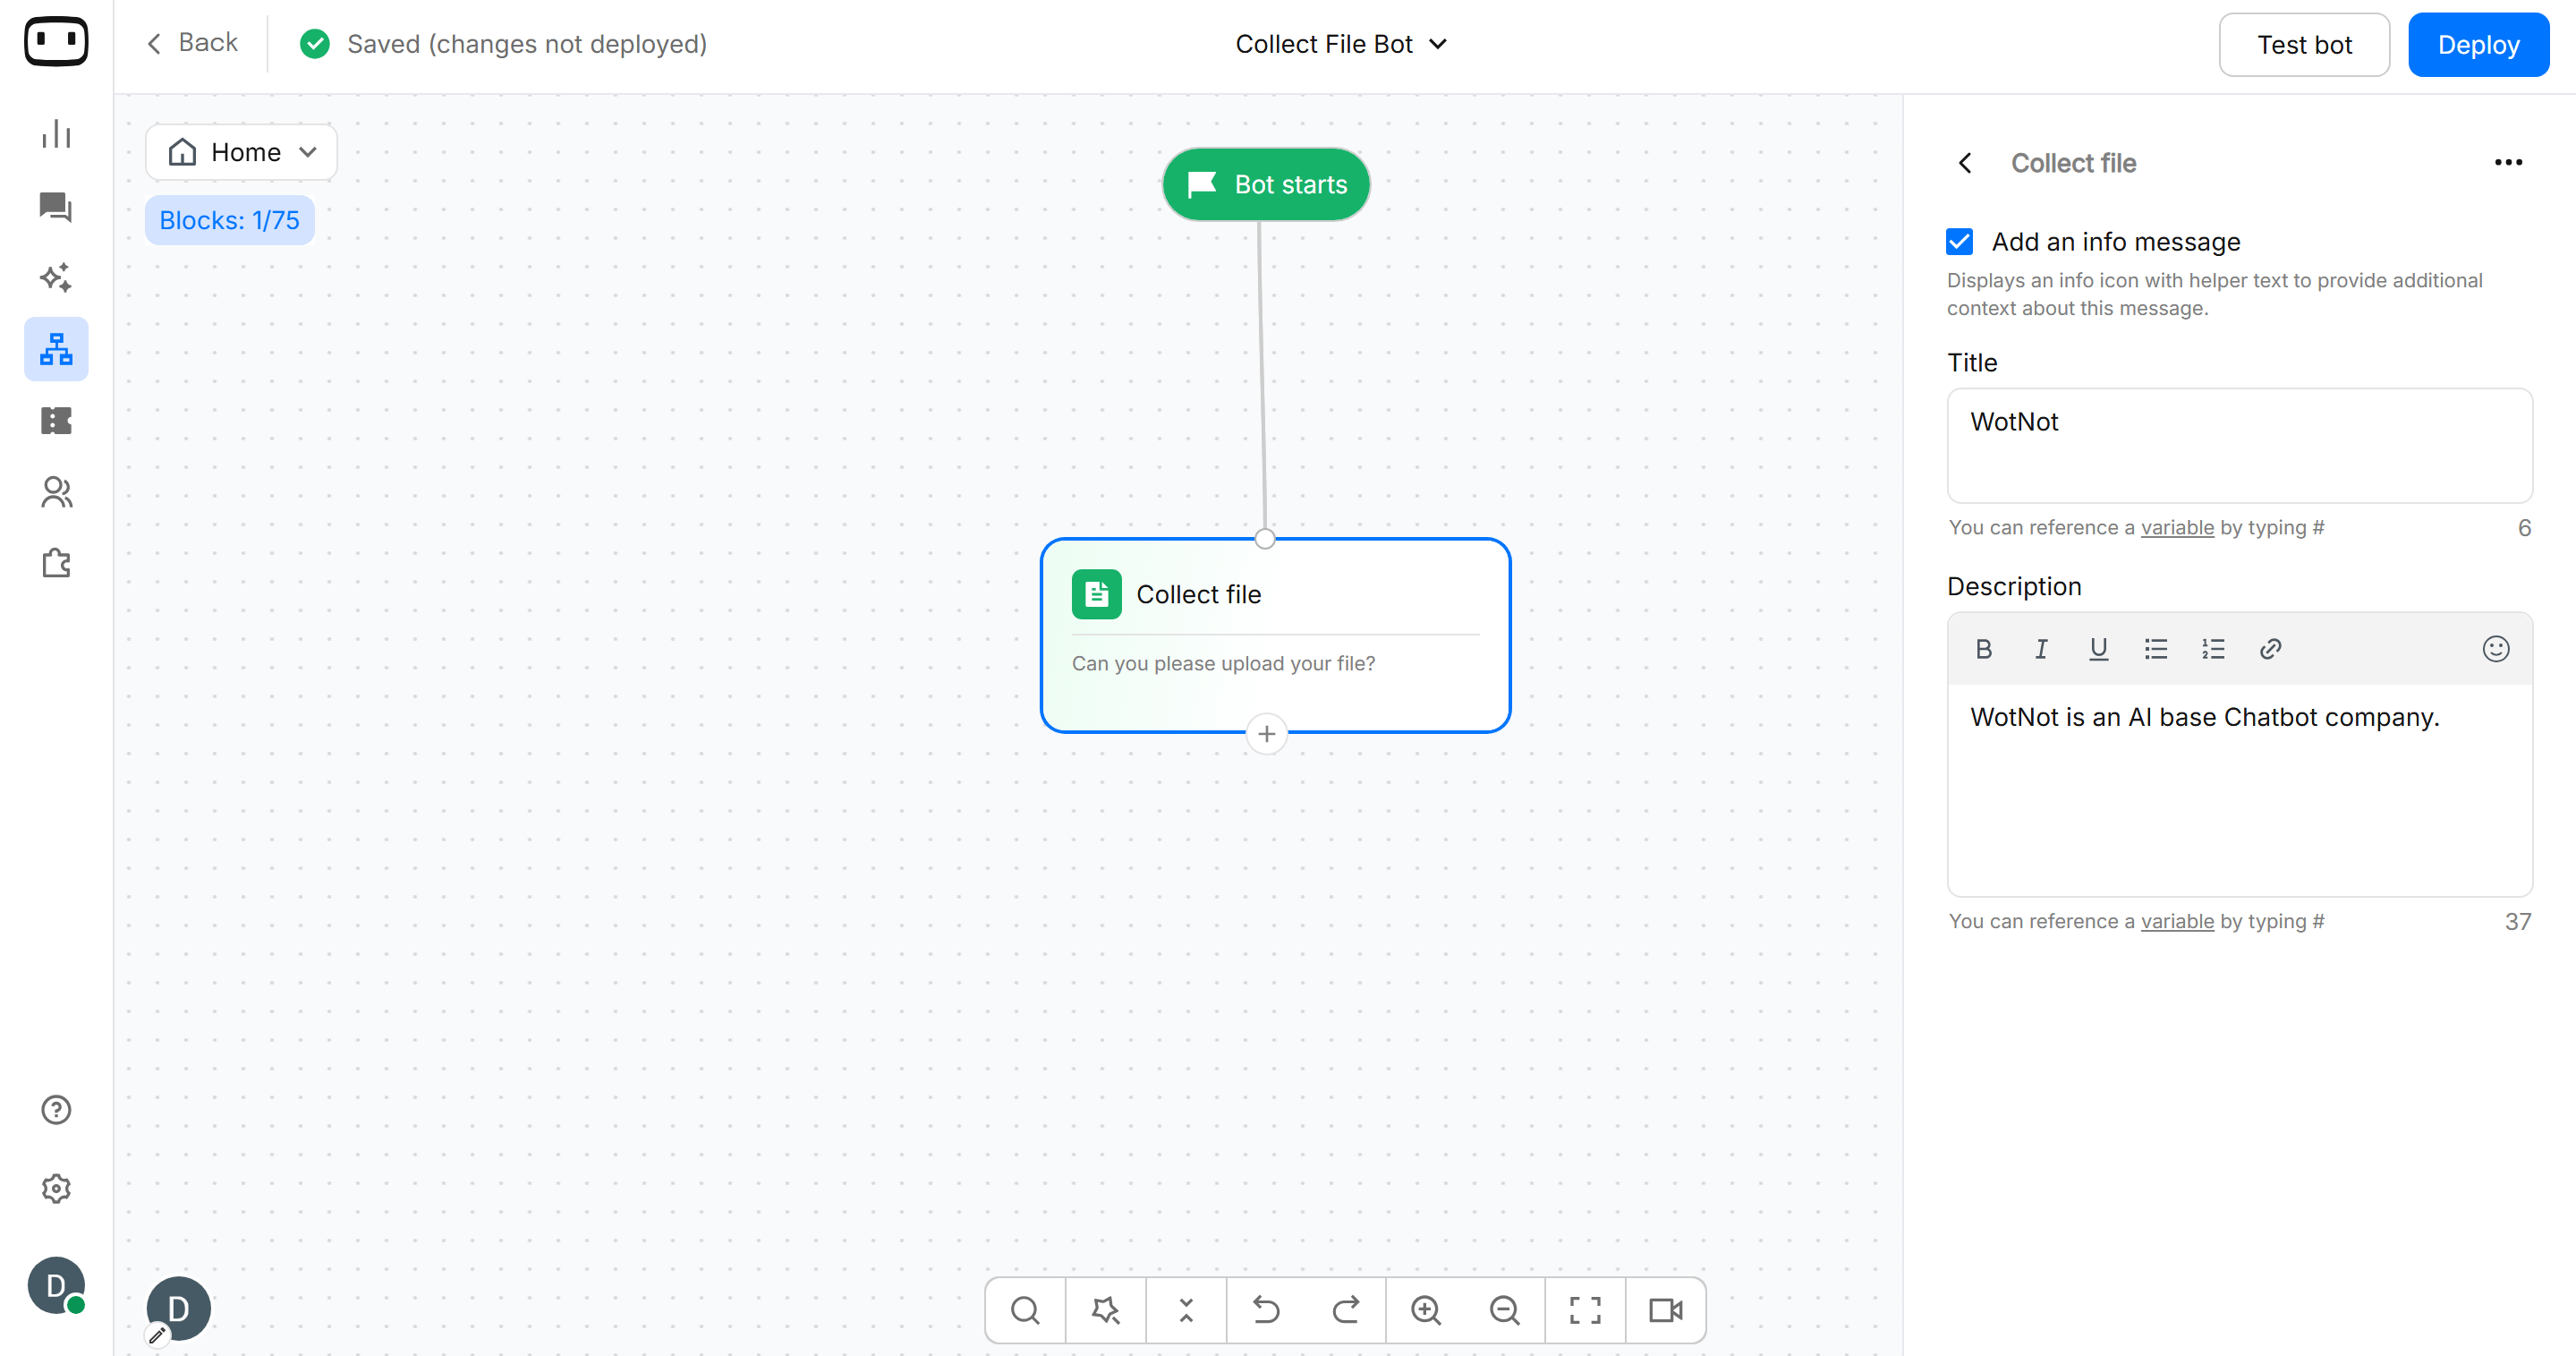
- Click on Advanced Settings>> select the checkbox , Enter Title and Description.
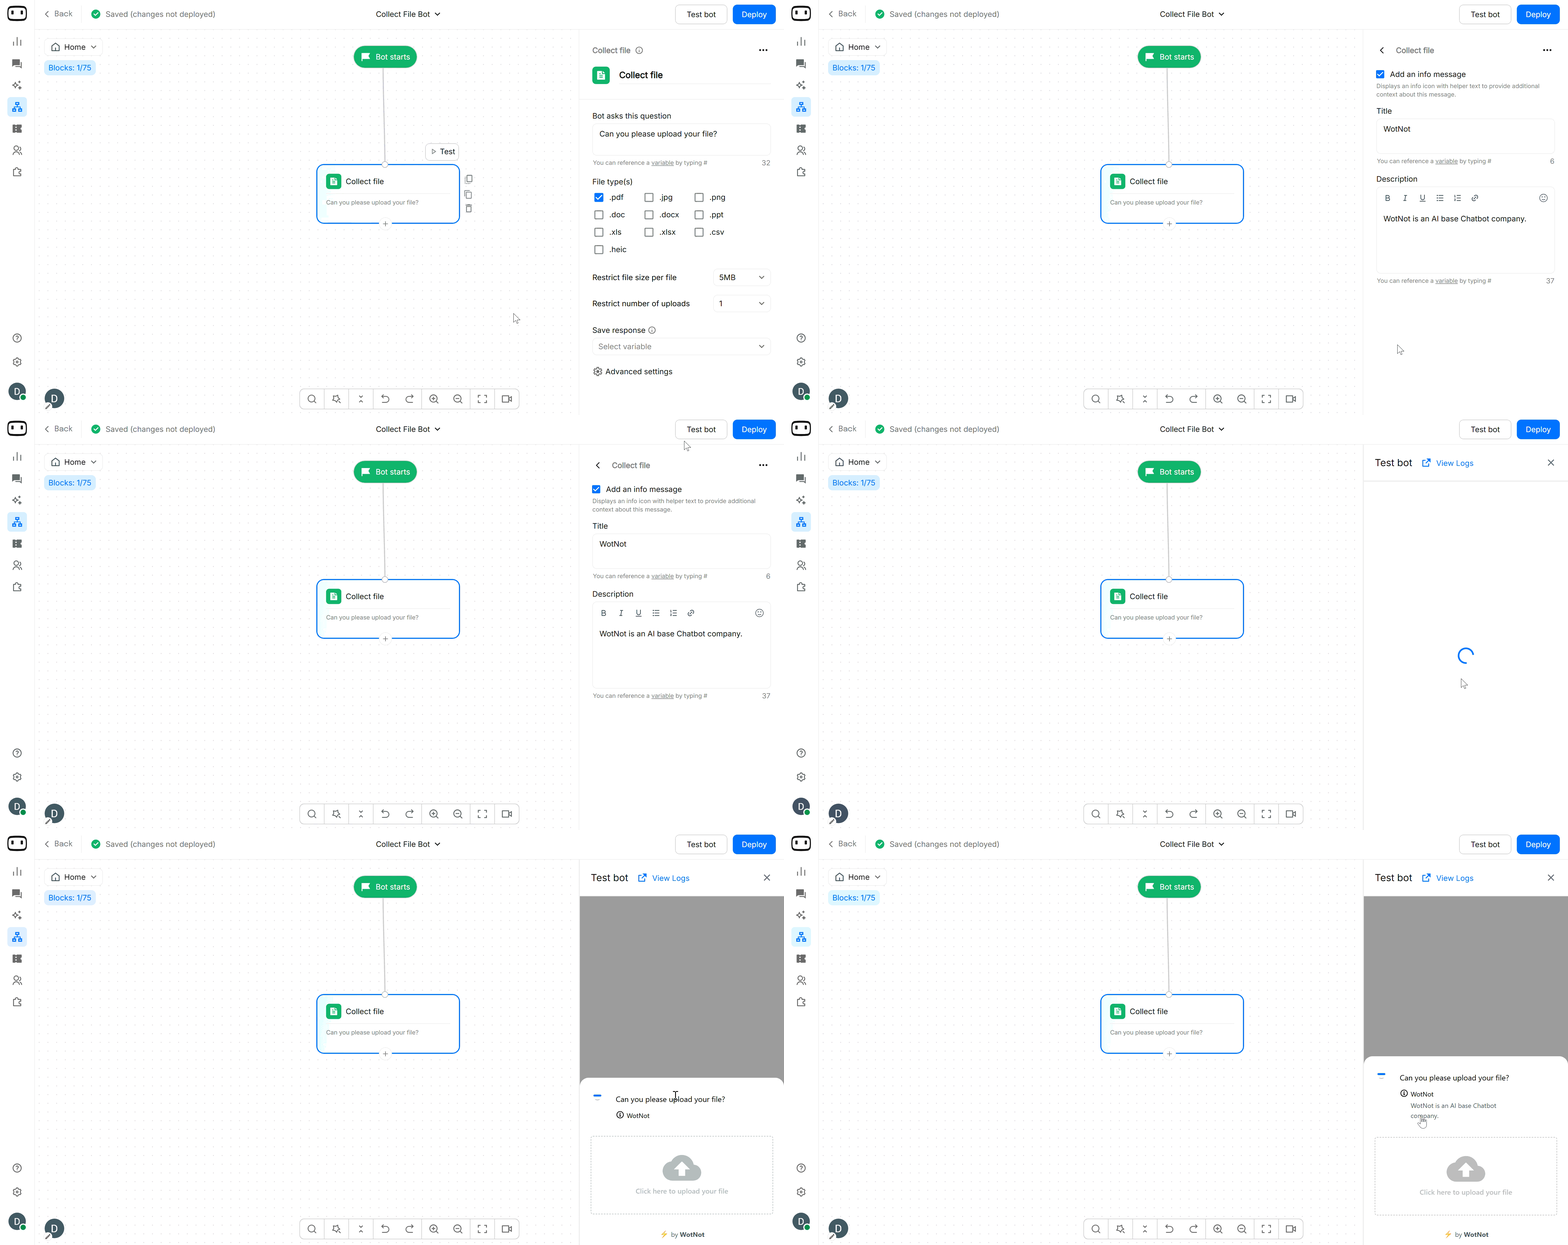
Output paths
Use the output paths to define what happens after the user attempts to upload a file.- Upload successful — Continue the conversation when the file is uploaded successfully.
- Upload failed or skipped — Handle cases where the upload fails or the user does not provide a file.