

Available in OUTBOUND BOTS only.
Sending emails requires a verified sending domain. Your domain must be configured and verified before you can send emails from your own domain. Email availability also depends on your WotNot plan.
Available only for TECHALPHA as an email provider.
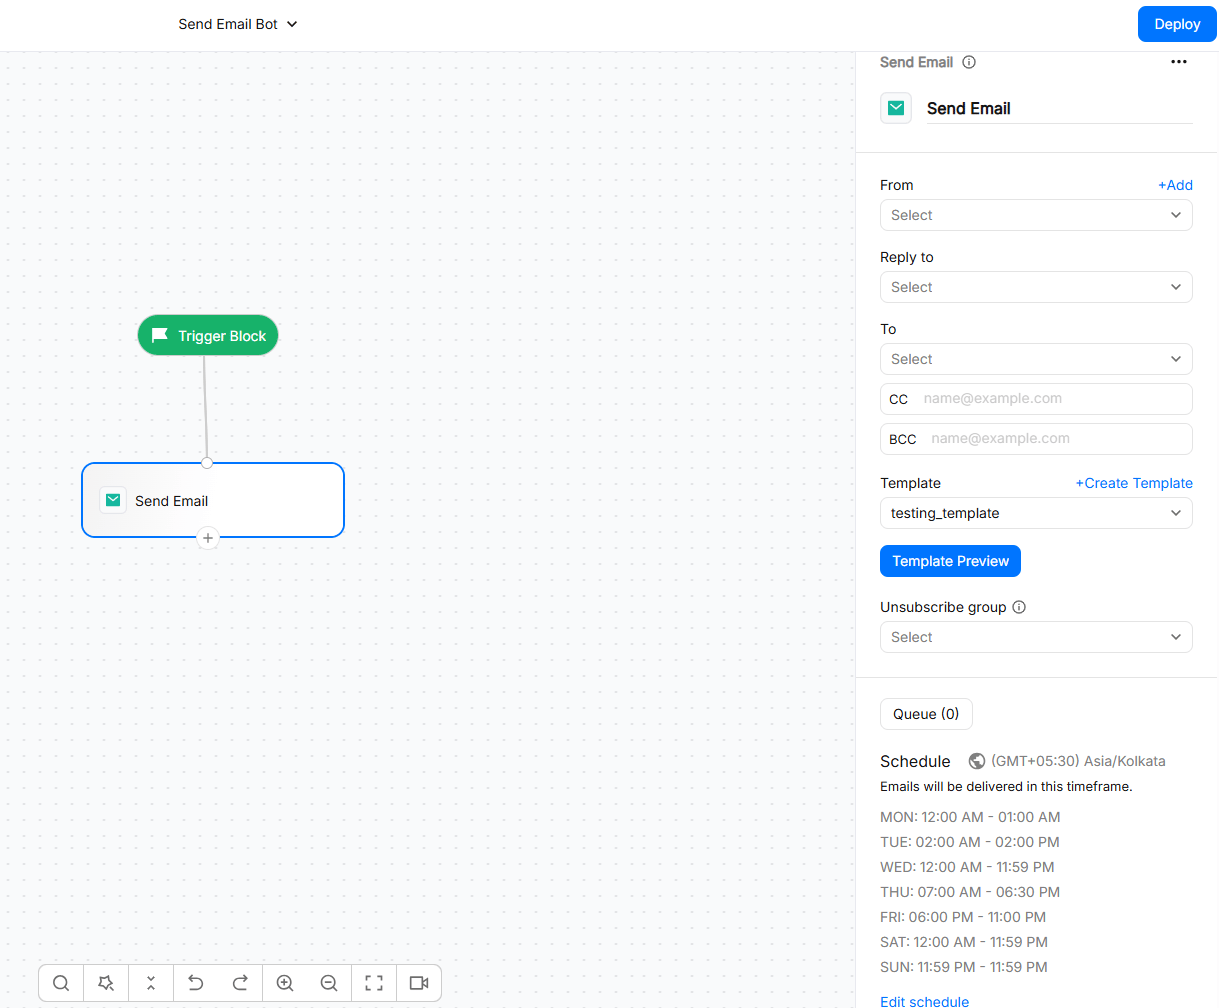
Using the Send Email block
Add the Send Email block to your outbound campaign after selecting the audience you want to contact. Configure the sender details, select an email template, and personalize the message using contact attributes.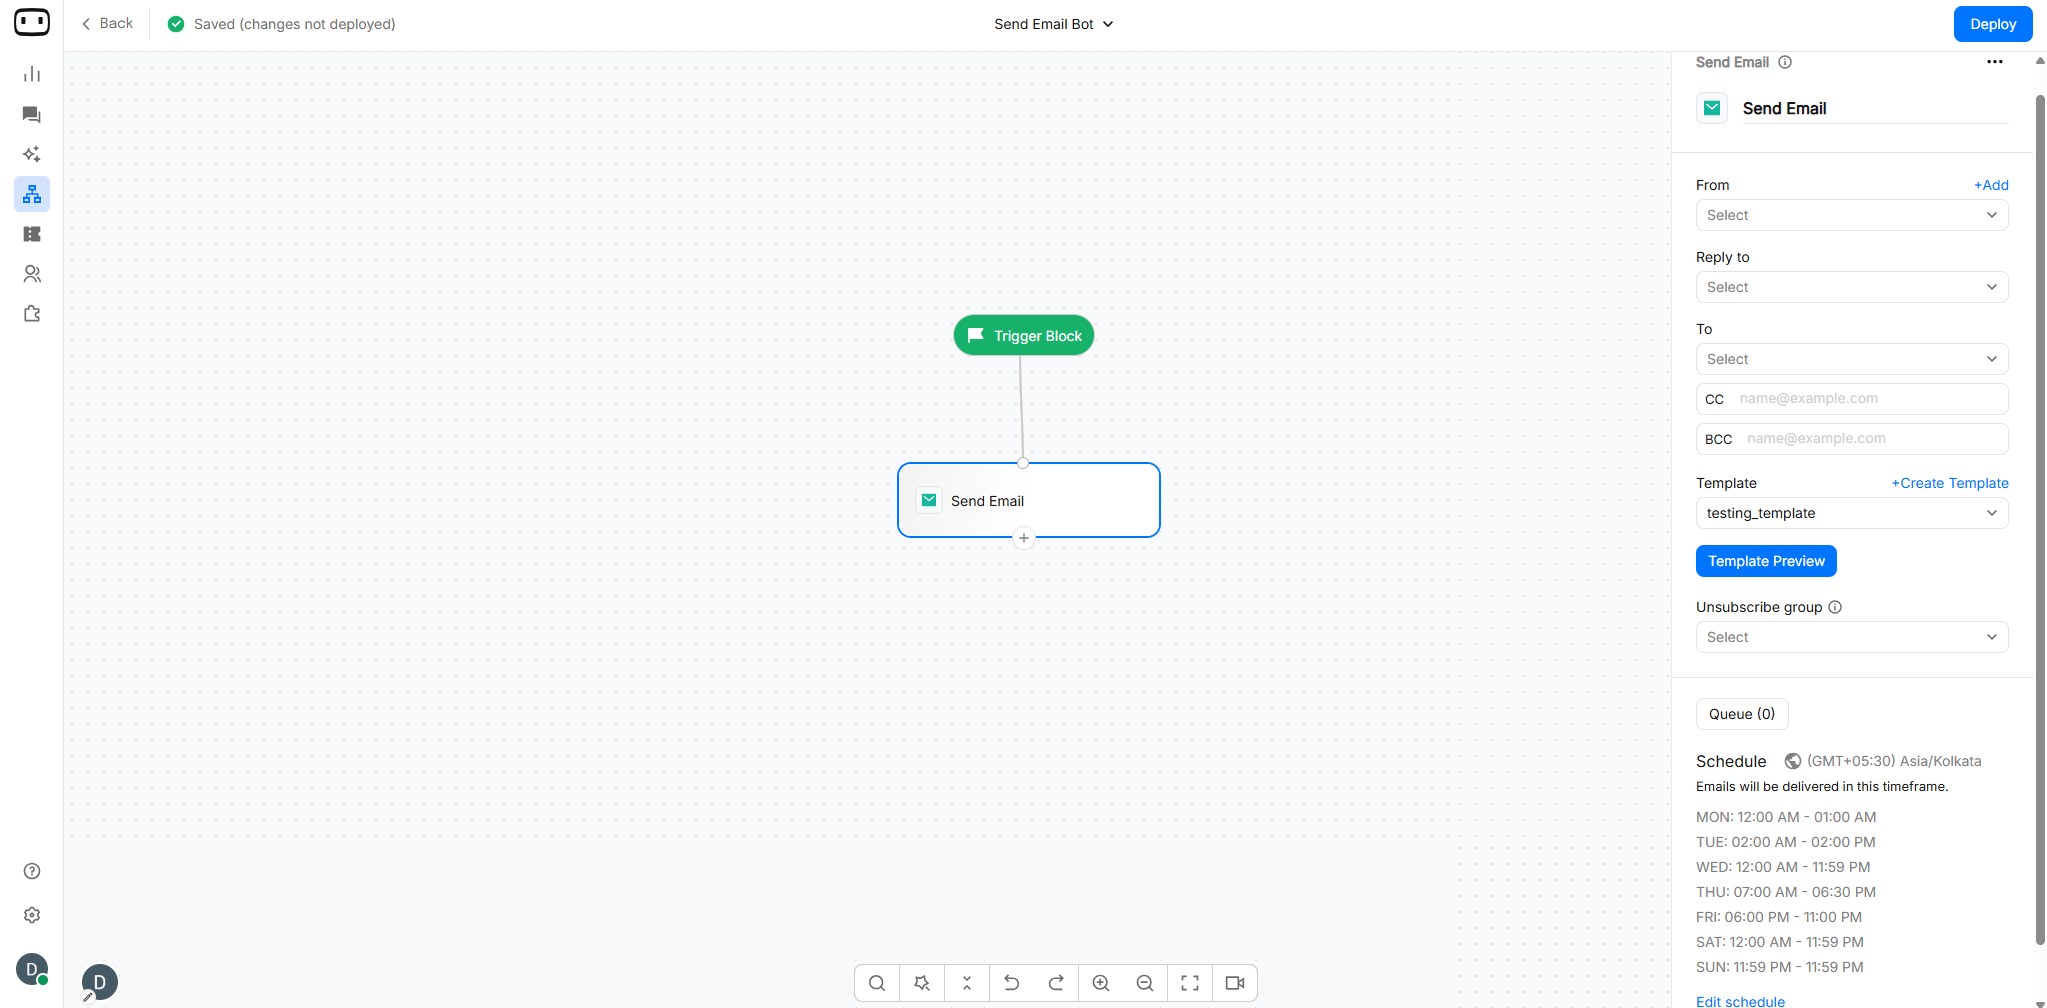
Configurations
From
Configure the email address that recipients see as the sender. The sending address must use a domain that has been verified for email sending. Domain verification helps email providers confirm that WotNot is authorized to send emails on behalf of your domain. Before sending a campaign, make sure the required DNS records are configured for your sending domain.Reply to
Specify the email address that should receive replies from recipients. This can be different from the address used to send the email. Use a monitored inbox if you want your team to respond to recipients who reply to the campaign.Recipients
Use the recipient fields to control who receives the notification.- To
- cc
- bcc
The primary recipient of the email.You can select a variable that contains the recipient’s email address.
Email template
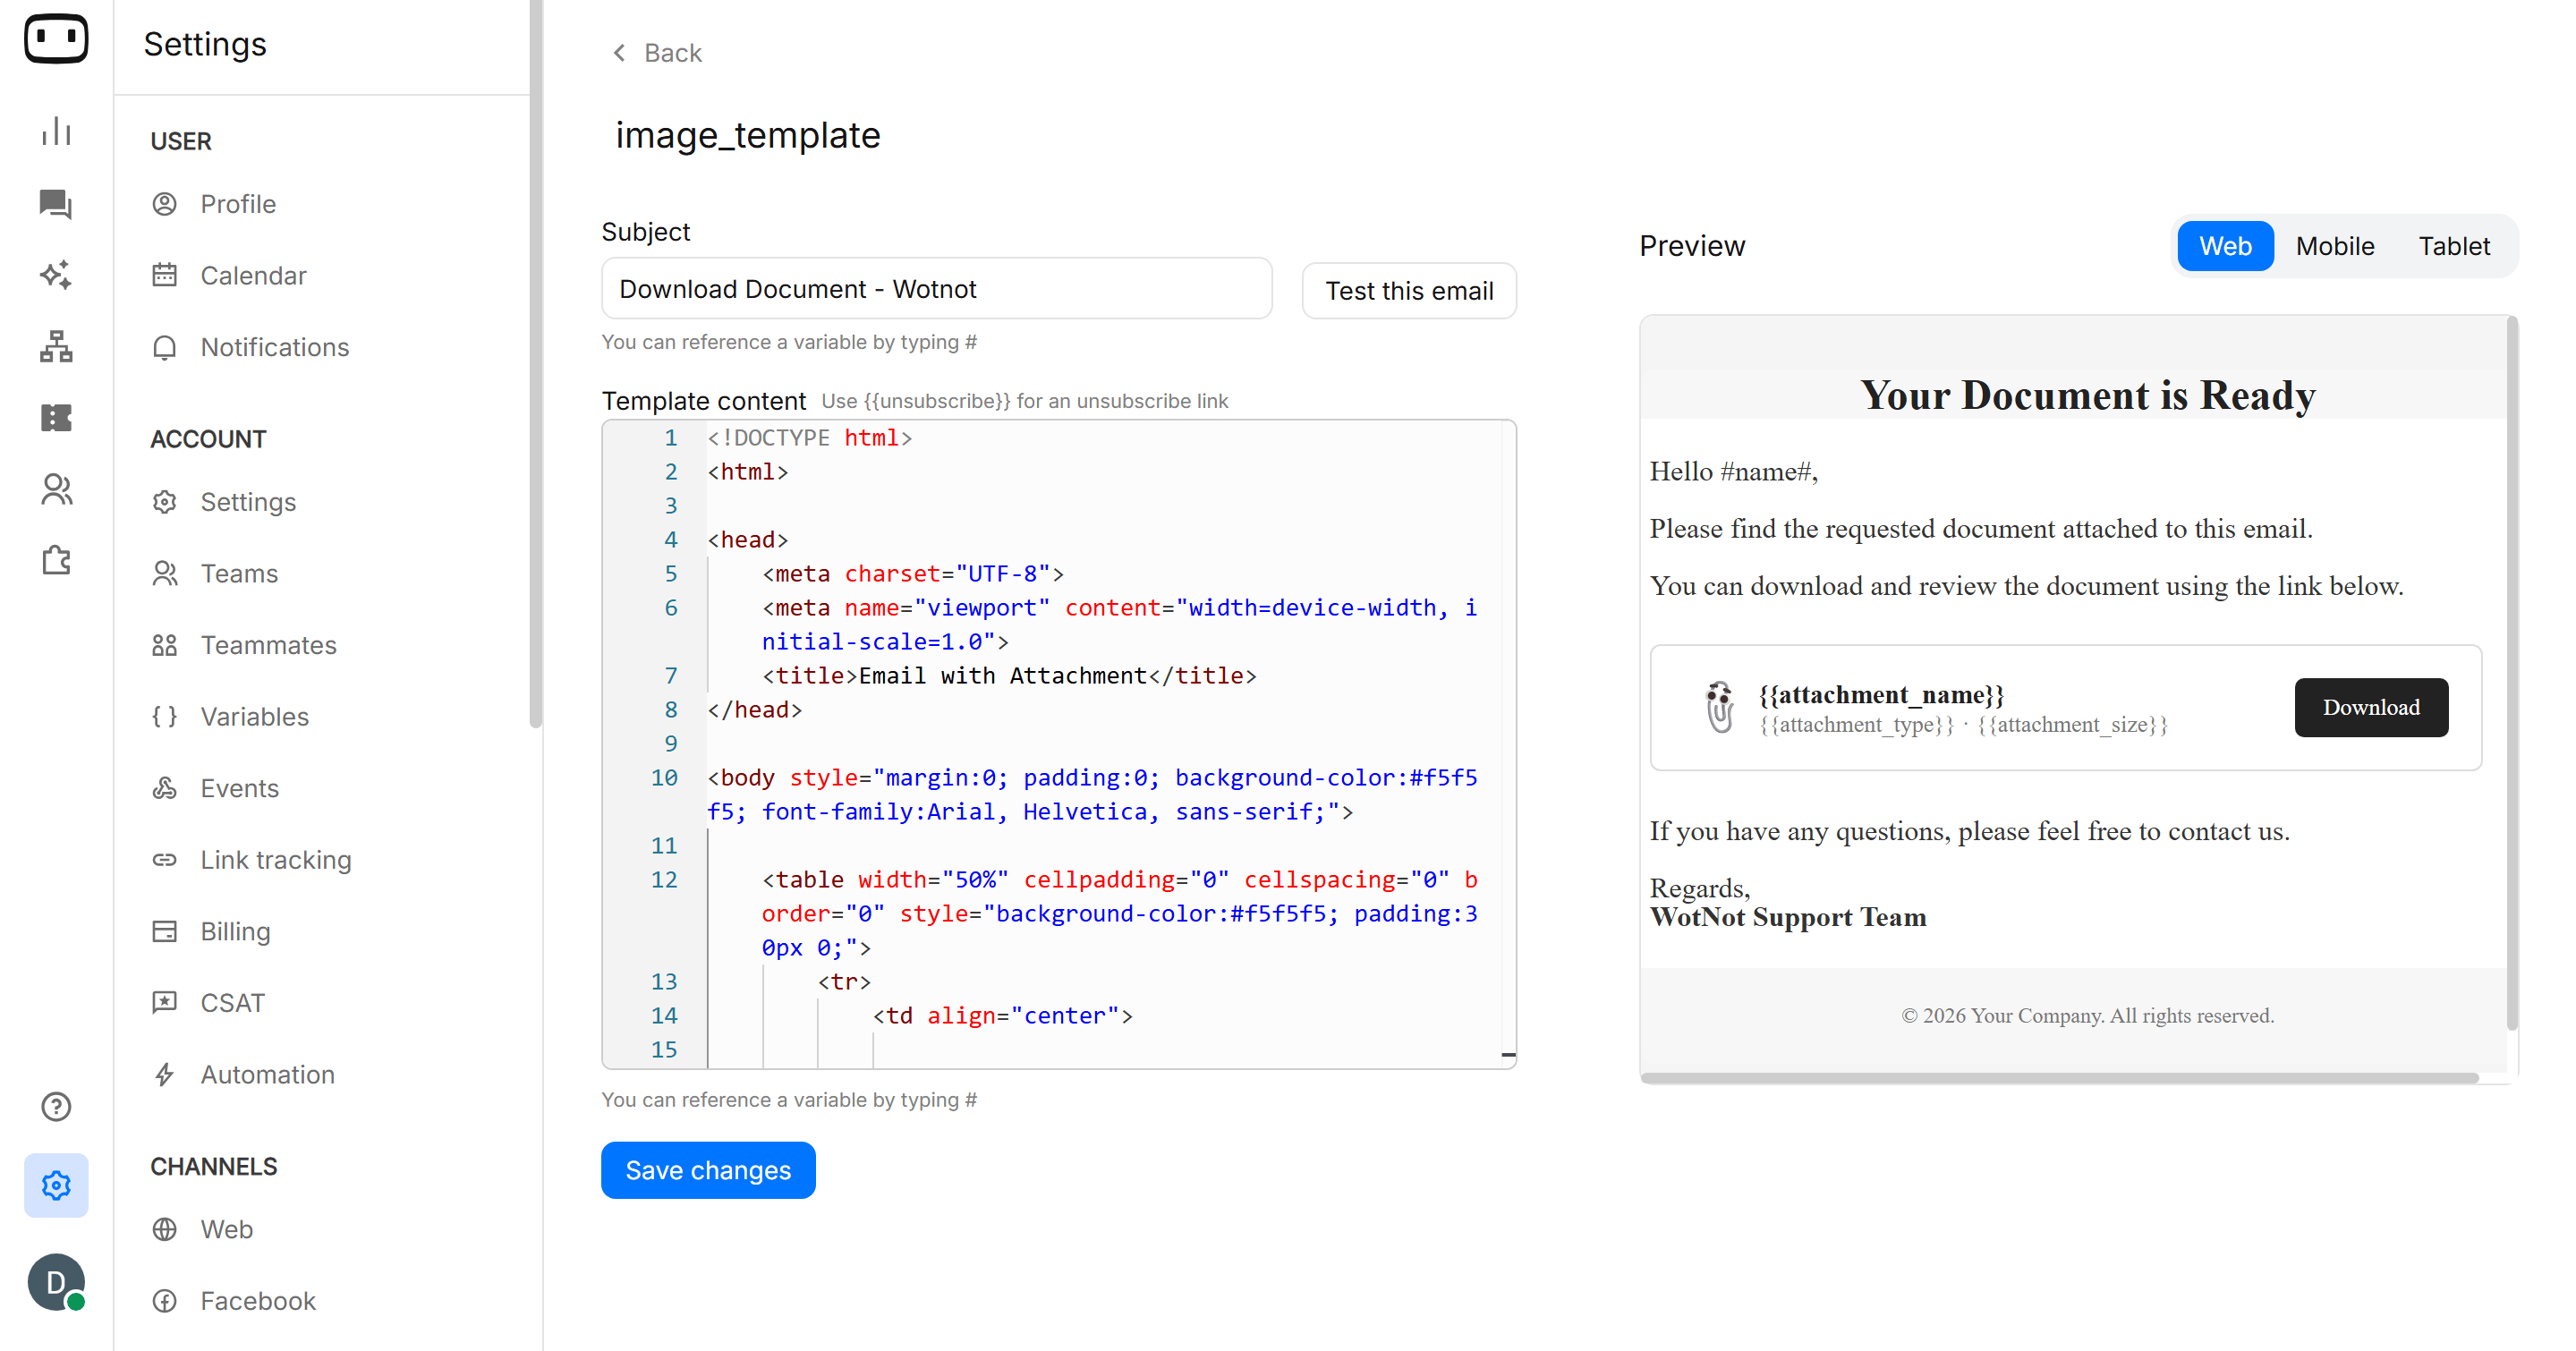
Select an existing email template or compose the email content for your campaign. Templates allow you to reuse a consistent email design across campaigns while keeping the content and personalization specific to each recipient.Creating a email template
- Click on Create Template

- A new page will open and you need to enter name your template , Subject line and Template Content.
- Click on Save changes
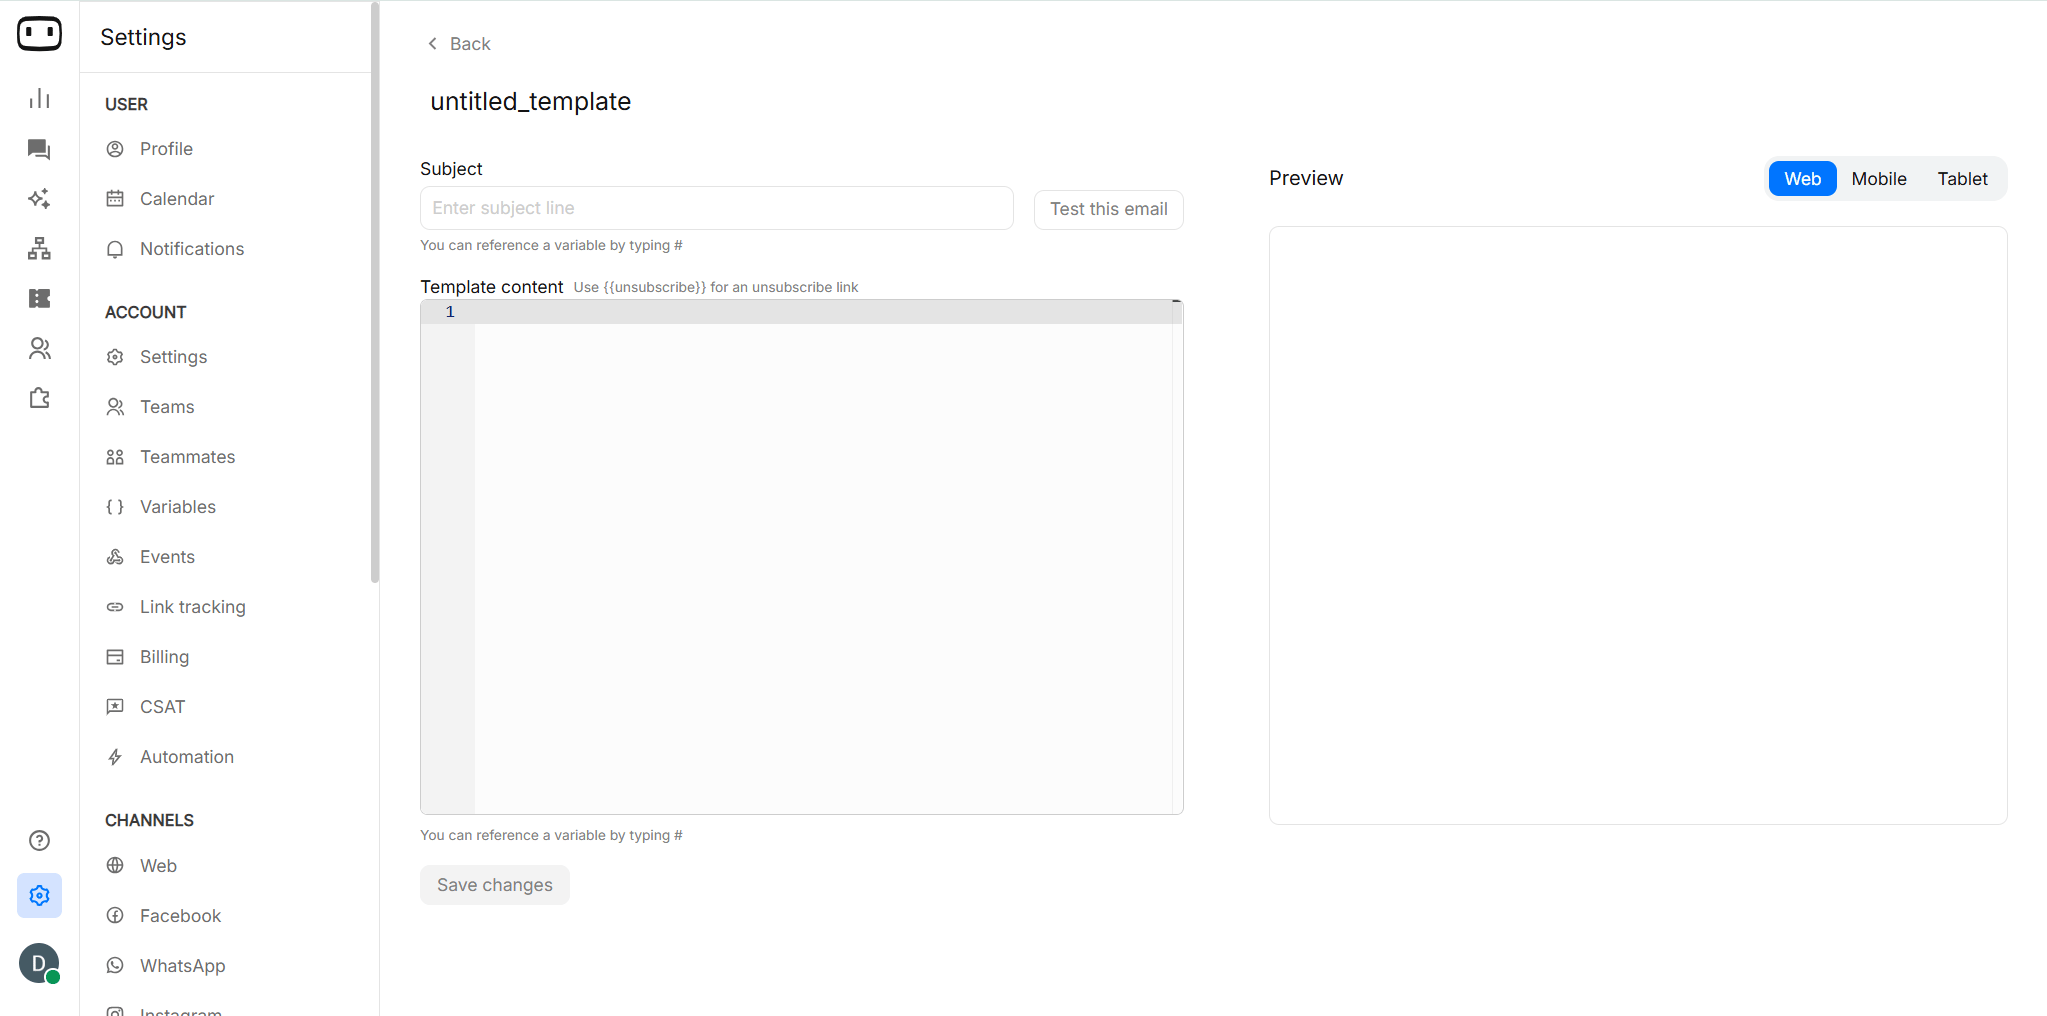
- After creating a template select a template from the dropdown on your canvas configuration
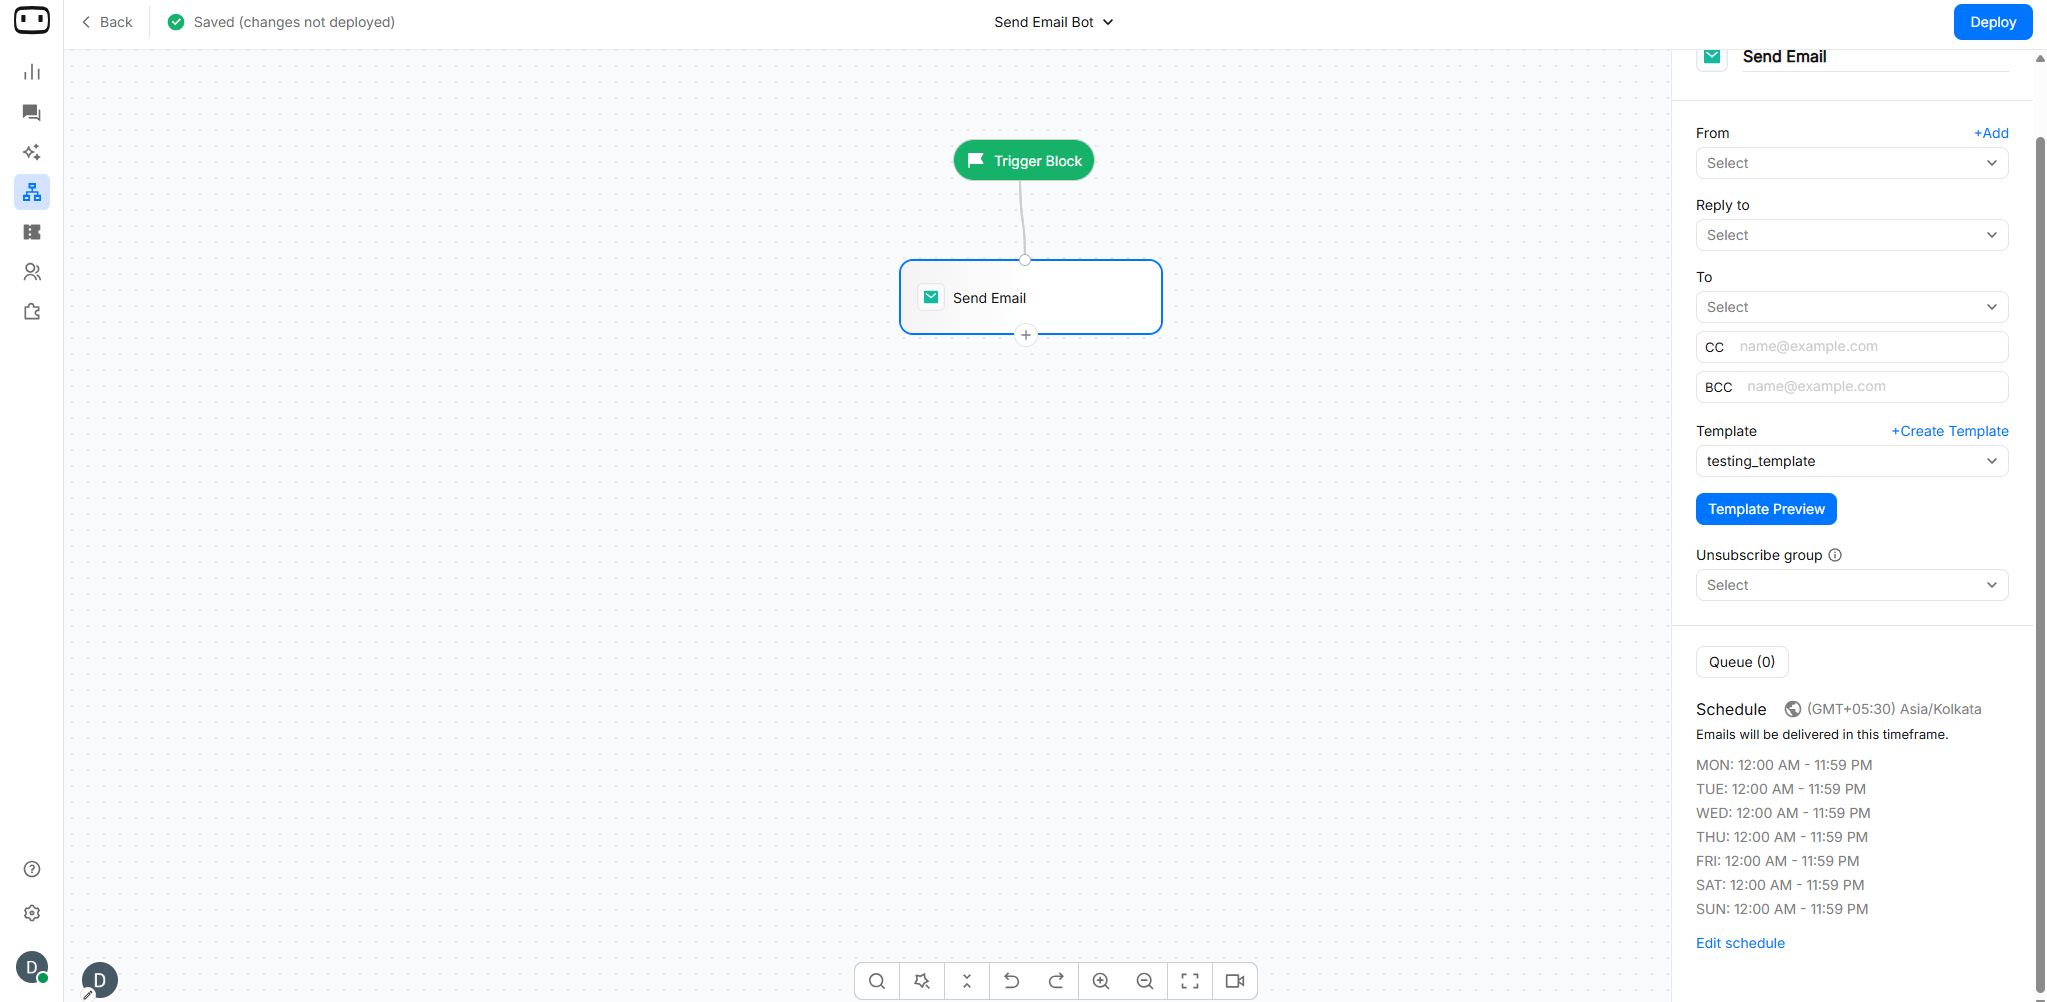
Selecting the email template
- If you have already created a template, select it from the dropdown.
- Click Preview Template to review the template before selecting it.
Subject line
Enter the subject line that recipients see in their inbox. You can personalize the subject using contact attributes. For example:Your order {{order_id}} is readyKeep the subject concise and make sure it accurately represents the content of the email.
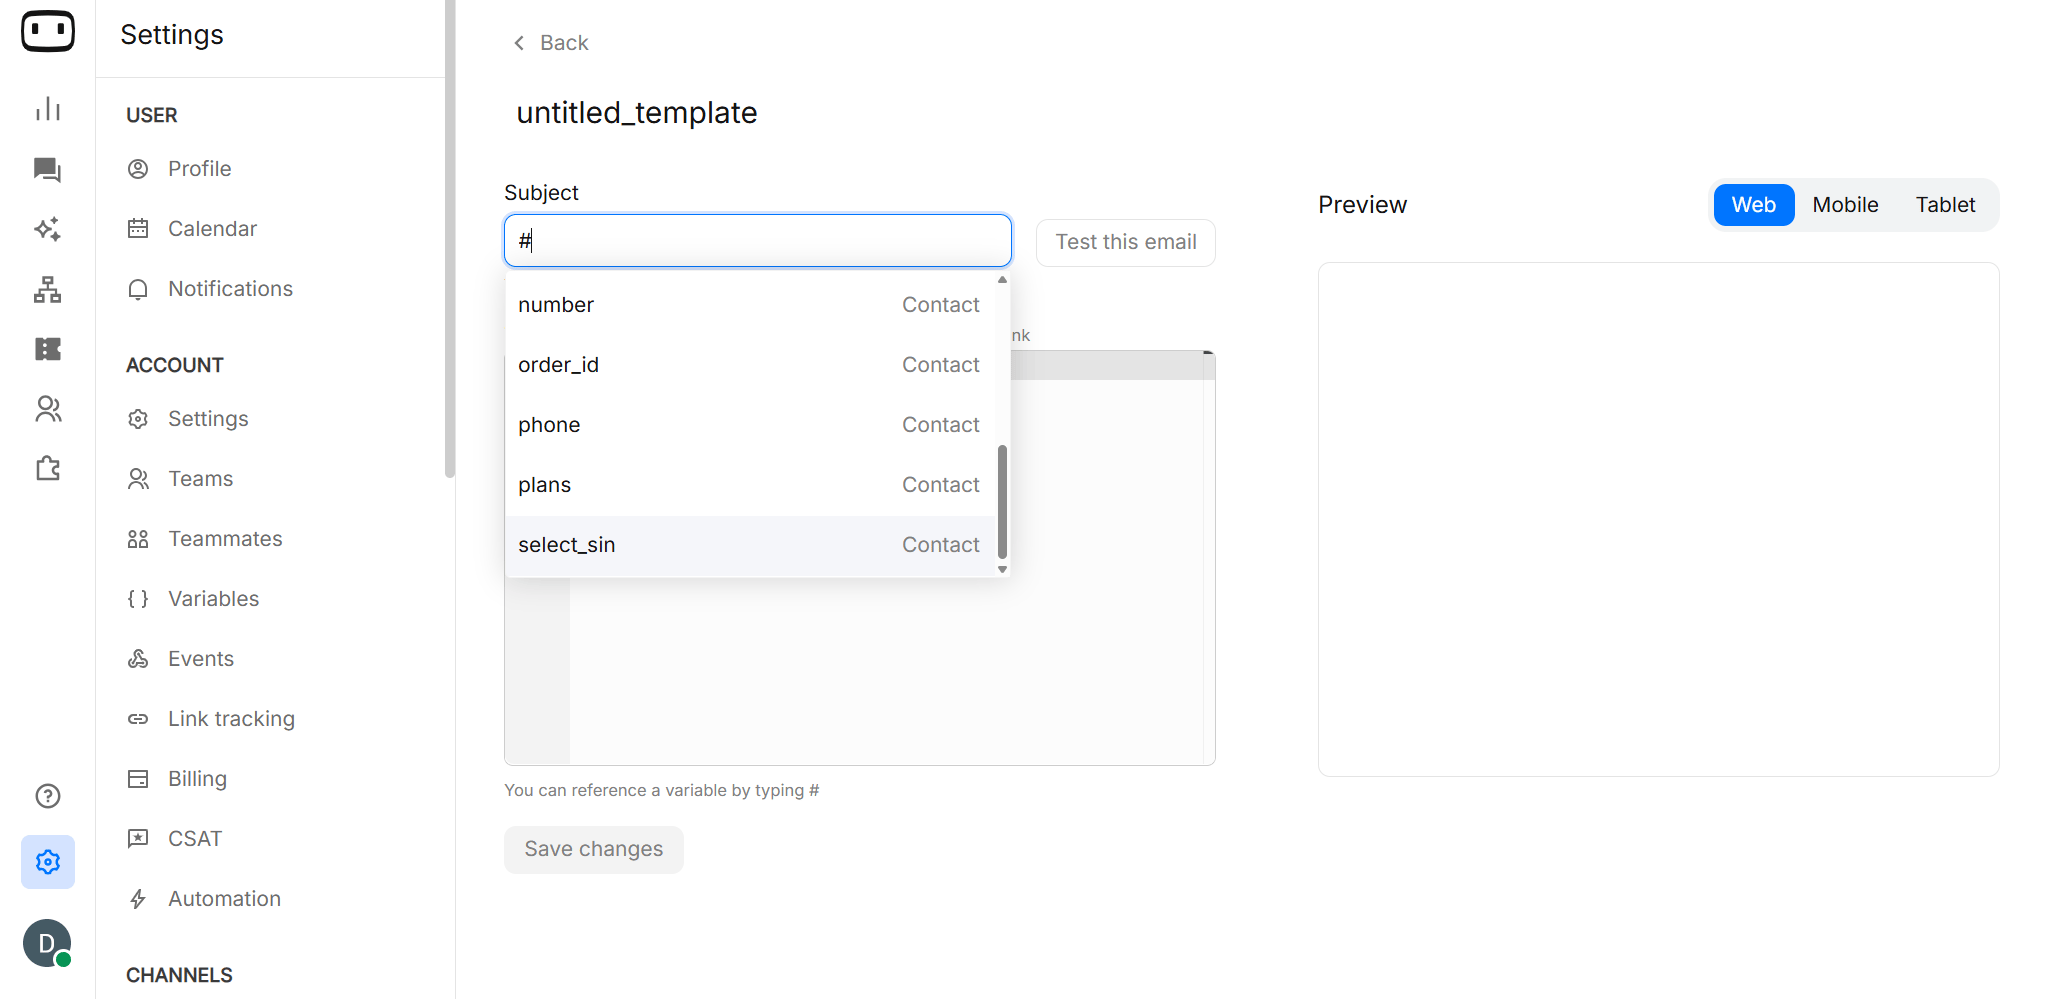
Personalisation
Personalize your email using contact attributes. You can insert variables into the subject line and email body to dynamically display information for each contact. Common examples include:- Contact name
- Order number
- Appointment date
- Account information
- Personalized offers
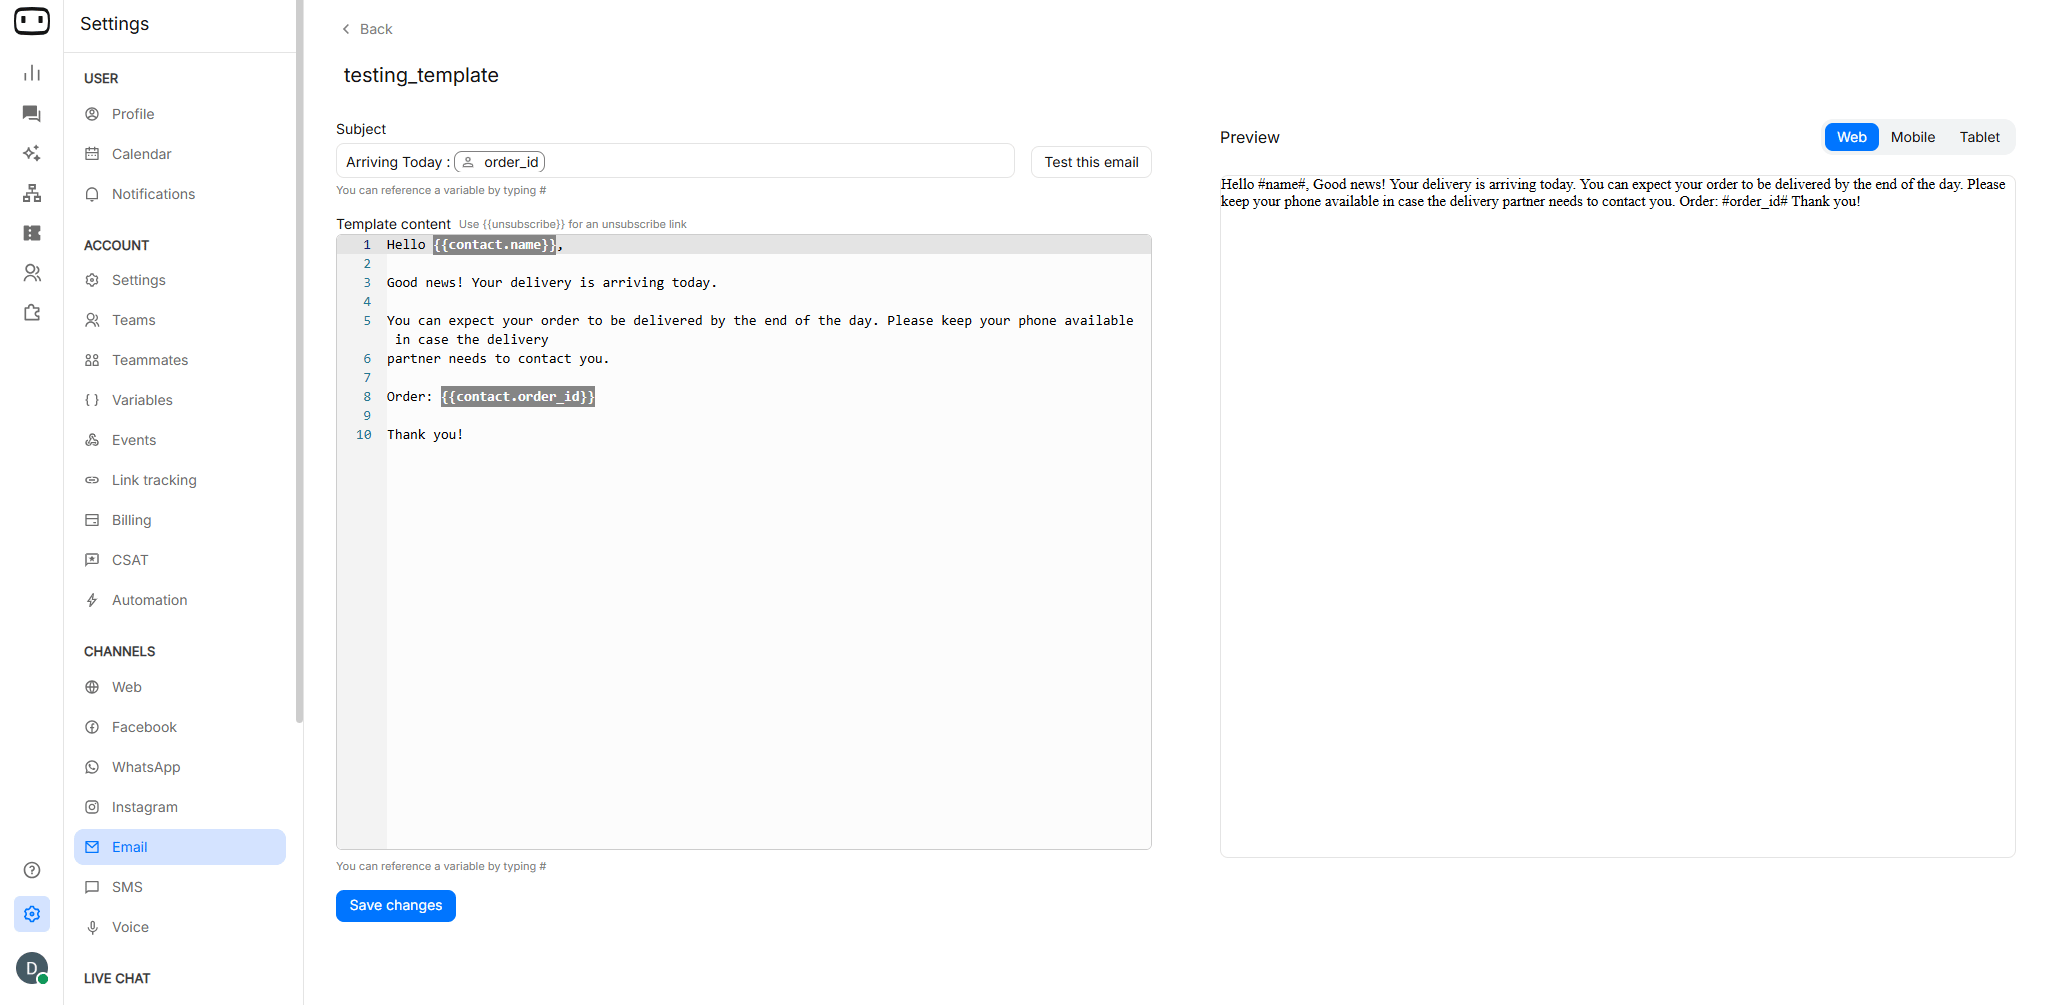
Unsubscribe link
WotNot now natively manages email unsubscriptions for your outbound campaigns. With native unsubscription management, every unsubscribe is tracked directly in WotNot, giving you full control over your contact lists and subscription groups from one place.For contacts receiving your emails
- A contact receives a campaign email sent via an outbound bot.
- They click the Unsubscribe link in the email.
- They are taken to WotNot’s hosted Subscription Preferences screen, where they can unsubscribe from specific groups or all communications.
- Their unsubscription is recorded immediately in WotNot.
For you managing campaigns
- Navigate to your outbound bot and open the Send Email block.
- From the configuration panel you can select Unsubscription Groups.
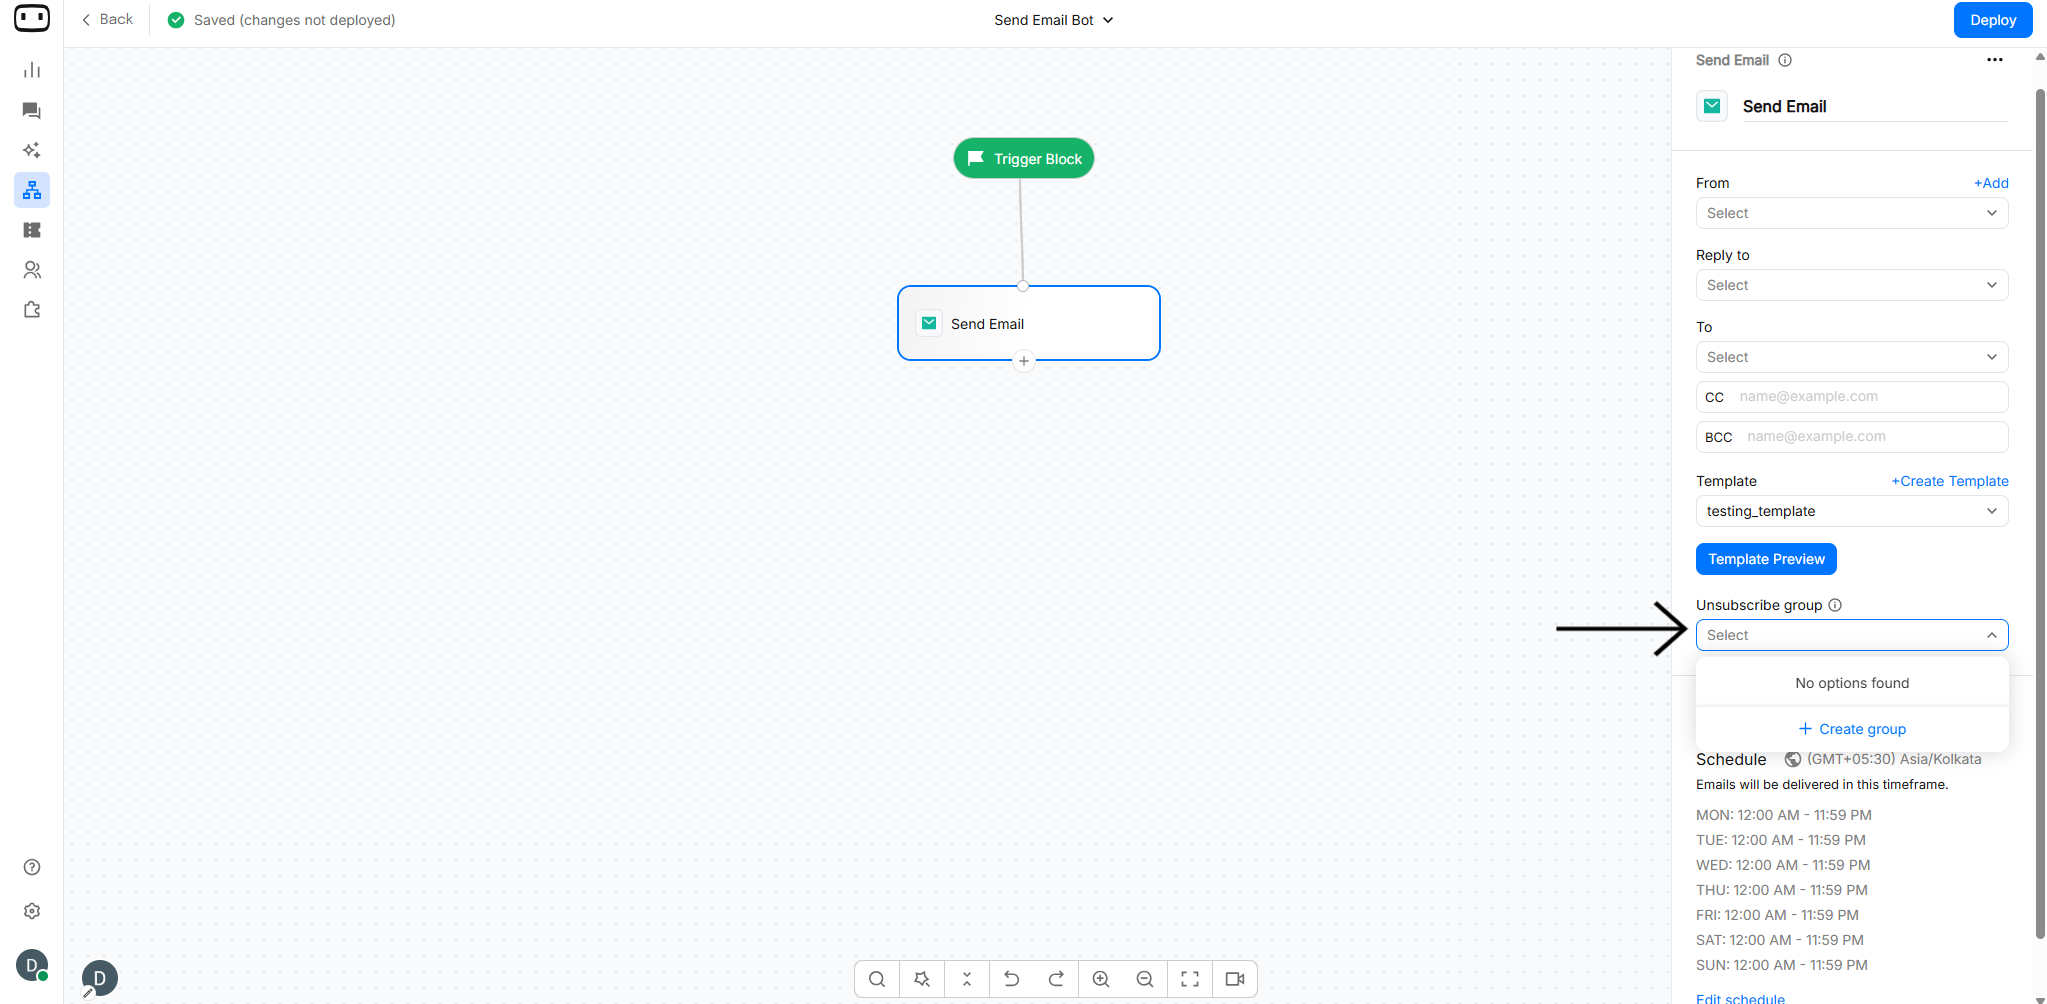
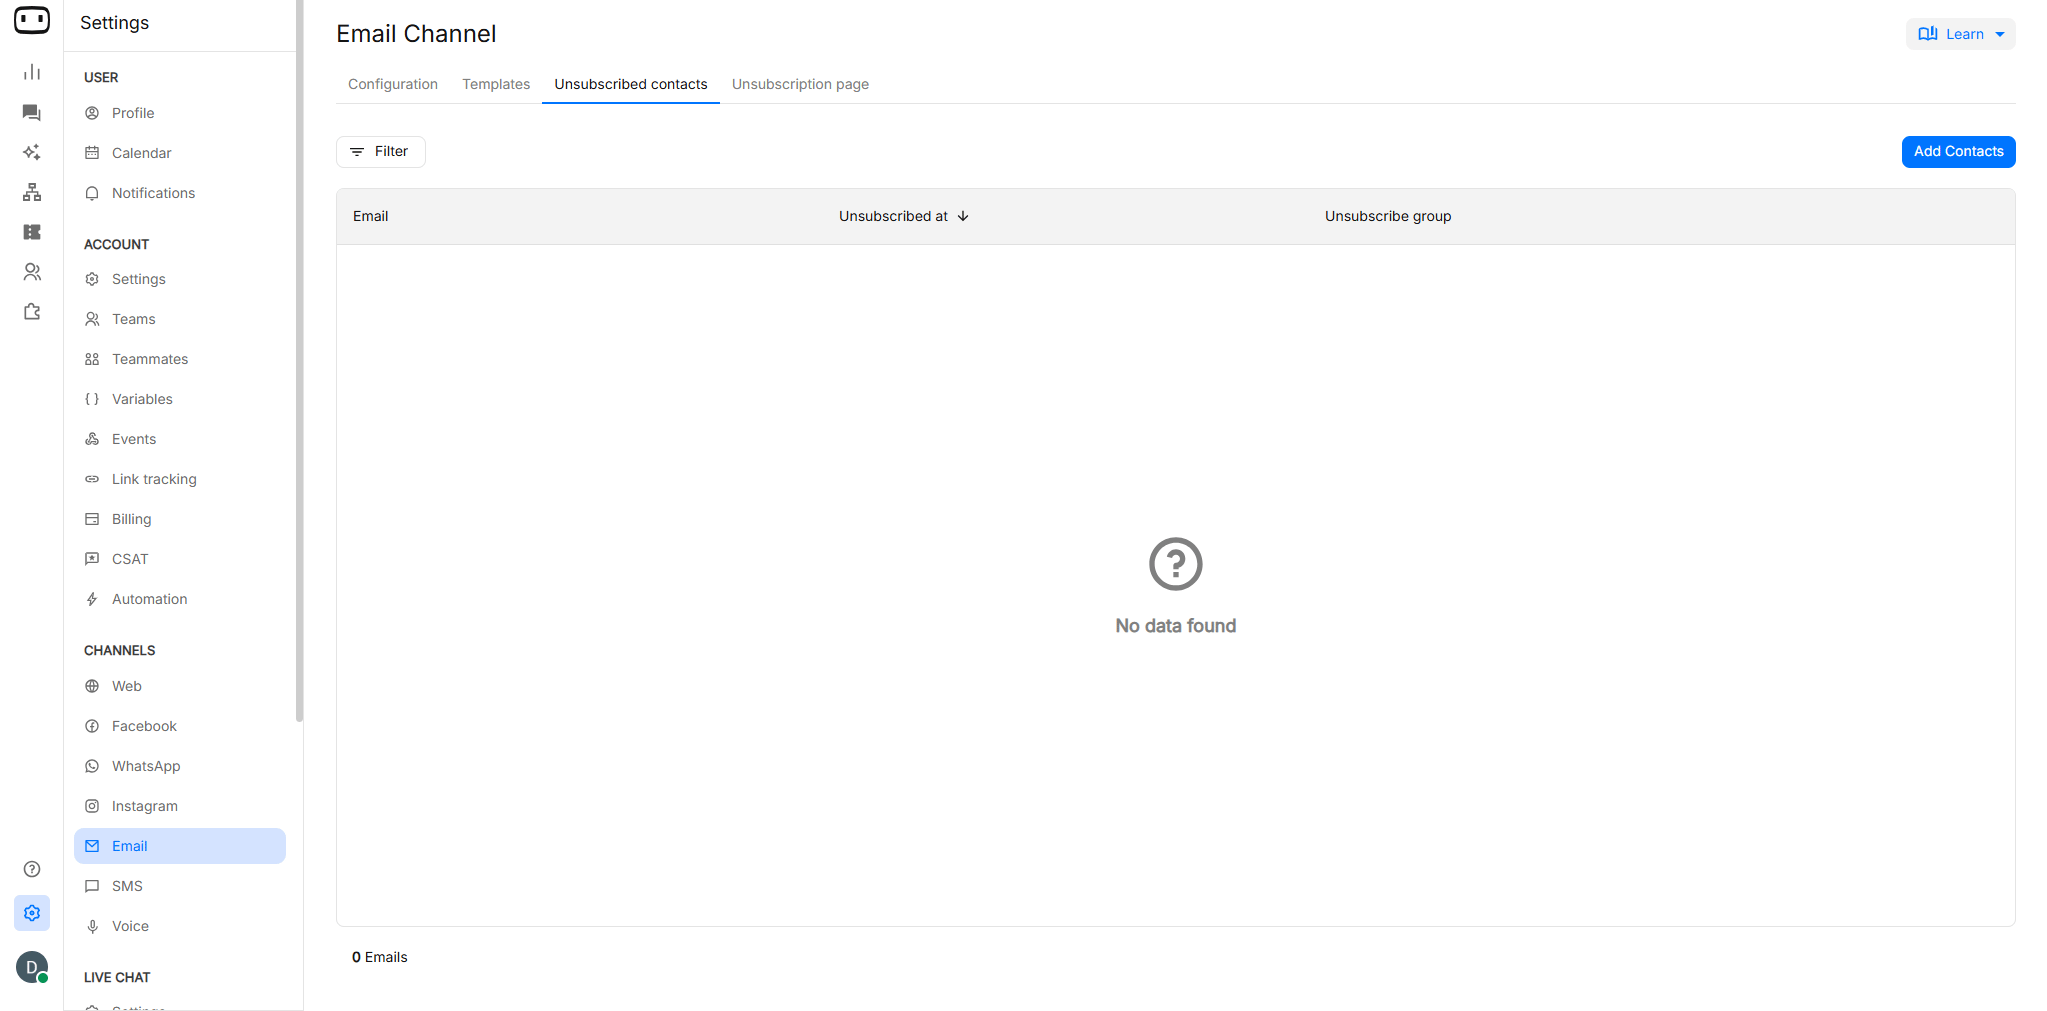
- After your campaign runs, go to Settings > Email > Unsubscribed Contacts to view which contacts have unsubscribed and from which groups.
- Unsubscribed contacts are automatically excluded from future sends to those groups.
Key things to know
- Unsubscriptions are now tracked in WotNot — you no longer need to cross-reference your transactional email provider to know who has opted out.
- You can create and manage Unsubscription Groups (e.g. “Product Updates”, “Weekly Newsletter”) so contacts can selectively unsubscribe rather than opting out entirely.
- Contacts who unsubscribe are automatically suppressed from future campaign sends to those groups.
- The WotNot Subscription Preferences screen is hosted and handled by WotNot — no custom setup required.
- Historical unsubscriptions recorded only on your email provider’s side are not retroactively imported.
Schedule Email
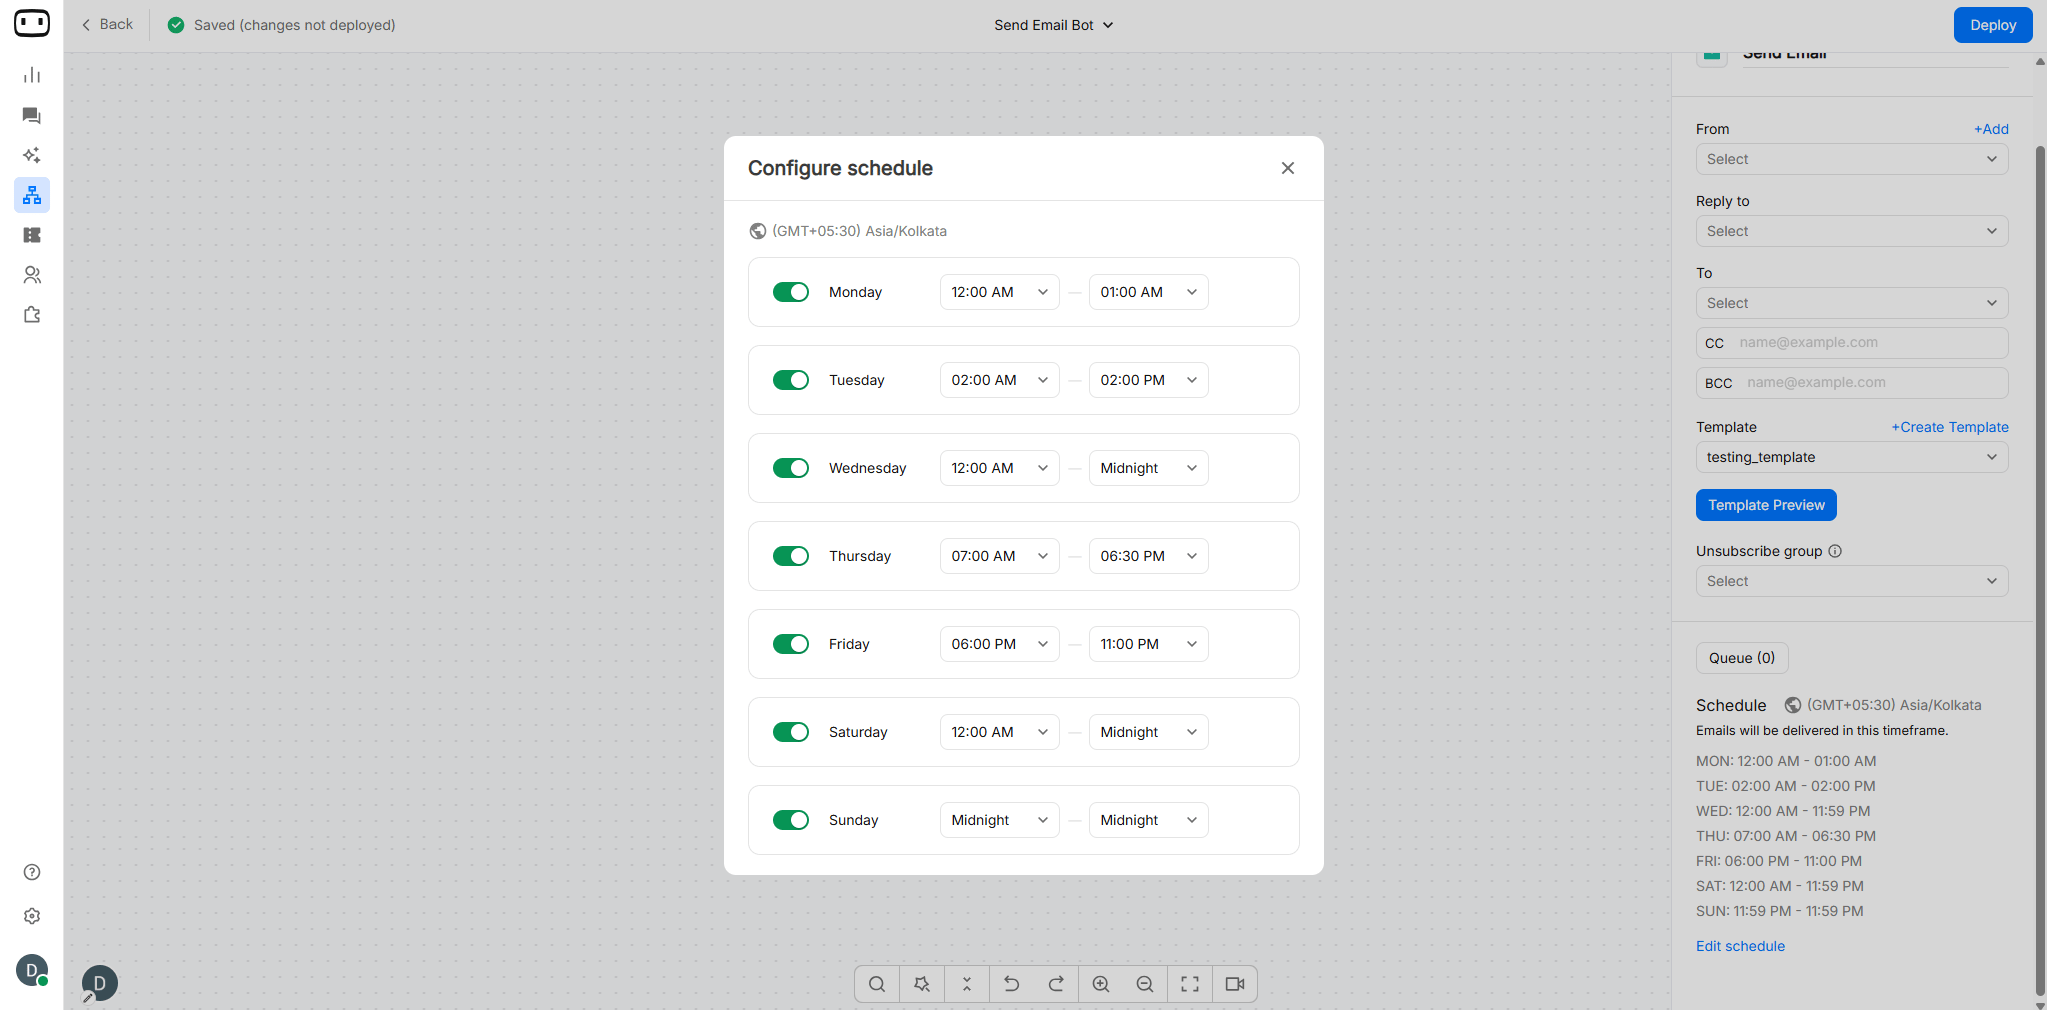
The Email Schedule feature lets you control when you / company can send automated emails. You can define specific sending hours for each day of the week and select the timezone in which the schedule should apply. This is especially useful when you send emails to customers in different countries or time zones. For example, if your business is based in Country A but you have customers in Country B, you can configure the schedule according to country B’s timezone so emails are sent during appropriate hours for your customers. Use Email Schedule to:- Set the hours during which automated emails can be sent.
- Configure different sending windows for each day.
- Select the appropriate timezone for your schedule.
- Send emails according to your customers’ local time, even when your business operates from another country.
- Prevent emails from being sent during unwanted or off-hours.
- Ensure customer communications are delivered at appropriate times.
Attachments
You can include files as attachments when sending an email. Add the file to the email configuration and it will be sent along with the message. Example: Attach invoices, reports, PDFs, images, or other files that the recipient needs to receive with the email.Attachment availability and file-size limits can depend on the email provider and WotNot configuration. Check your account’s supported limits before using attachments in a large campaign.
Track link on this message
Enabling this feature tracks all link clicks on this message.
Output Paths
The Send Email block can branch based on the outcome of the email. Depending on the available delivery information , you can handle outcomes such as : Not sent: Email has bounced or failed to send. Sent: Email has been sent to the email sending service, but not yet delivered. Delivered: Email has been delivered to the contact. Opened: Email has been opened at least once by the contact. Clicked: User has interacted with the email by clicking at least one URL inside the email. Use these paths to build follow-up campaign logic.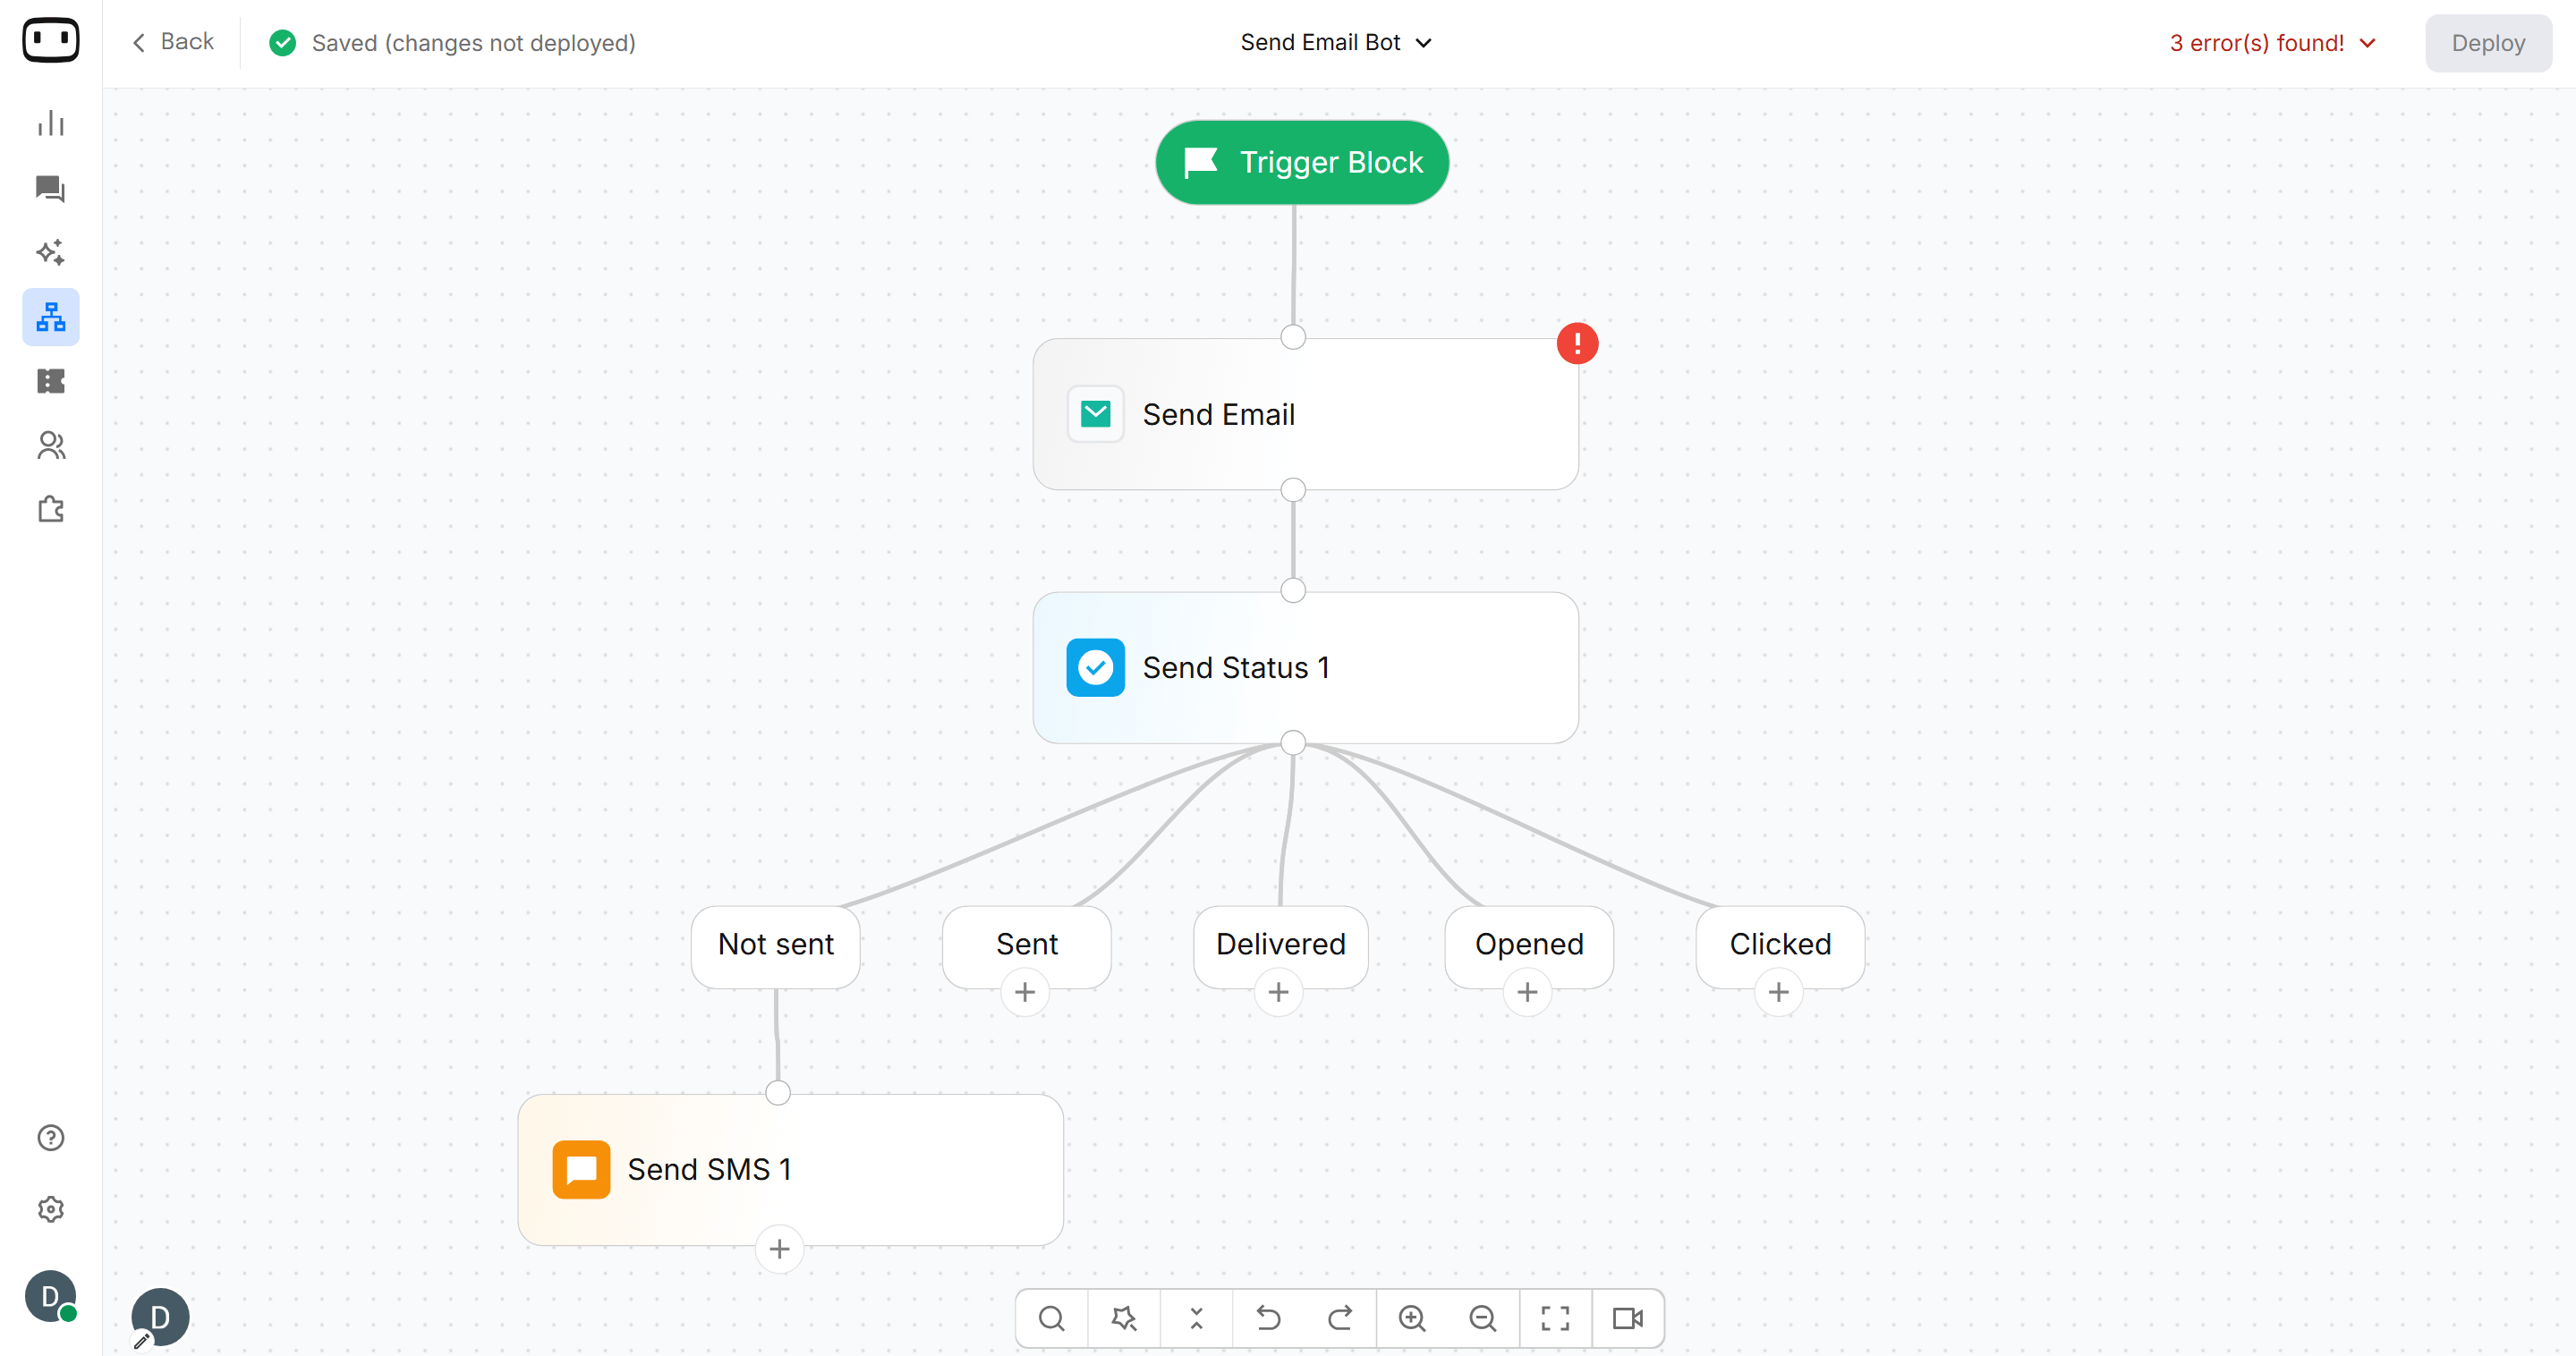
Click to learn how Send Status works