Interface overview
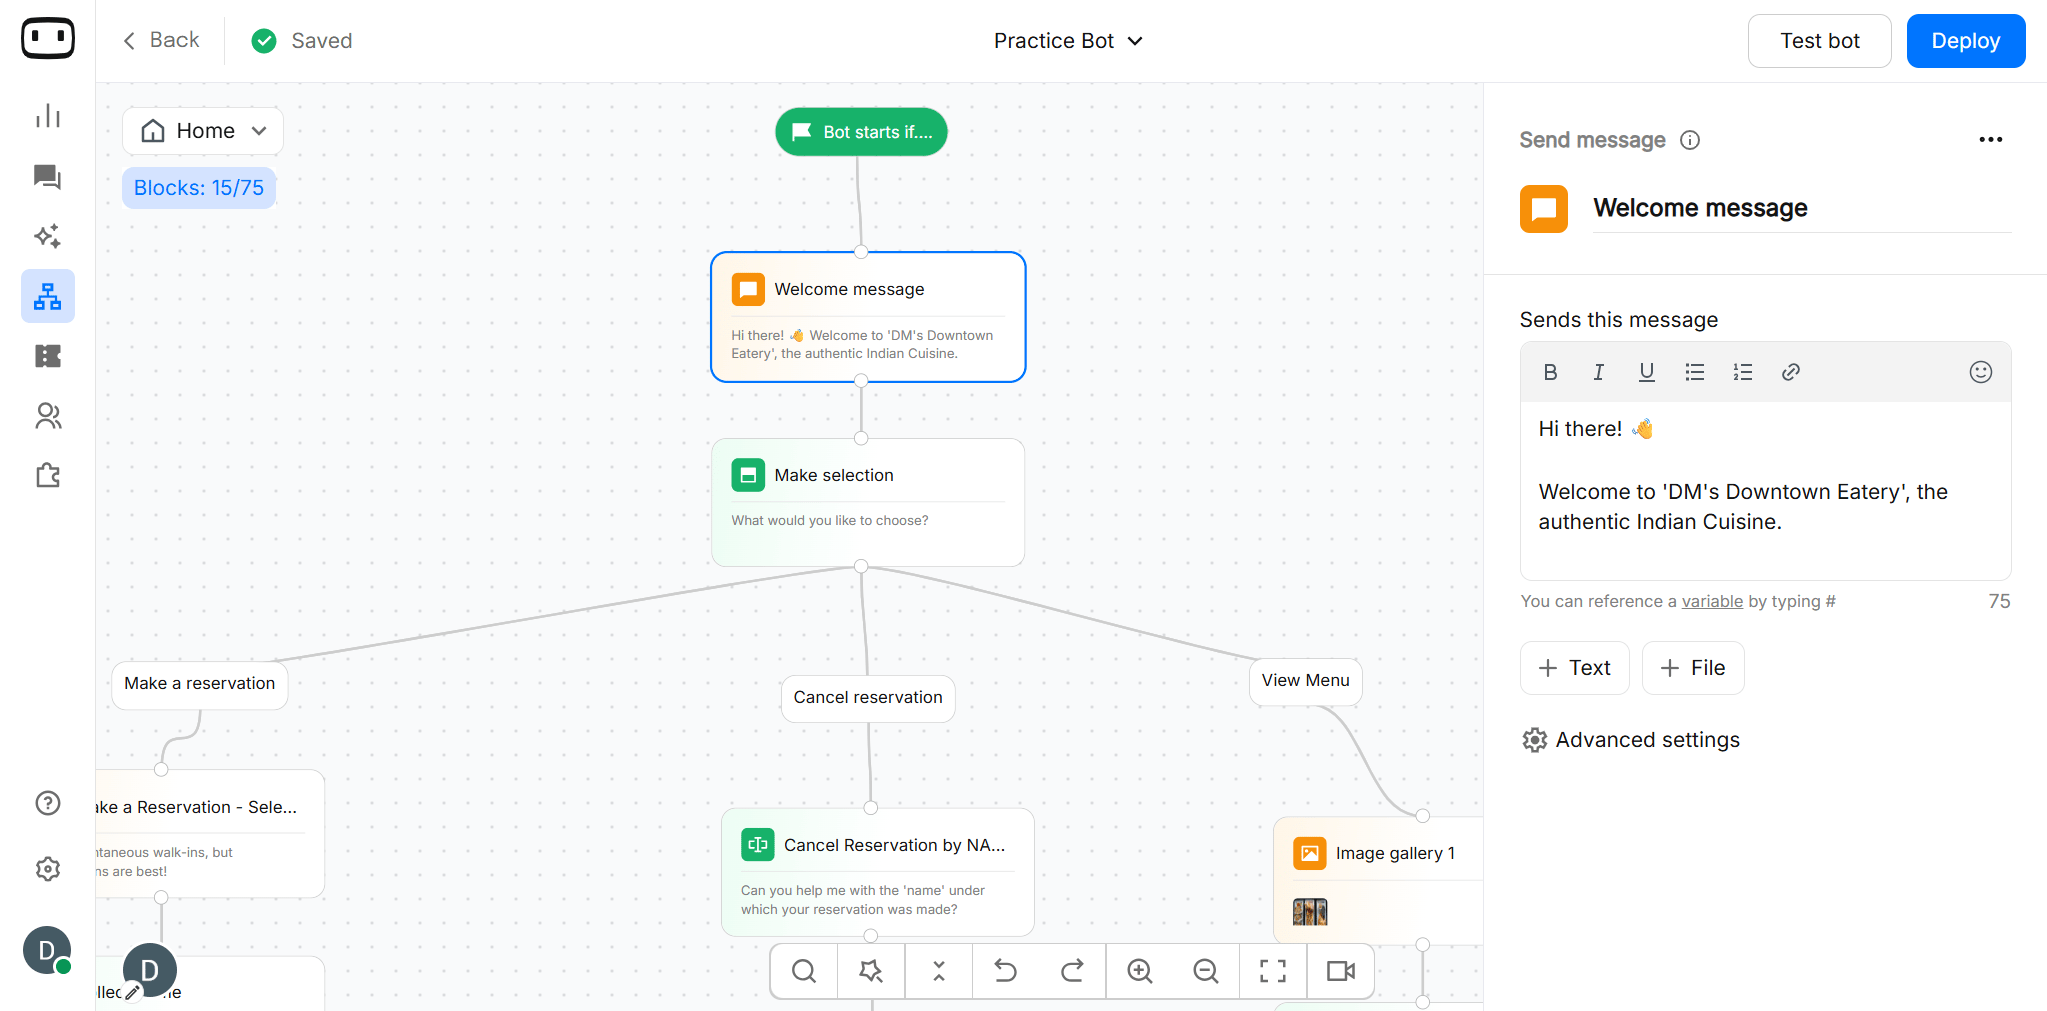
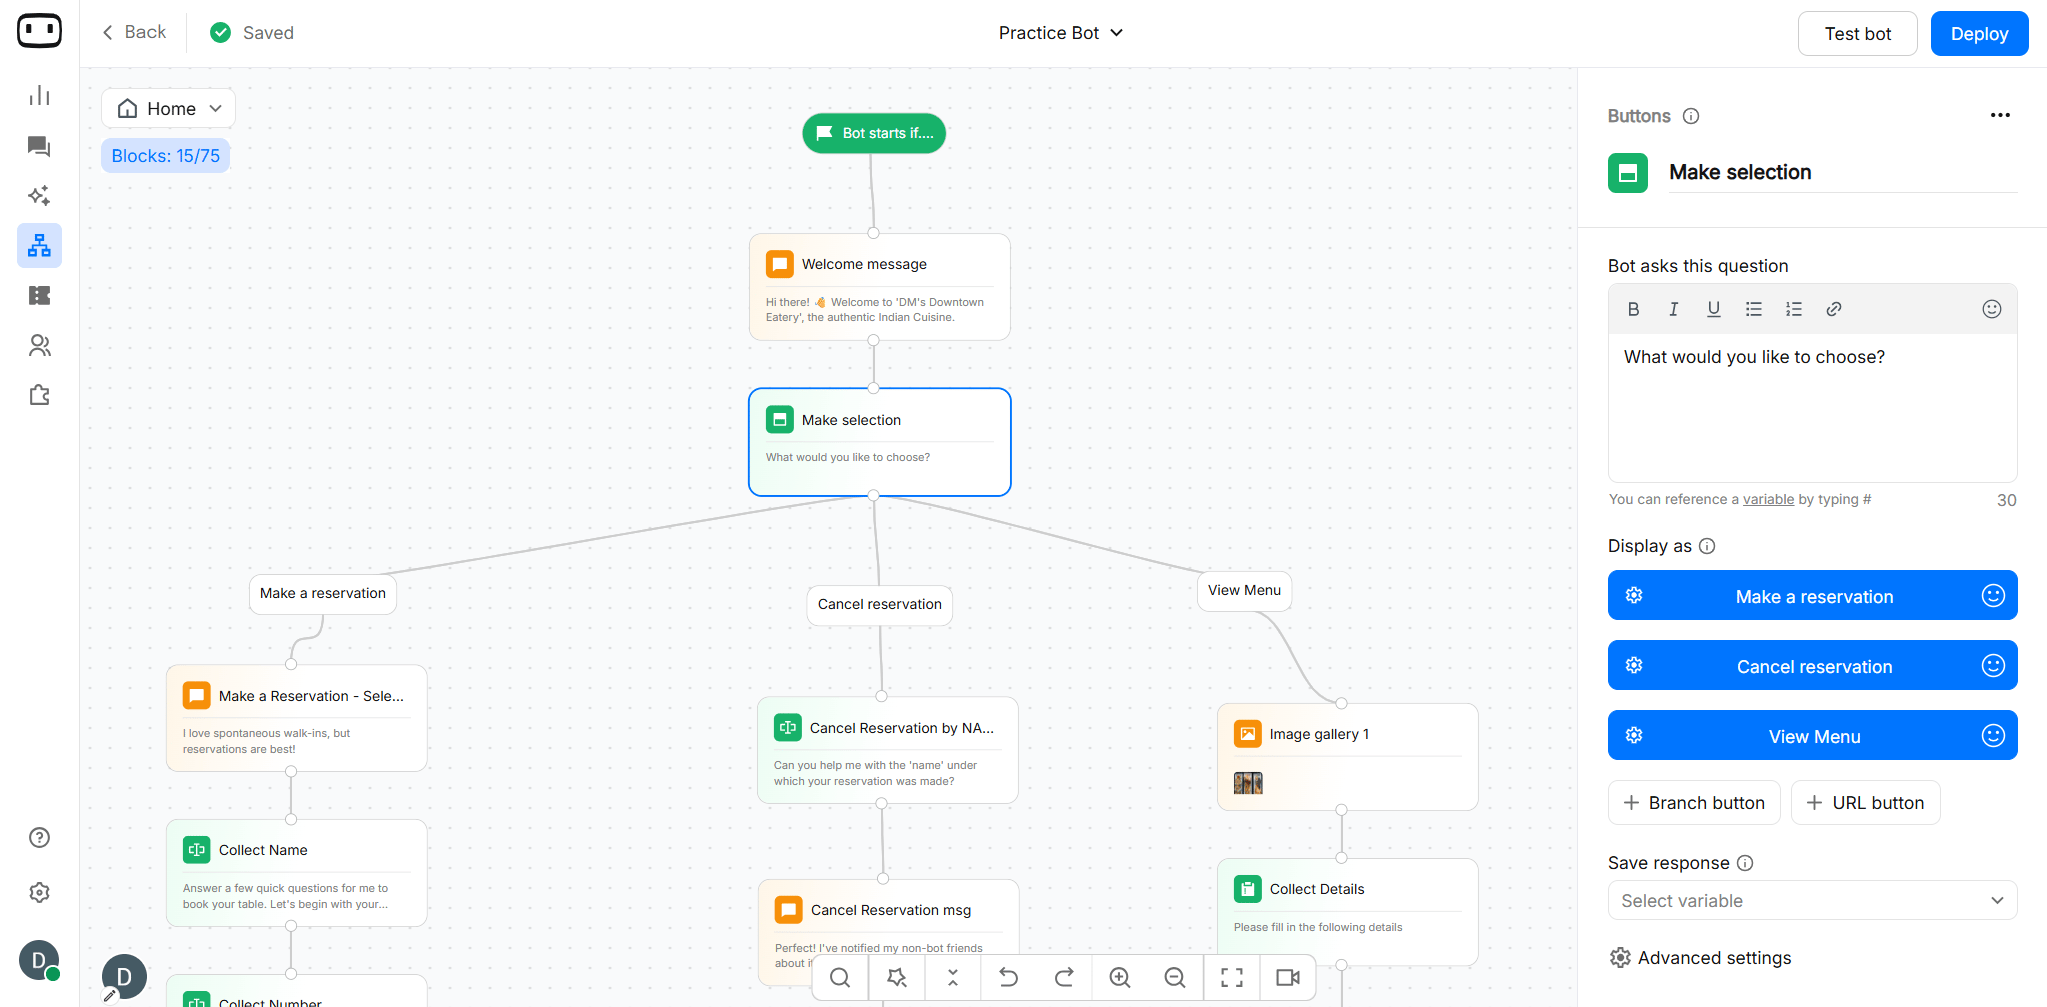
When you select an action block on the canvas, its configuration appears in the Action Panel. Use this panel to configure the selected block’s content, conditions, API settings, or other options.
Canvas
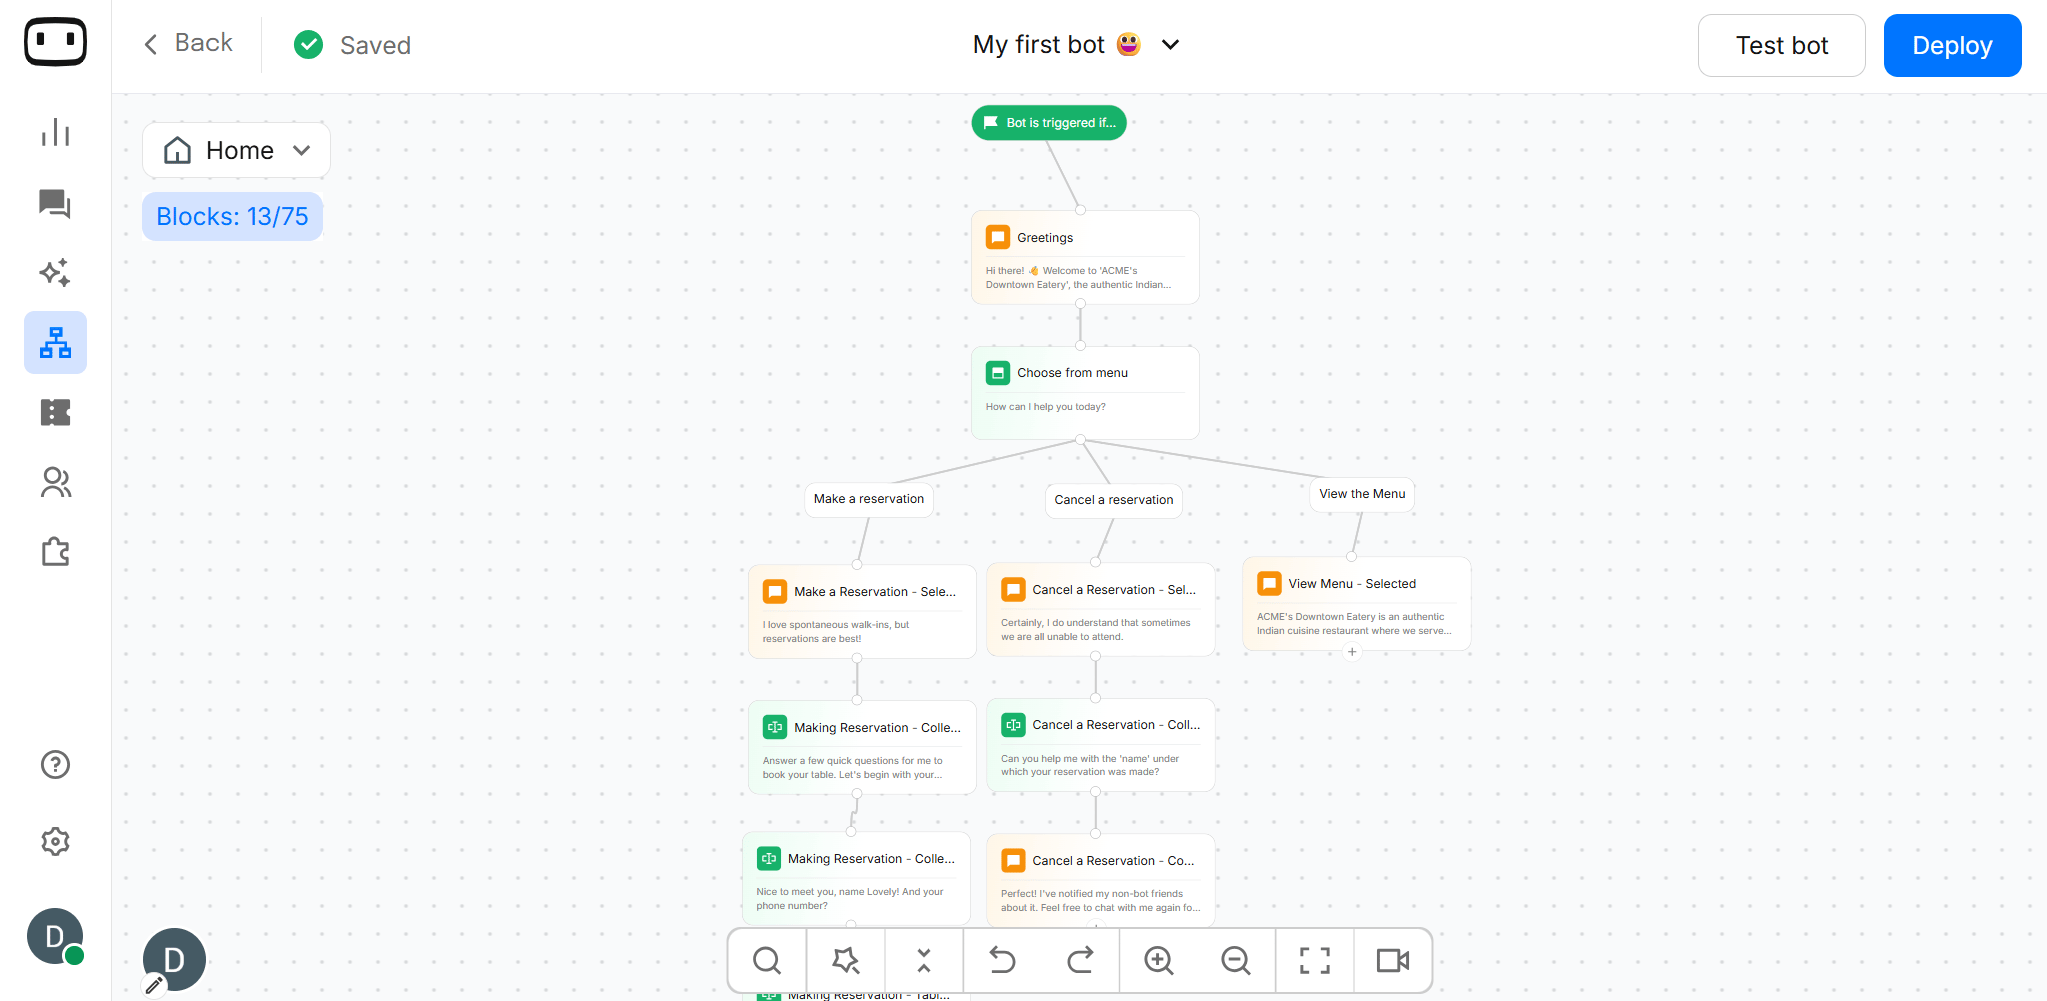
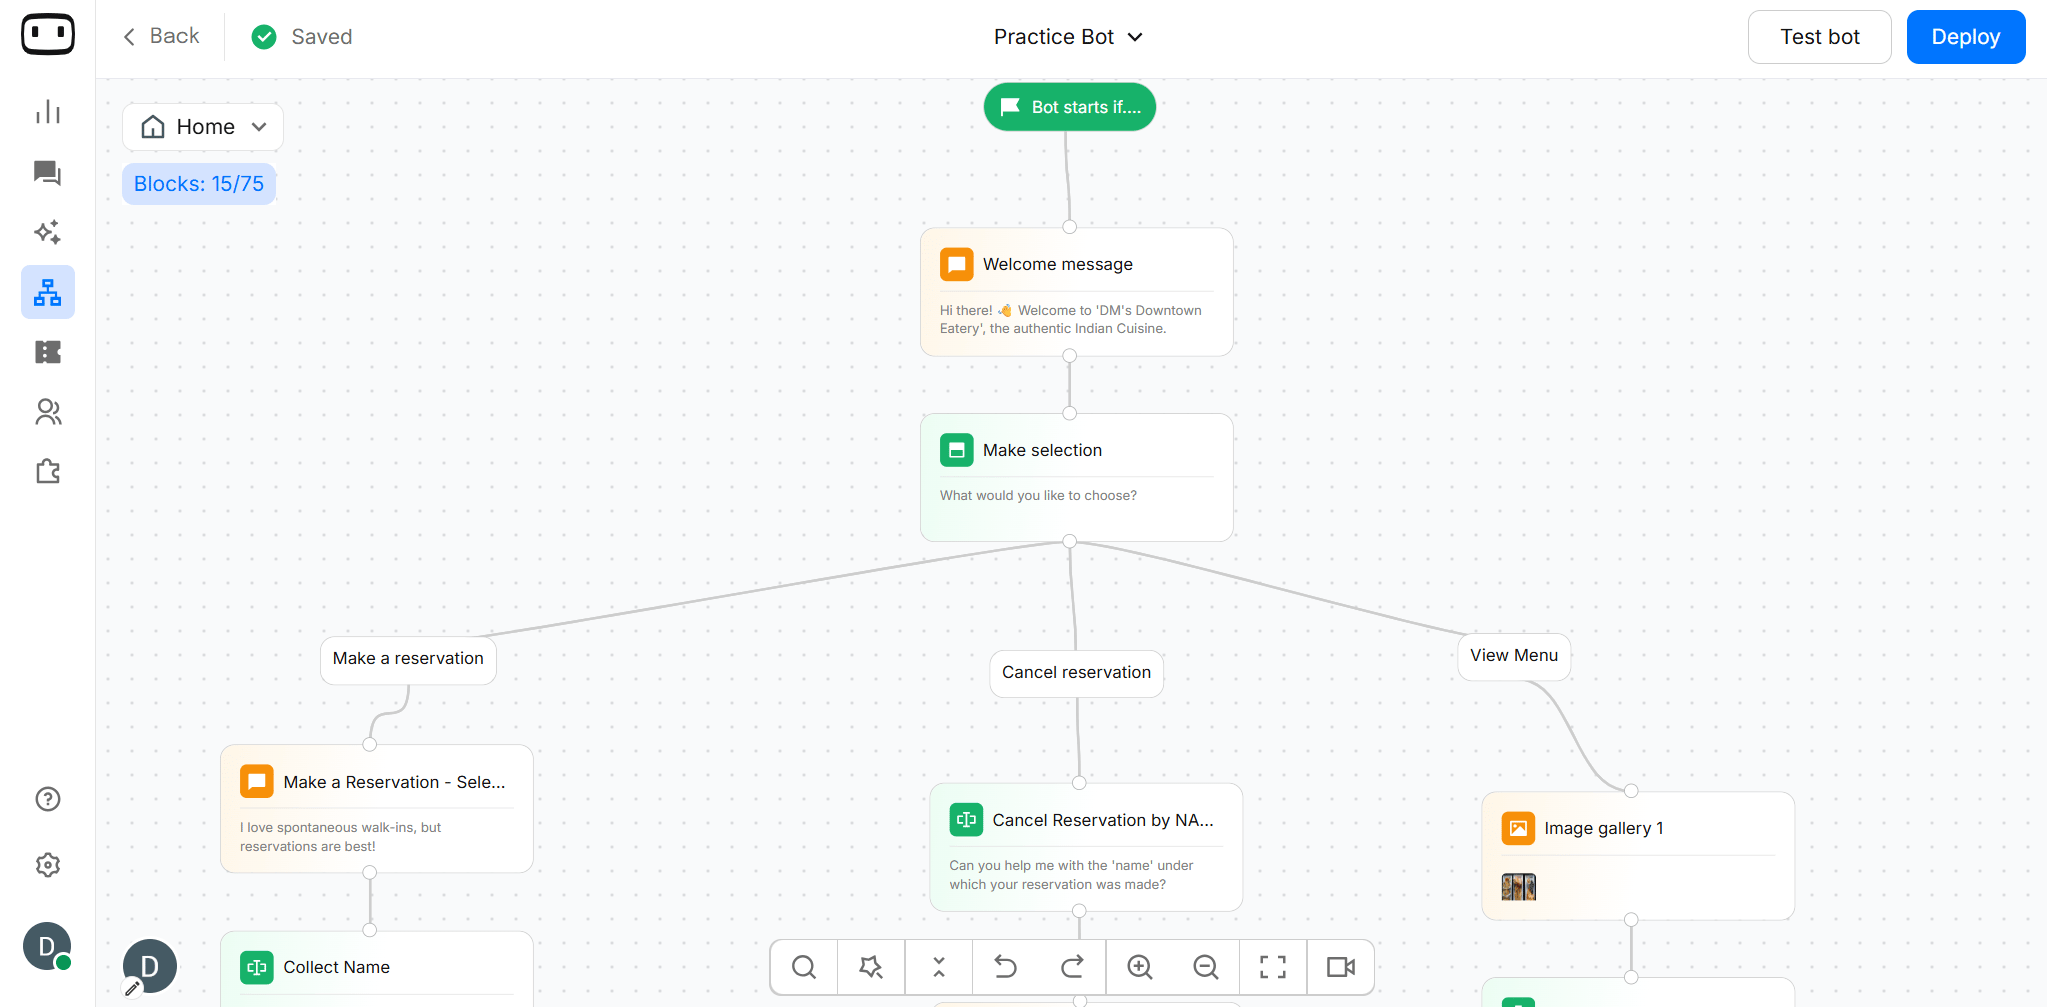
The canvas is where you build the conversation flow by adding, arranging, and connecting action blocks.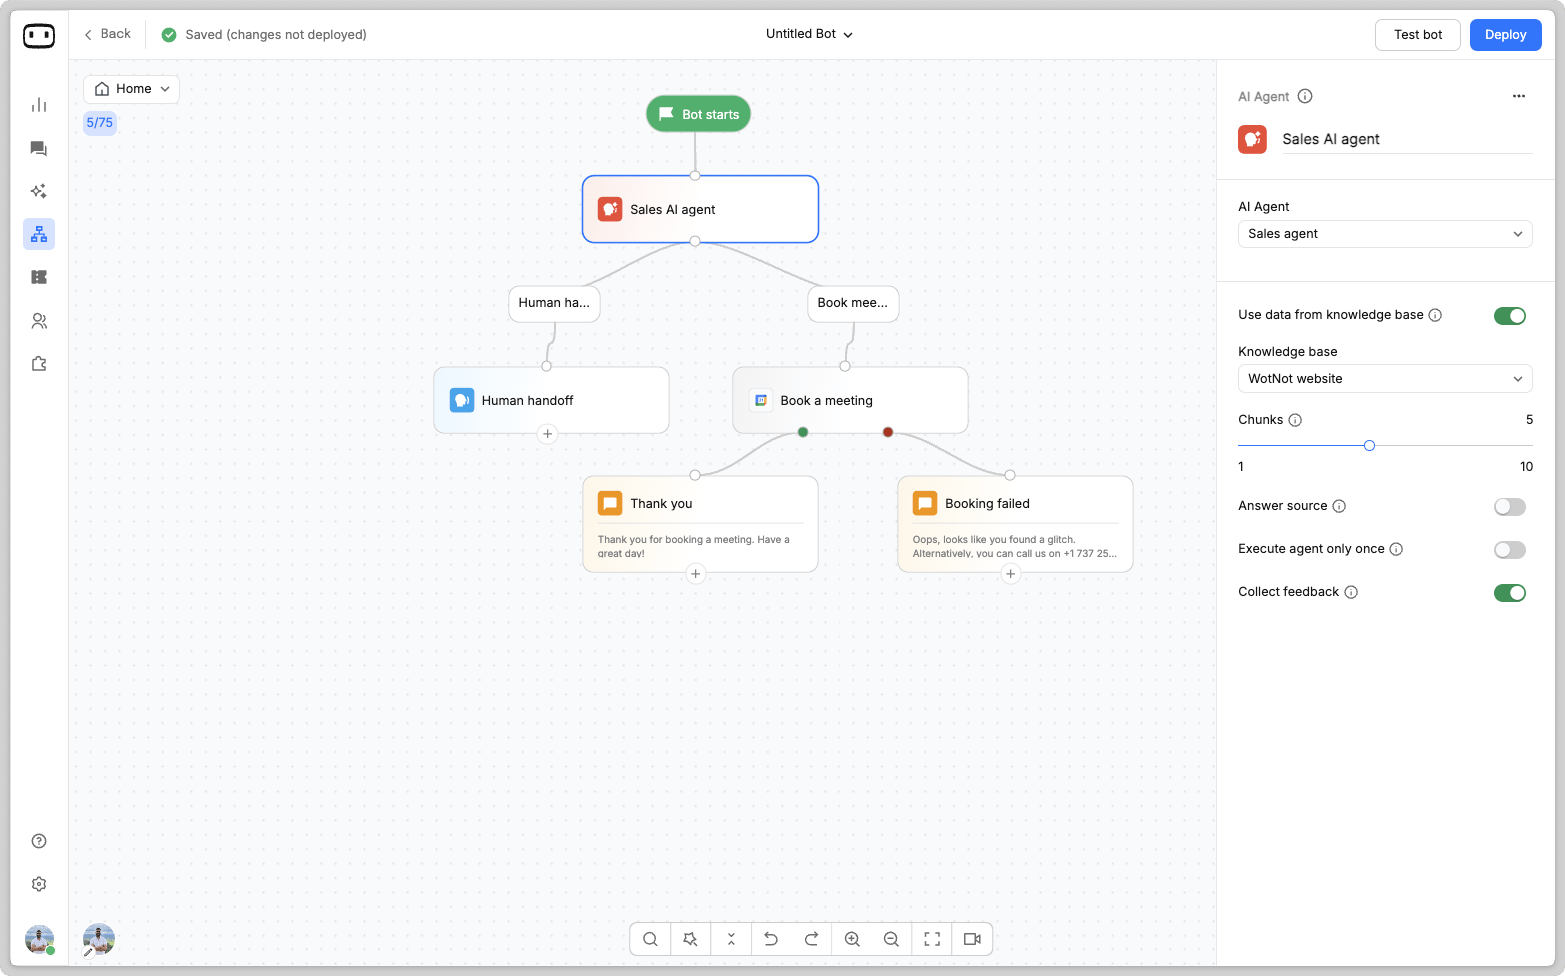
Adding Blocks
Add blocks to the canvas to define what your bot should do at each stage of the conversation.- Open the Bot Builder.
- Click + to open the block list and choose the action you want to add to your flow.
- Select the block from the dropdown.
- Drop it at the position where you want it in the flow.
- Select the block to open its configuration panel.
Configuring Blocks
- Select the block on the canvas.
- Configure its settings in the right-hand action panel.
- Add the required content, conditions, variables, or integrations.
- Save the configuration if required.
- Connect the block to the next step in the flow.
The available configuration depends on the block, as each block has its own set of configurations.
Actions you can perform
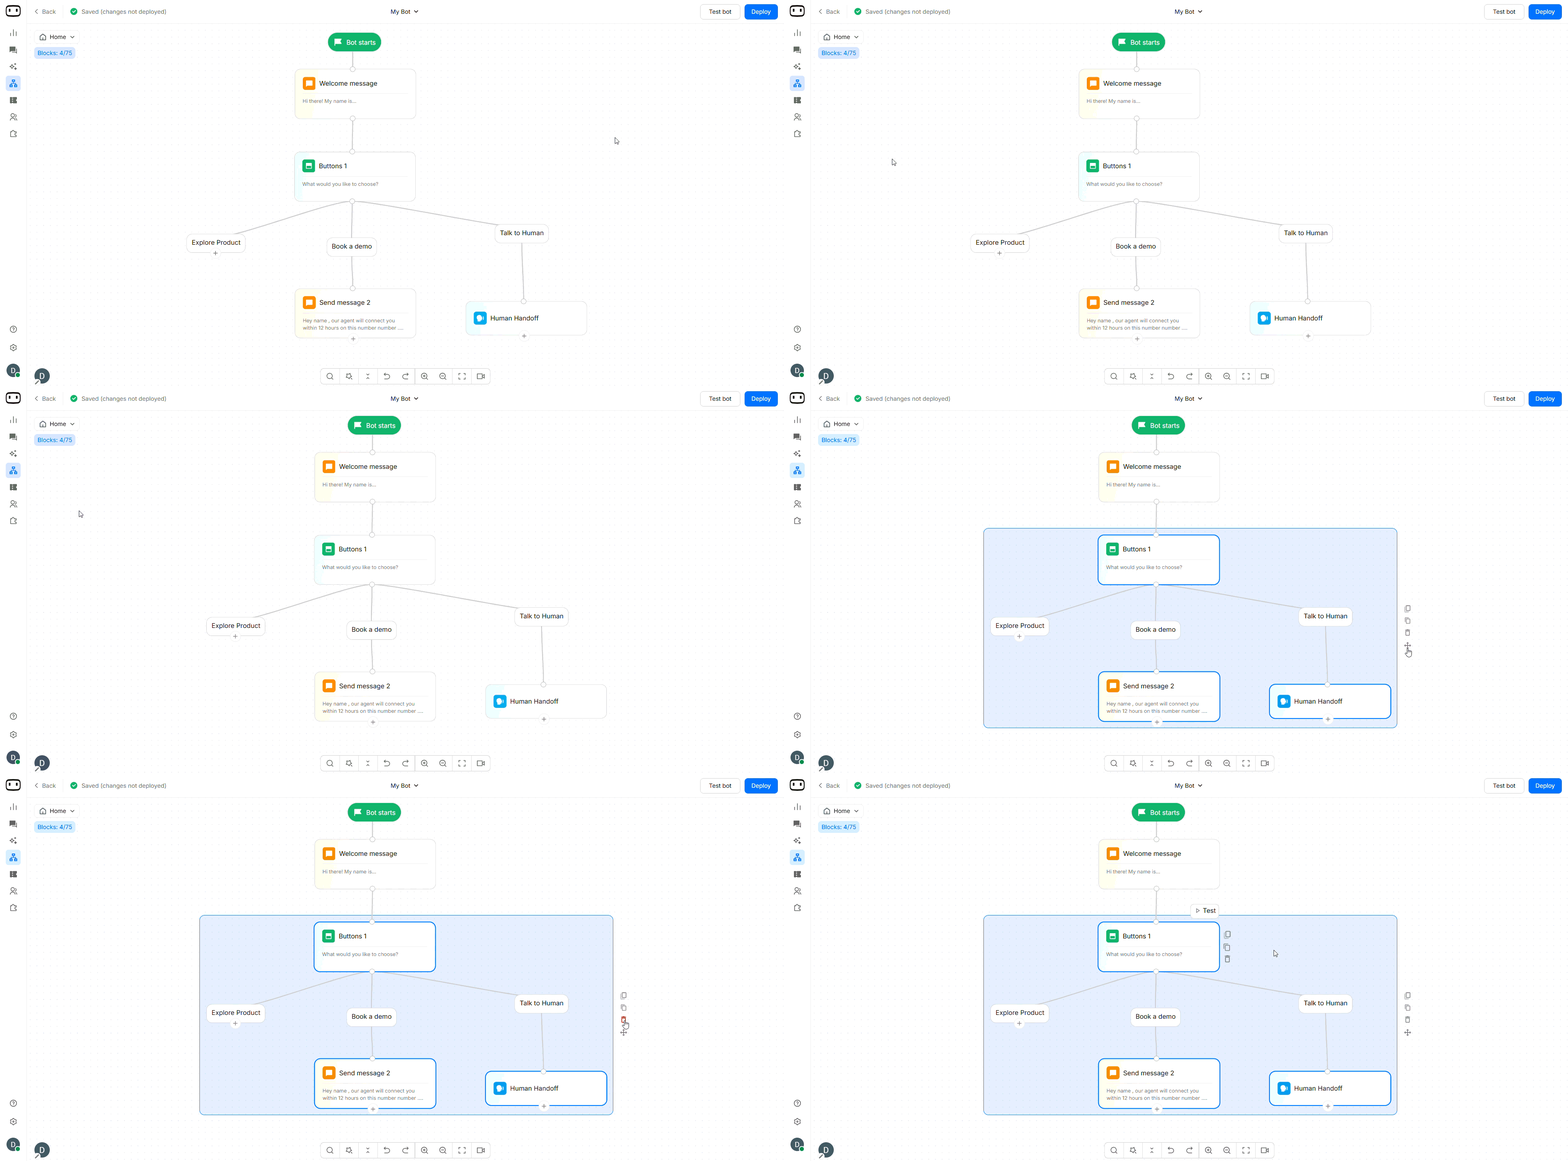
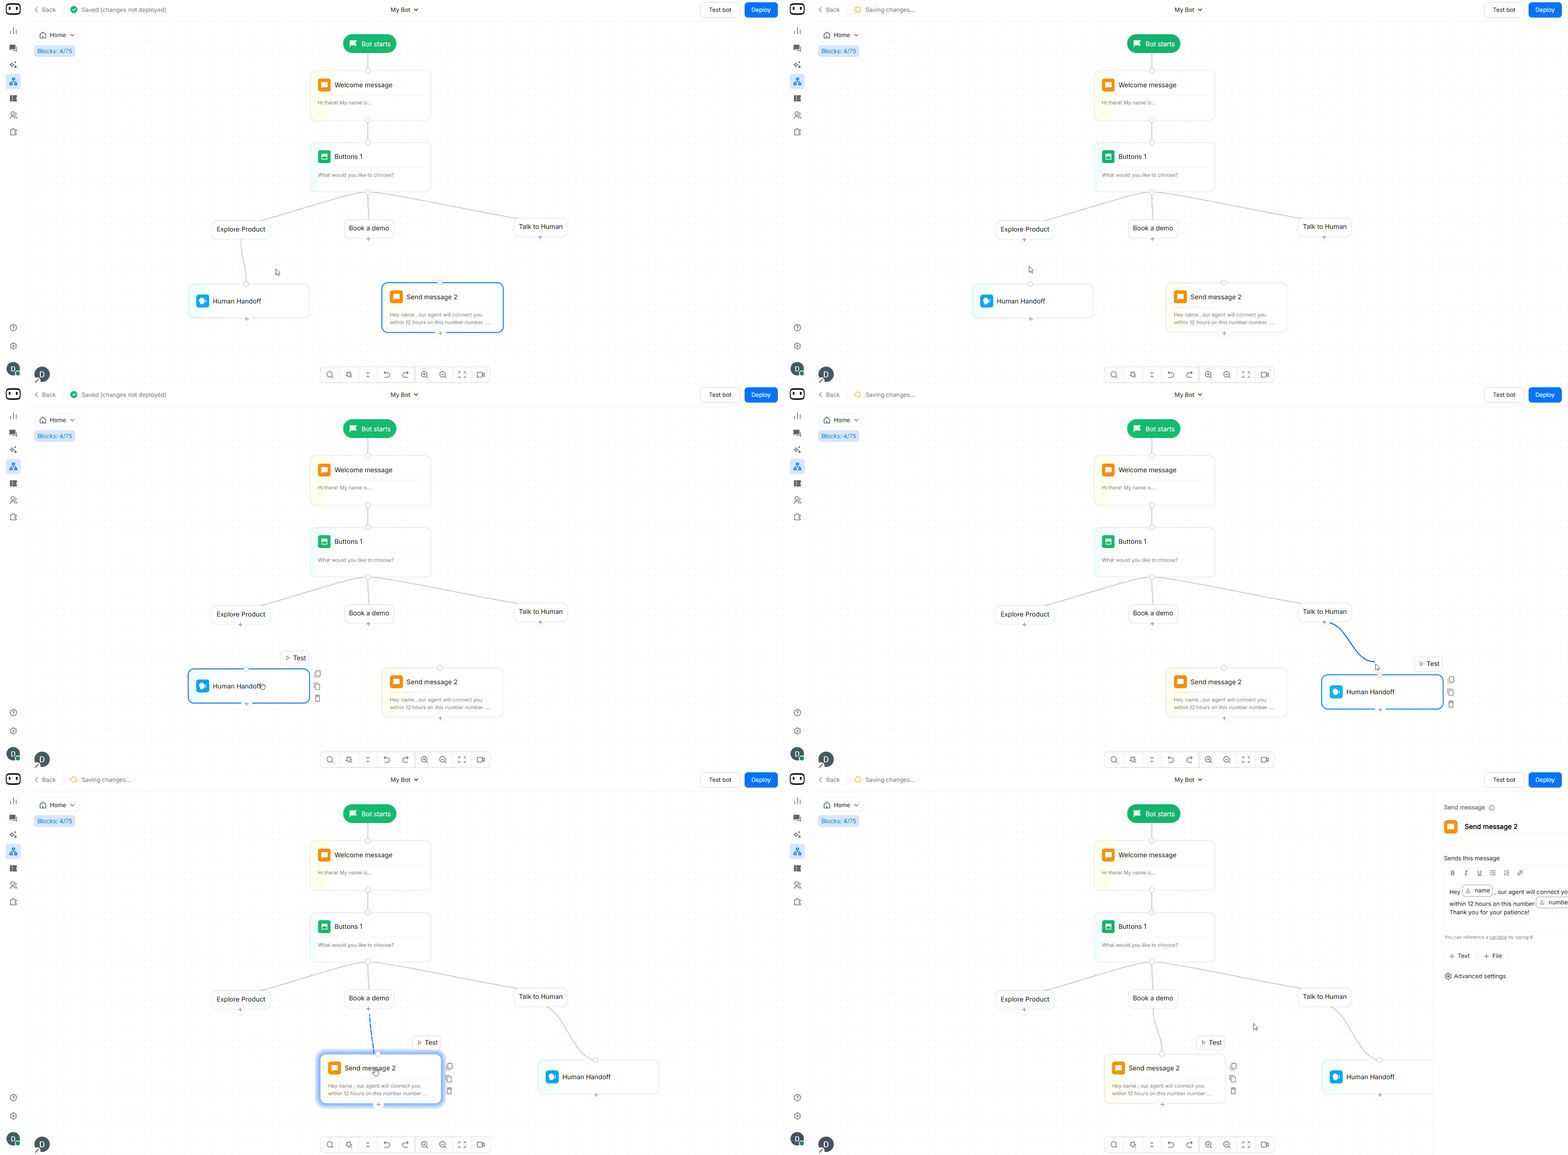
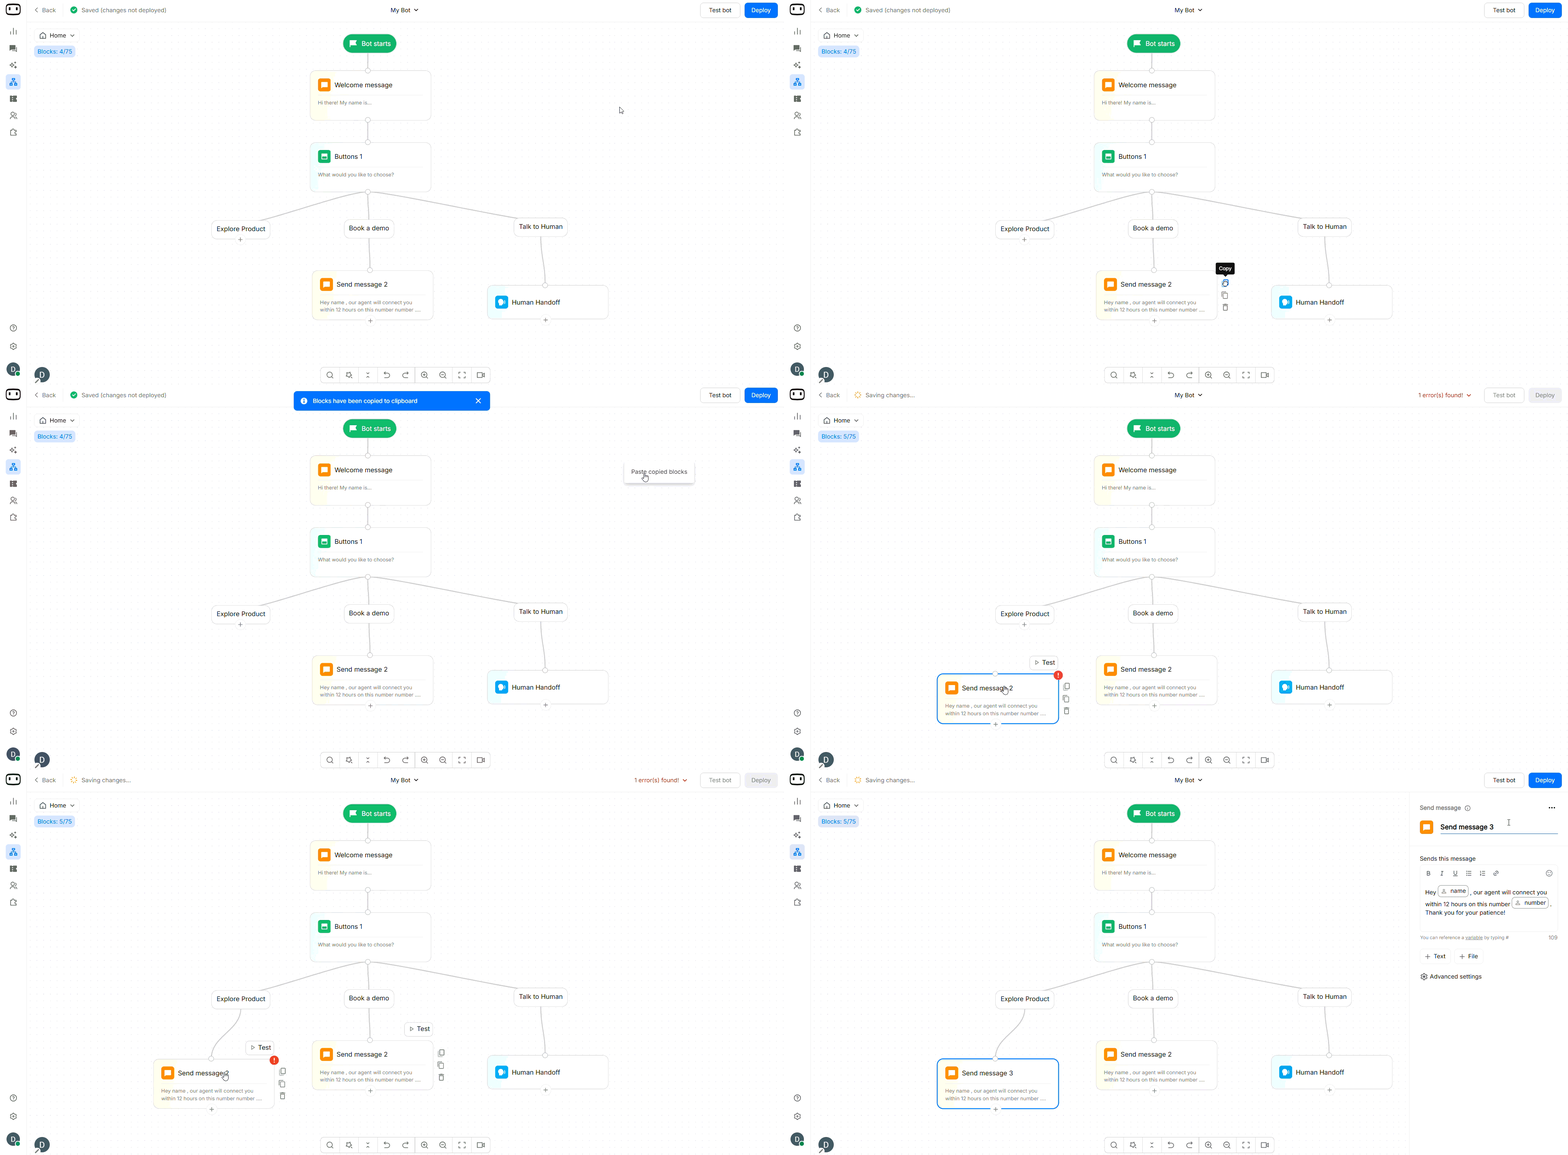
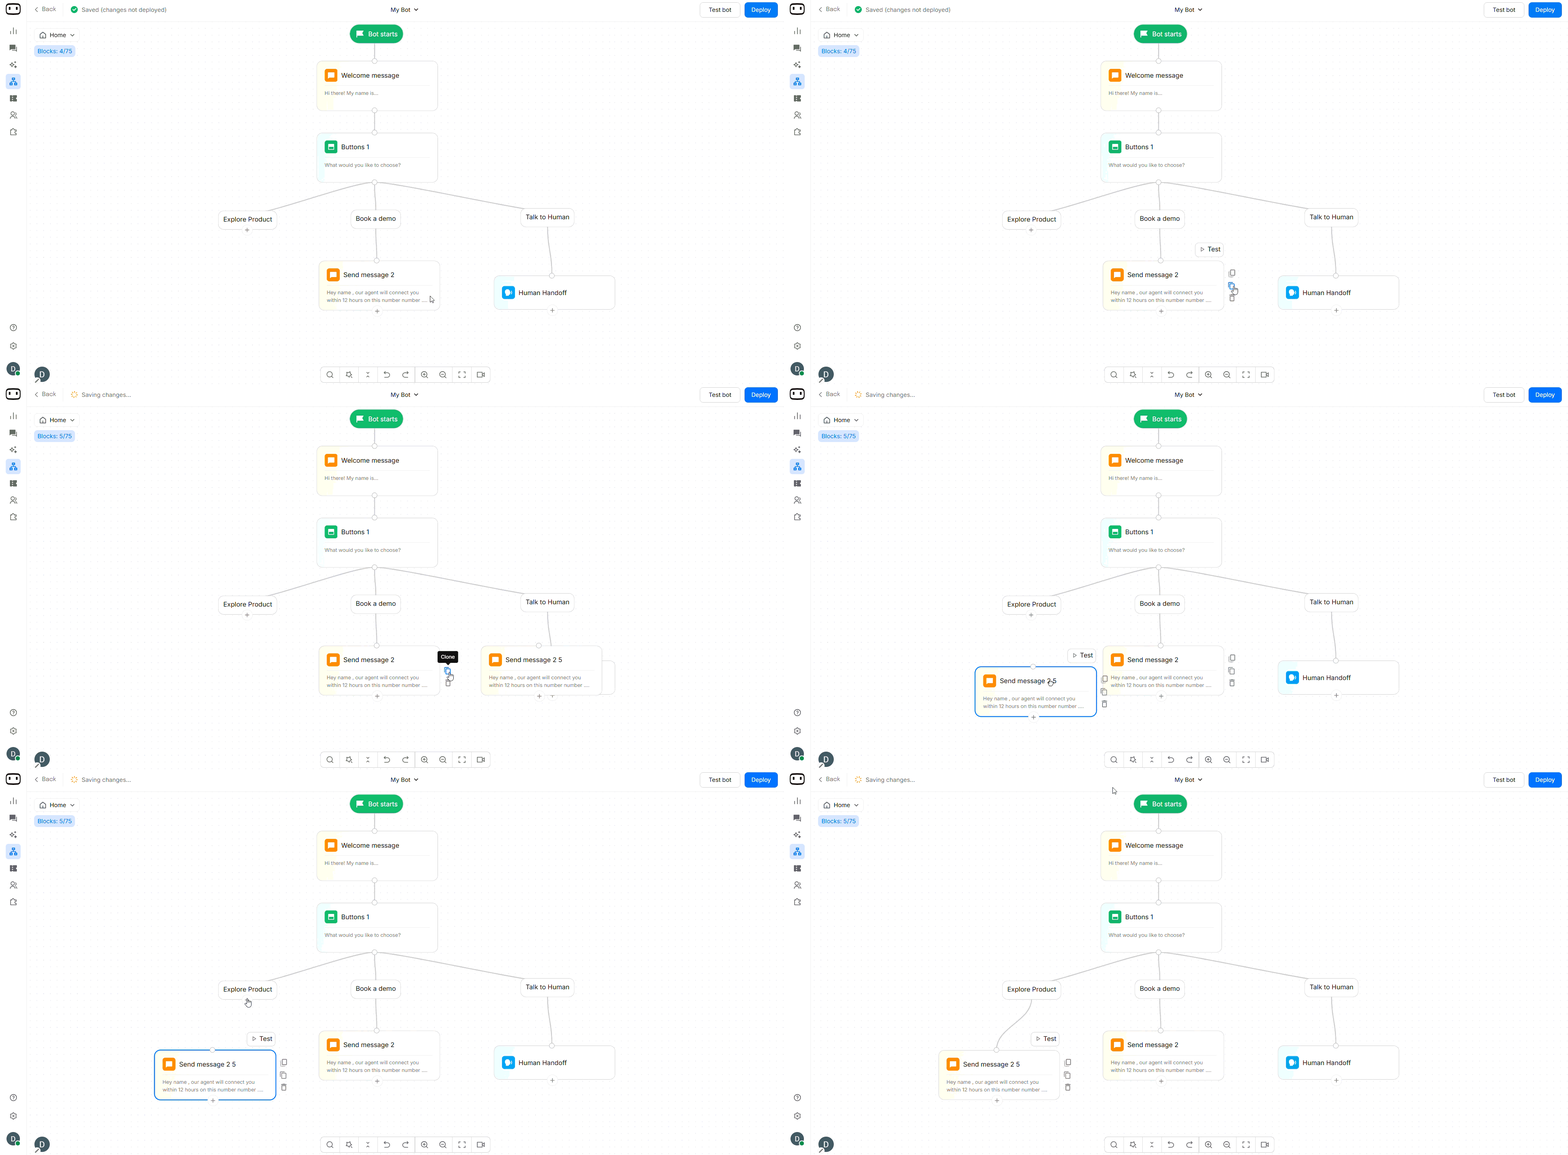
Once blocks are on the canvas, you can manage them and build the conversation logic around them.- Select a block
- Move a block
- Select multiple blocks
- Delete a block
- Connect blocks
- Copy block
- Clone block
Click a block to select it and open its configuration in the action panel.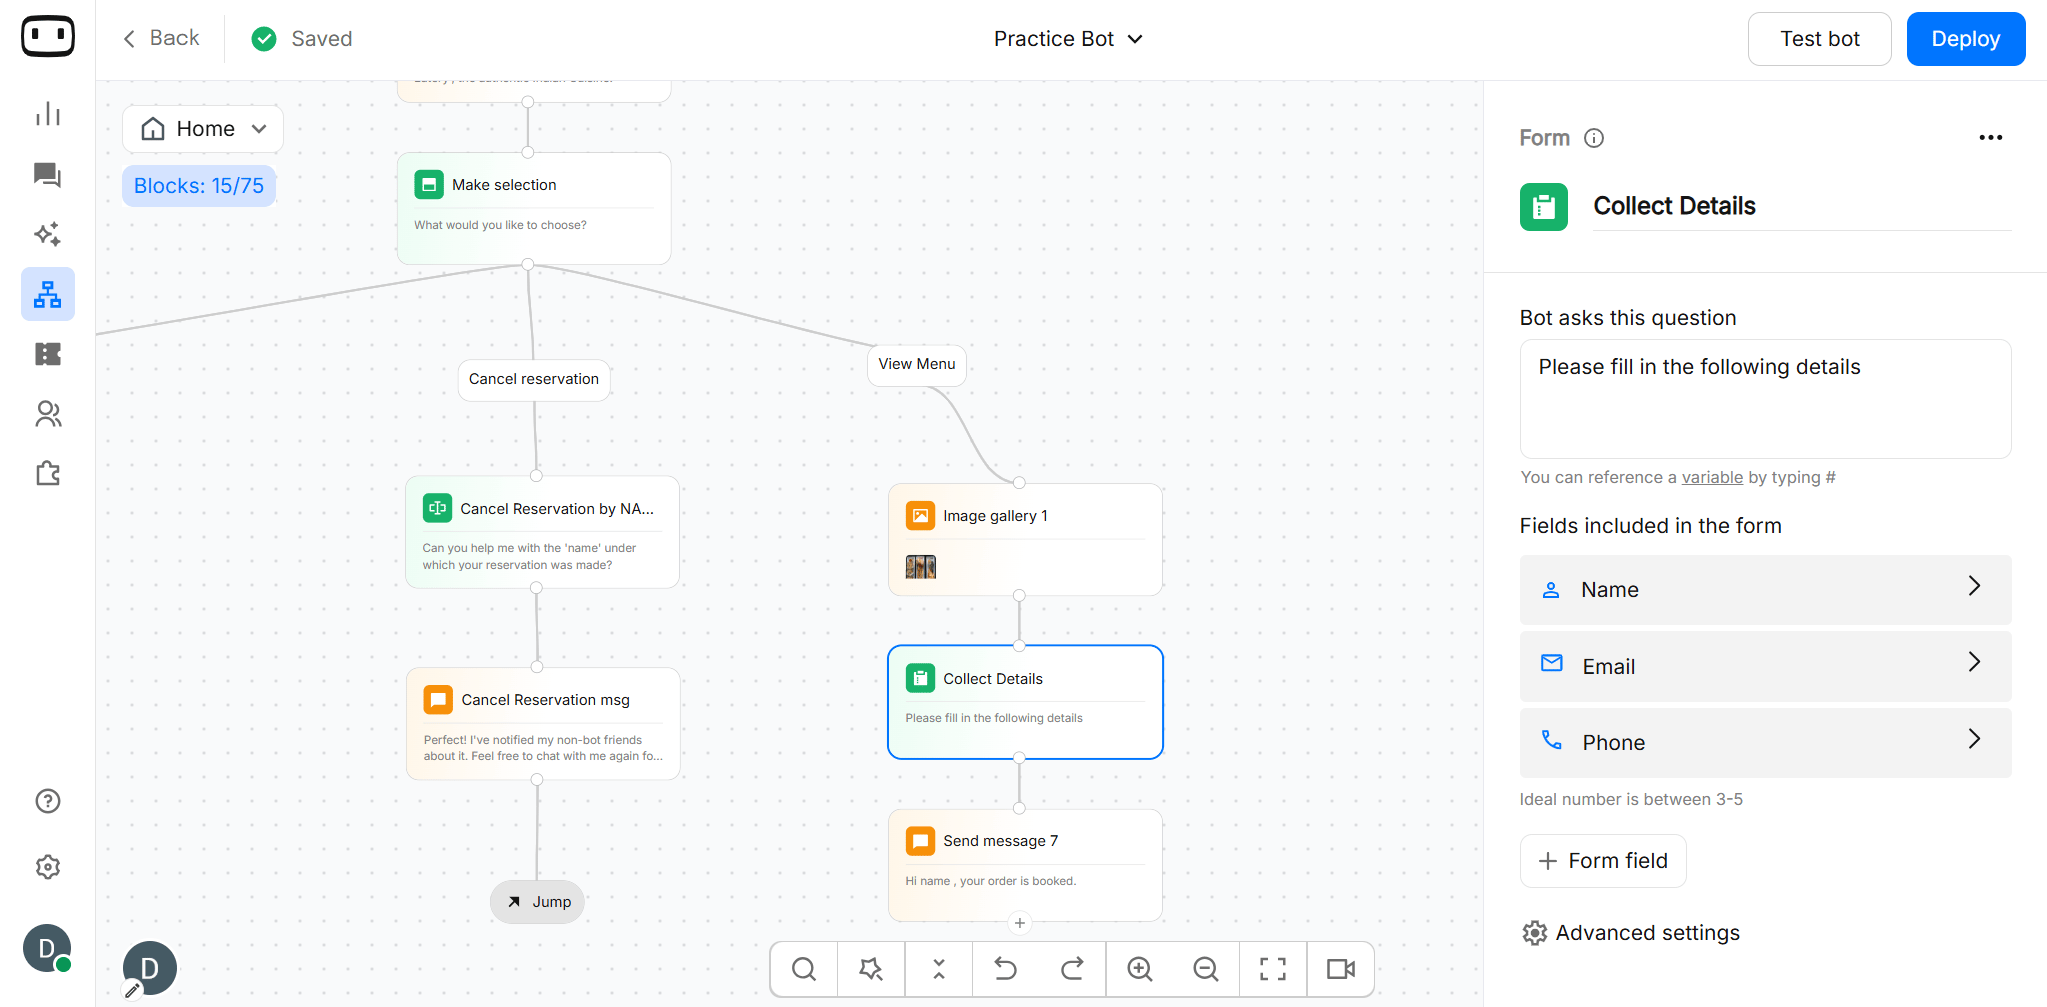


Creating a loop
Loops are useful when a conversation needs to return to an earlier part of the flow, such as retrying invalid input or showing a menu again. To create a loop:- Add the blocks that should handle the first attempt, such as a message followed by a Collect Input block.
- Add a Condition block to check whether the user’s input meets the required criteria.
- Connect the unsuccessful condition path to a message explaining what the user should do, then connect it to a Jump block.
- Configure the Jump block to return the conversation to the block where the process should start again.
- Connect the successful condition path to the next part of the conversation so the user can exit the loop.

Breaking a bot into flows
Large bots can become difficult to manage when every conversation path is built on a single canvas. The Flow block lets you split a large bot into smaller, manageable flows. Instead of keeping every conversation path on one canvas, group related logic into separate flows. This makes large bots easier to build, maintain, and navigate. Use separate flows when:- A topic has a large number of connected blocks.
- A stage of the conversation has its own logic.
- A section is reused or maintained independently.
- Different team members work on different parts of the bot.

Utility Tools
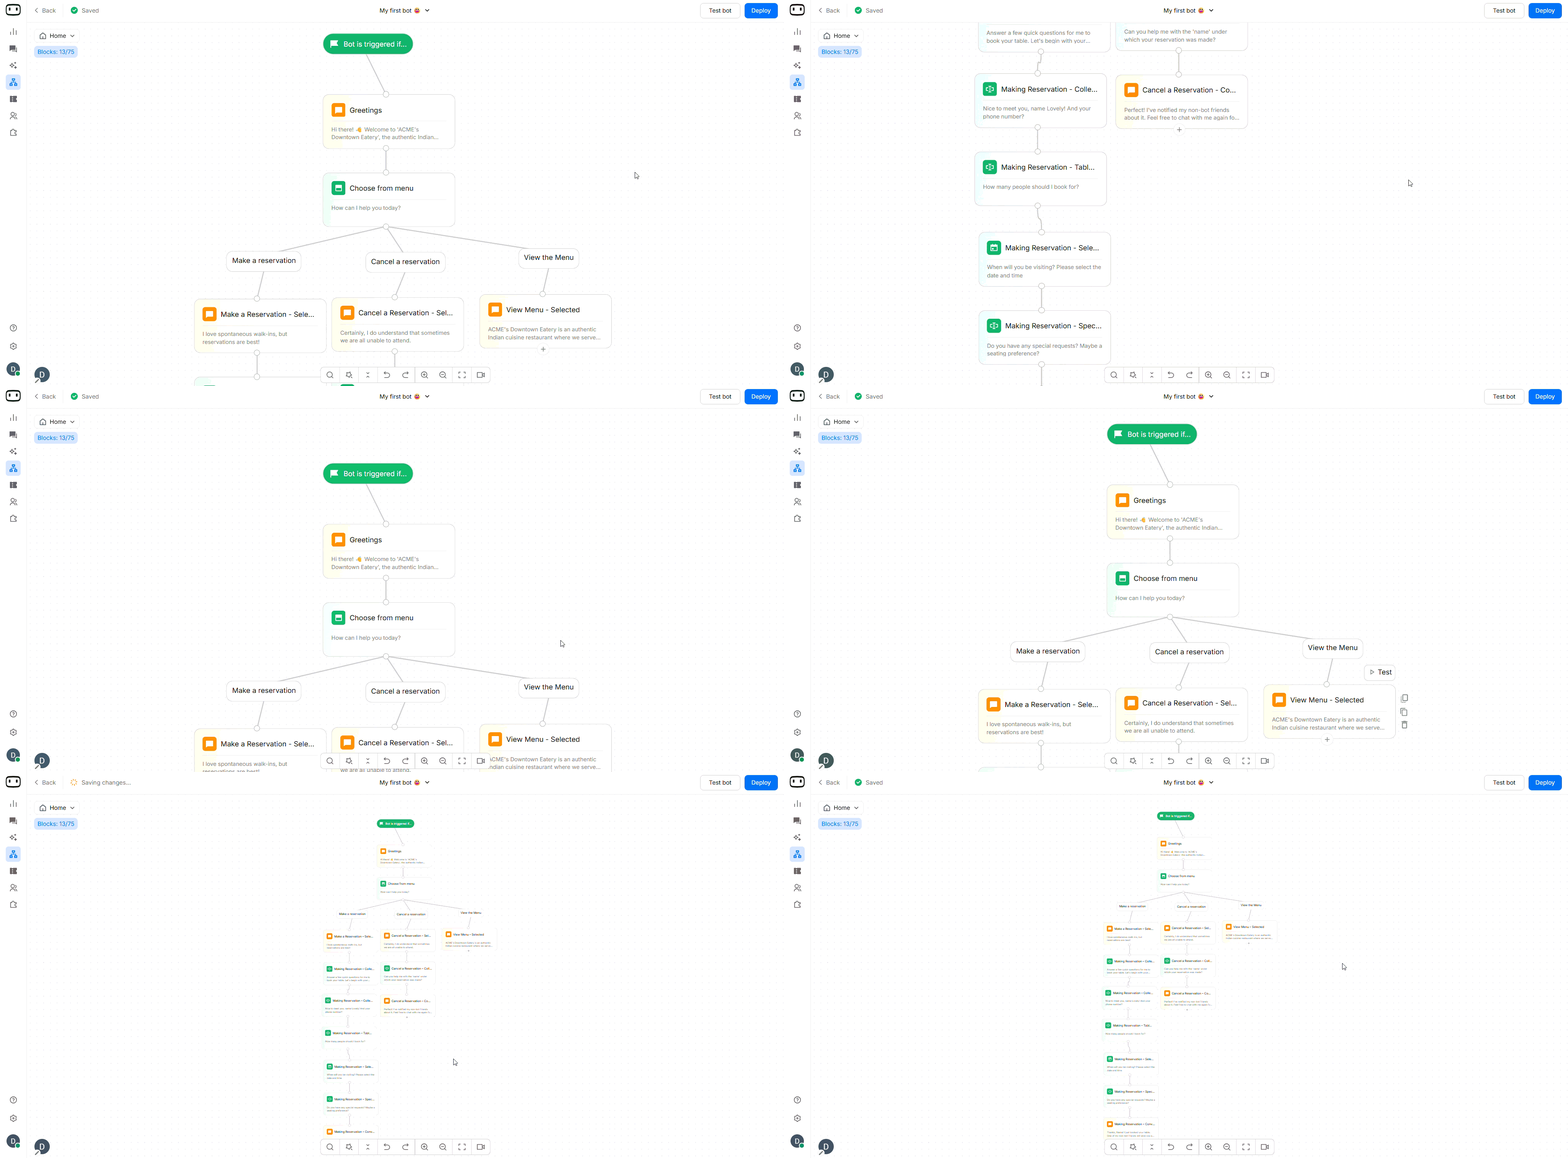
The utility tools at the bottom of the canvas help you navigate and manage large flows. WotNot provides controls for search, undo/redo, zoom, recentering, and grid alignment.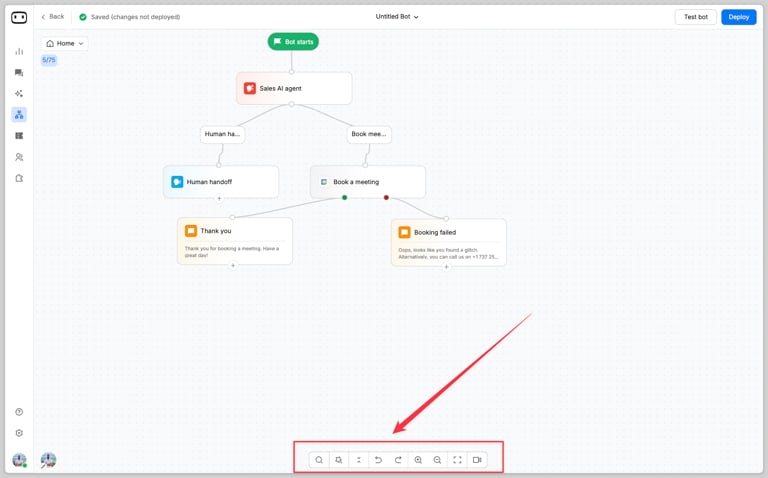
- Search
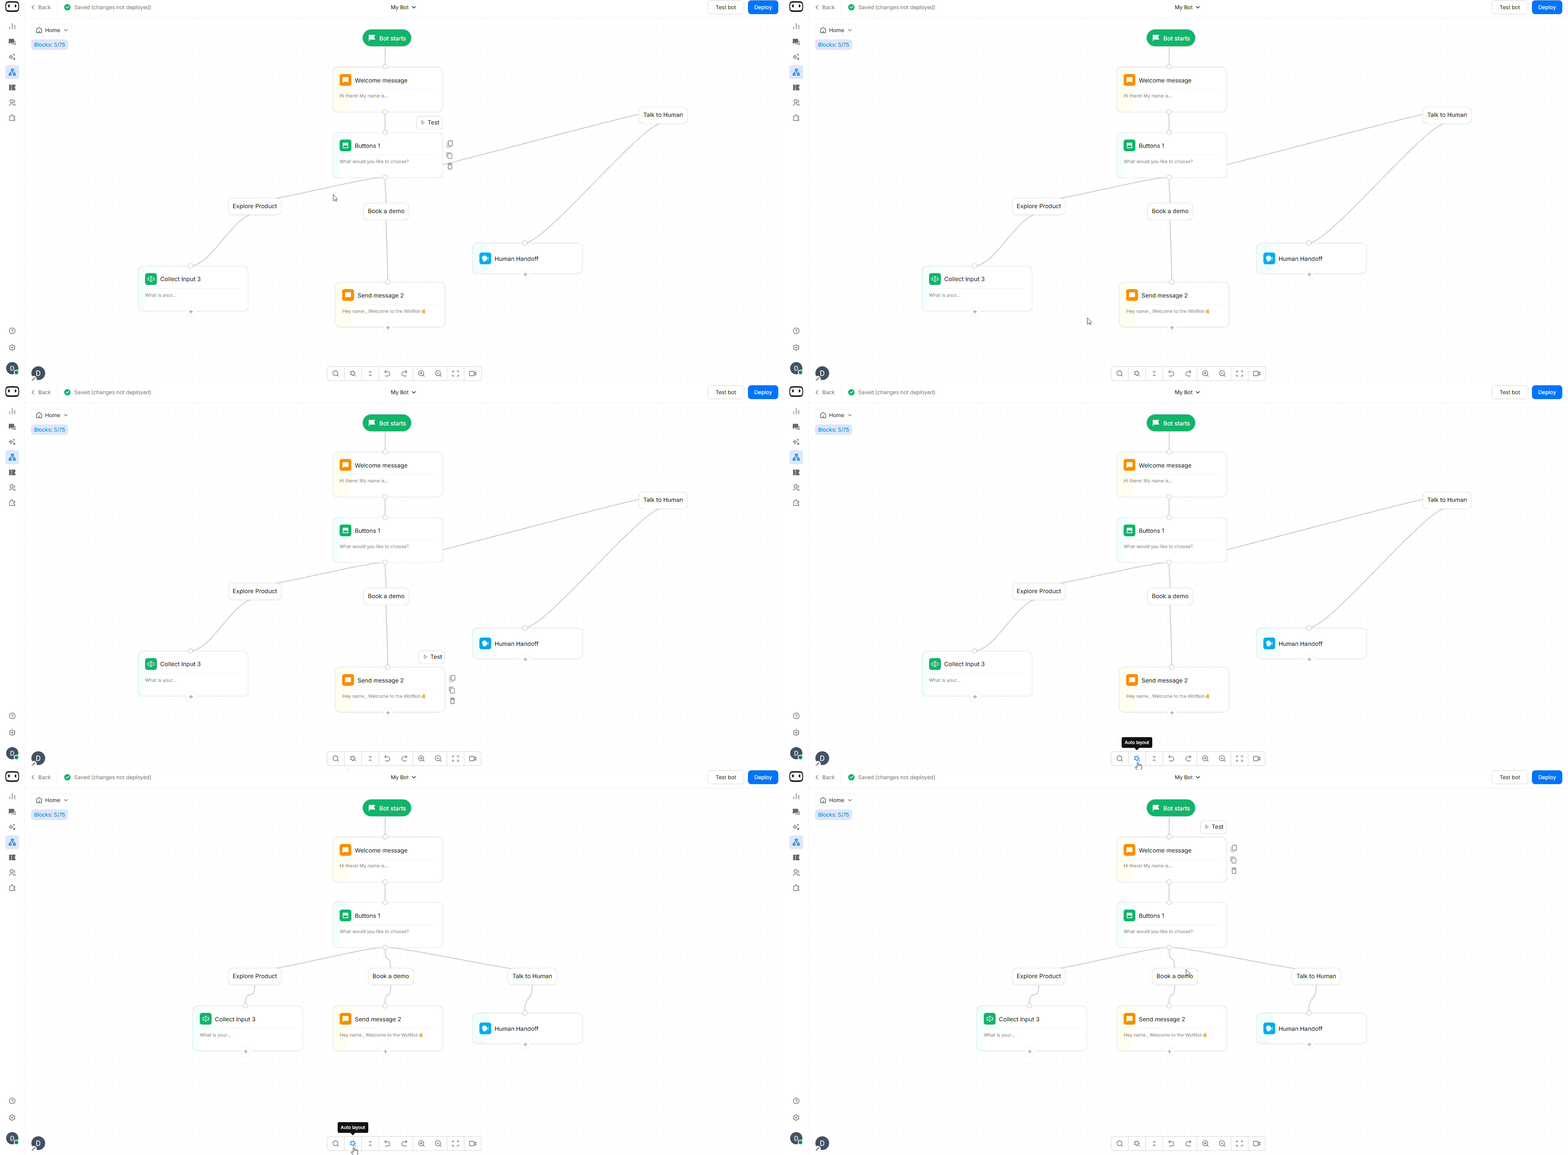
- Auto Layout
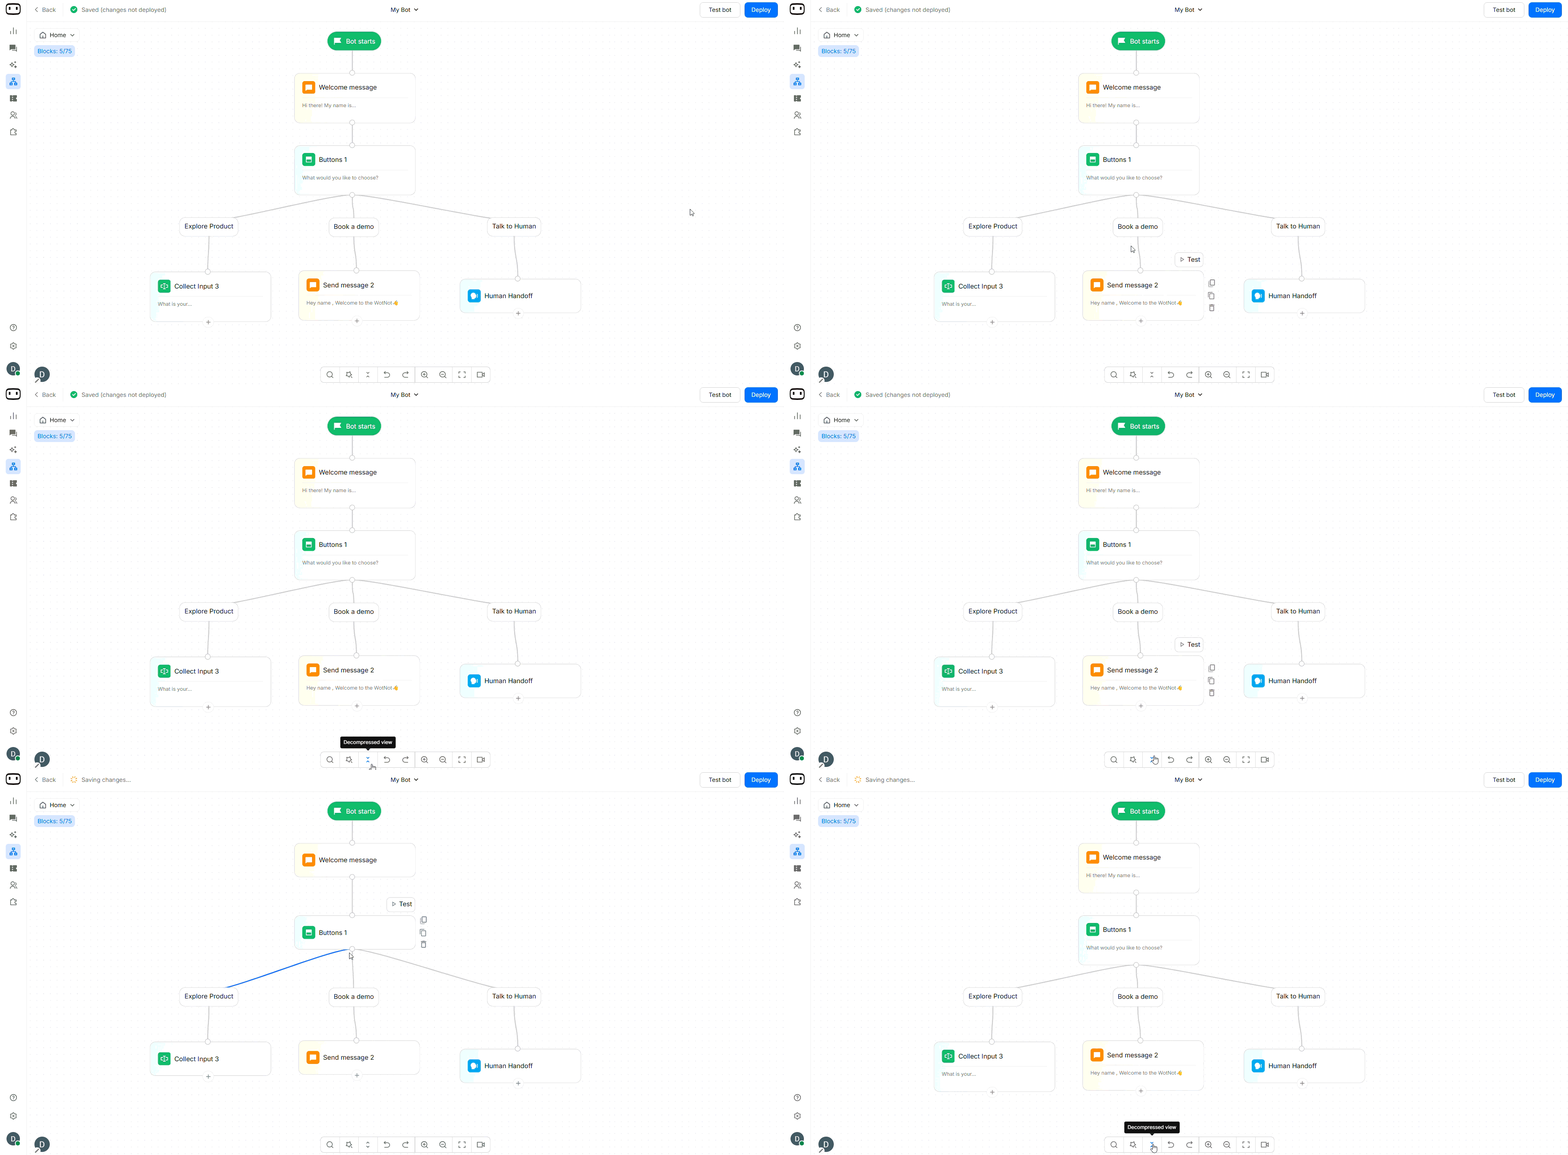
- Decompression View
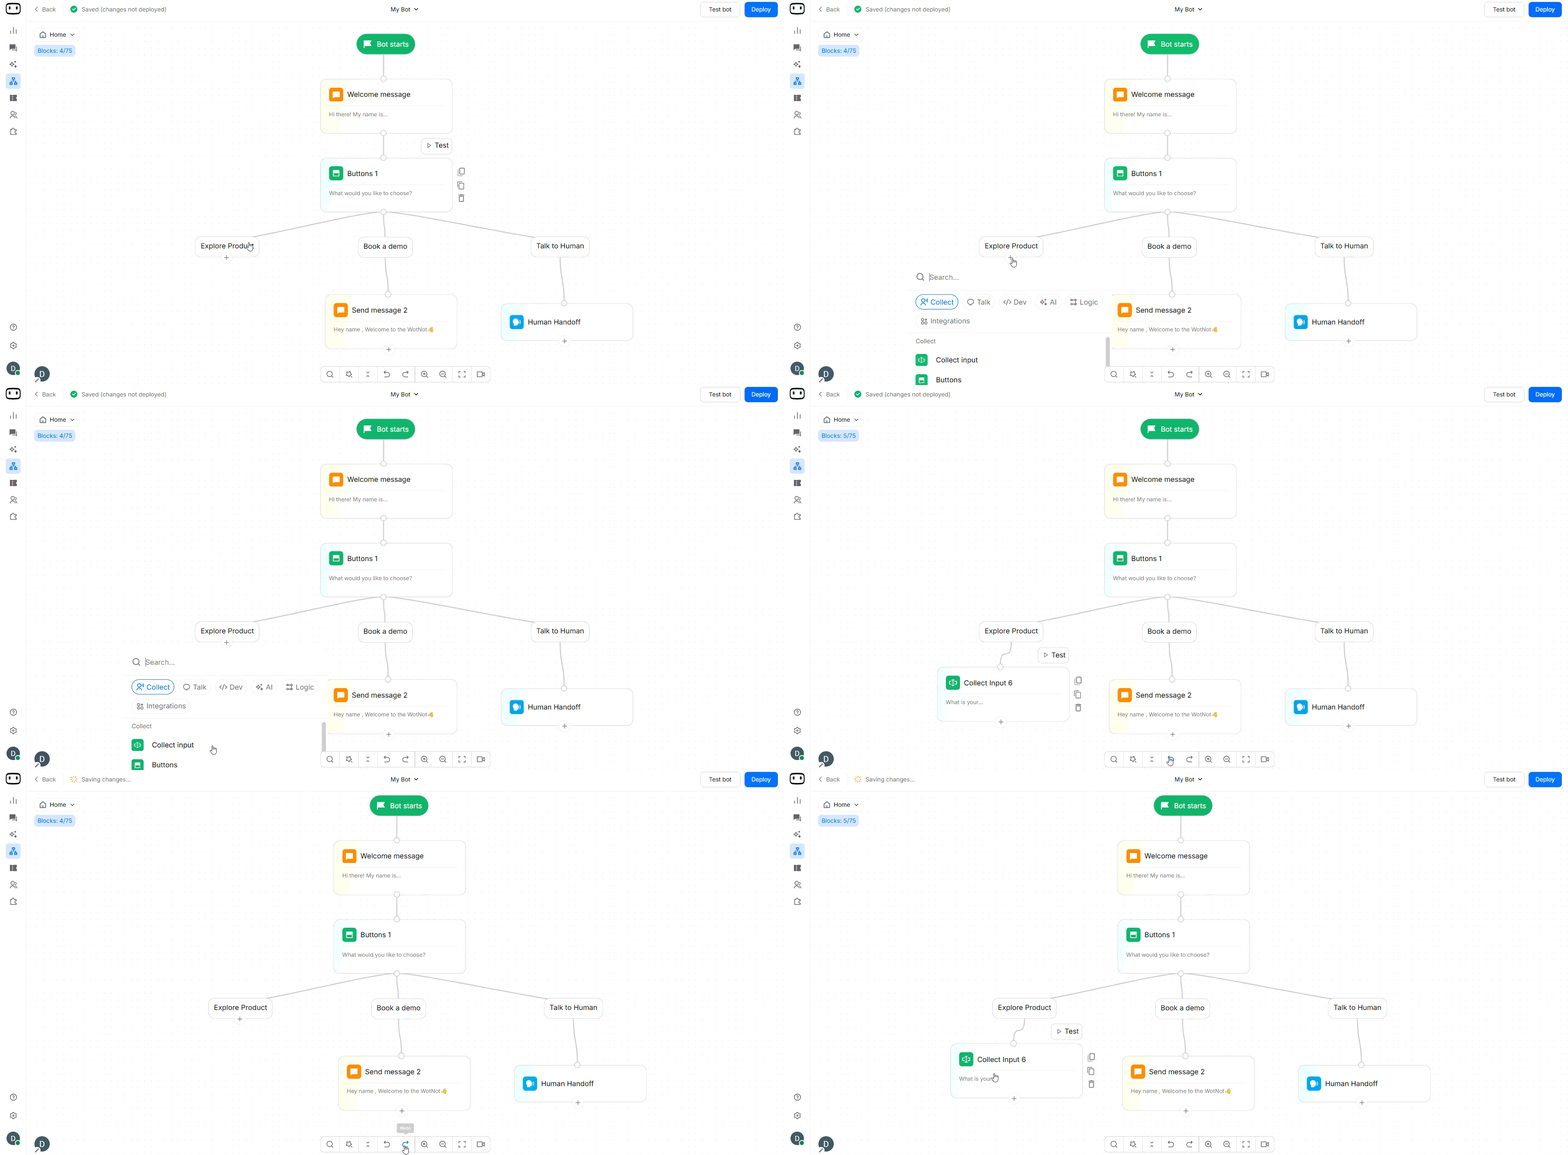
- Undo / redo
- Zoom in / out
- Zoom to content
Use Search to find a block or text within a large bot flow.Enter the text you want to find and review the matching results. Selecting a result takes you to the relevant part of the canvas, making it easier to locate a specific block without manually navigating through the entire flow.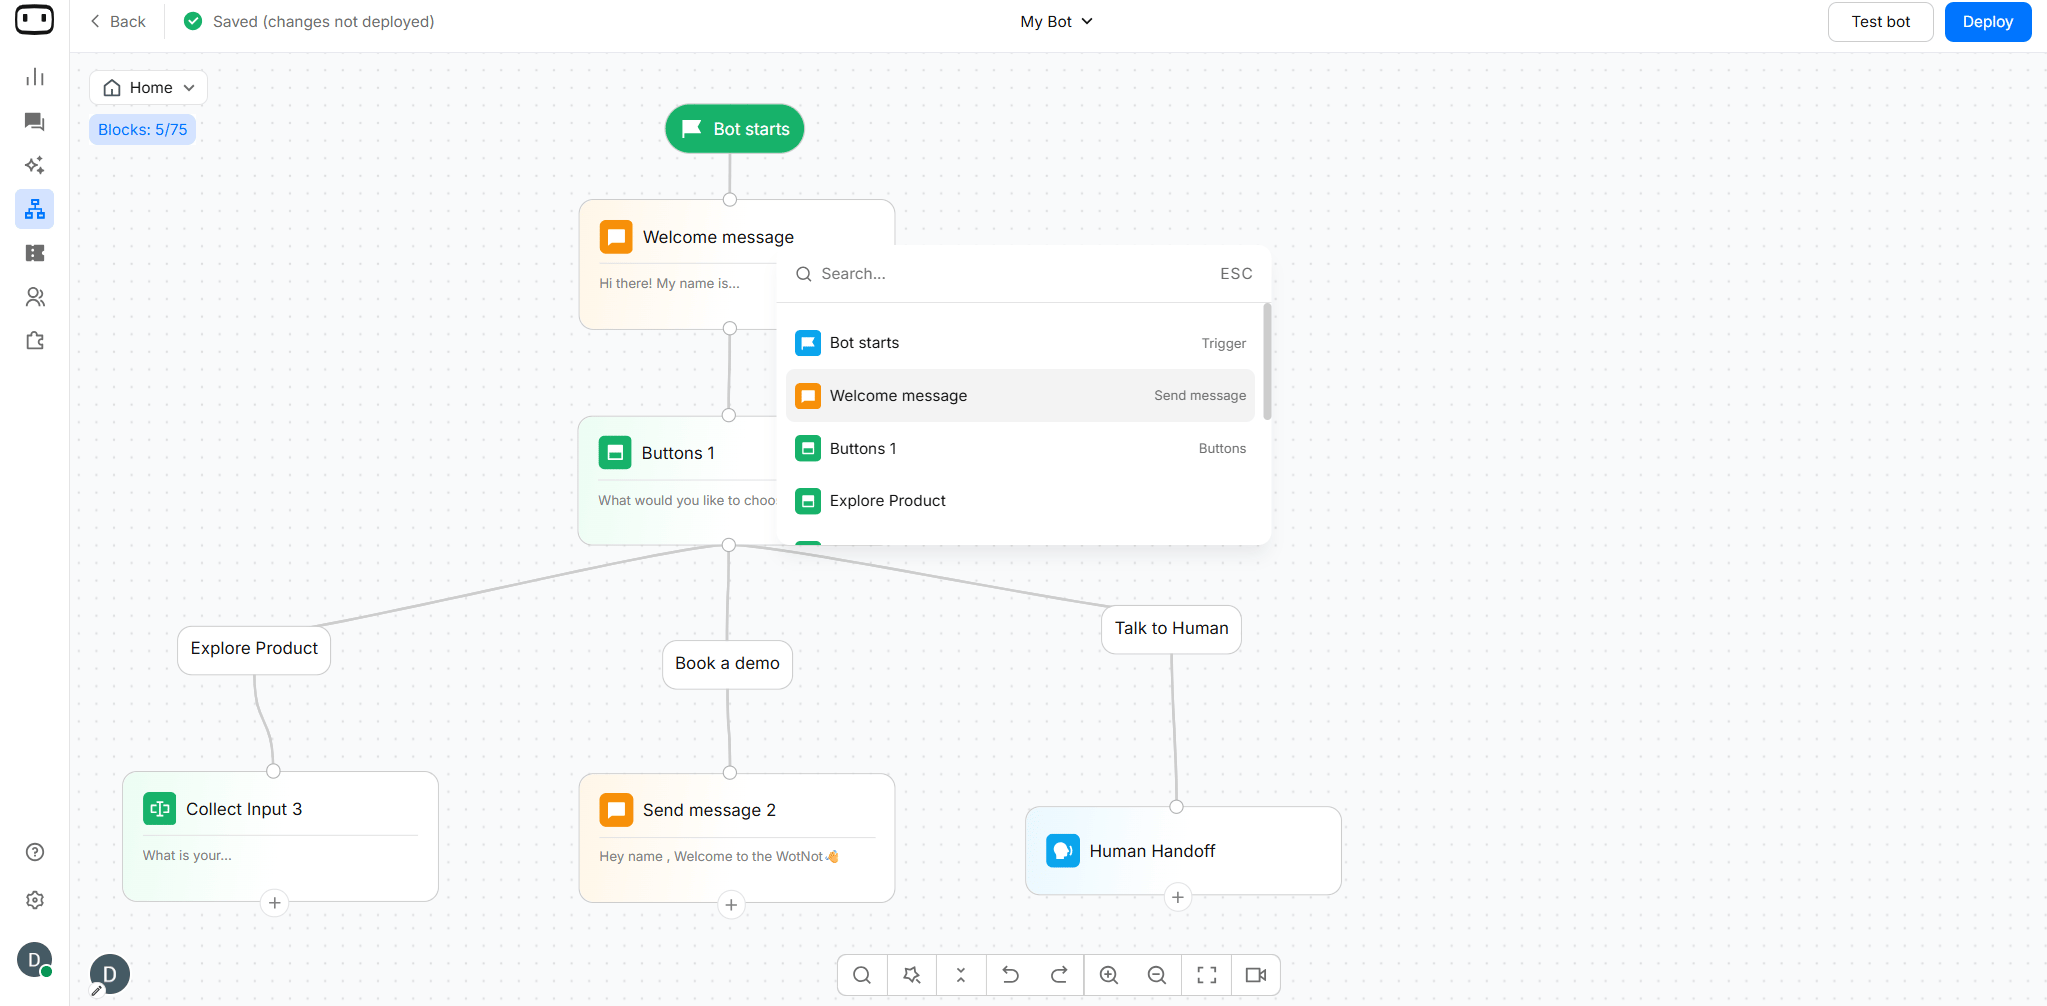
You can also use Ctrl + F on your keyboard to search for a block name.
Navigation Bar
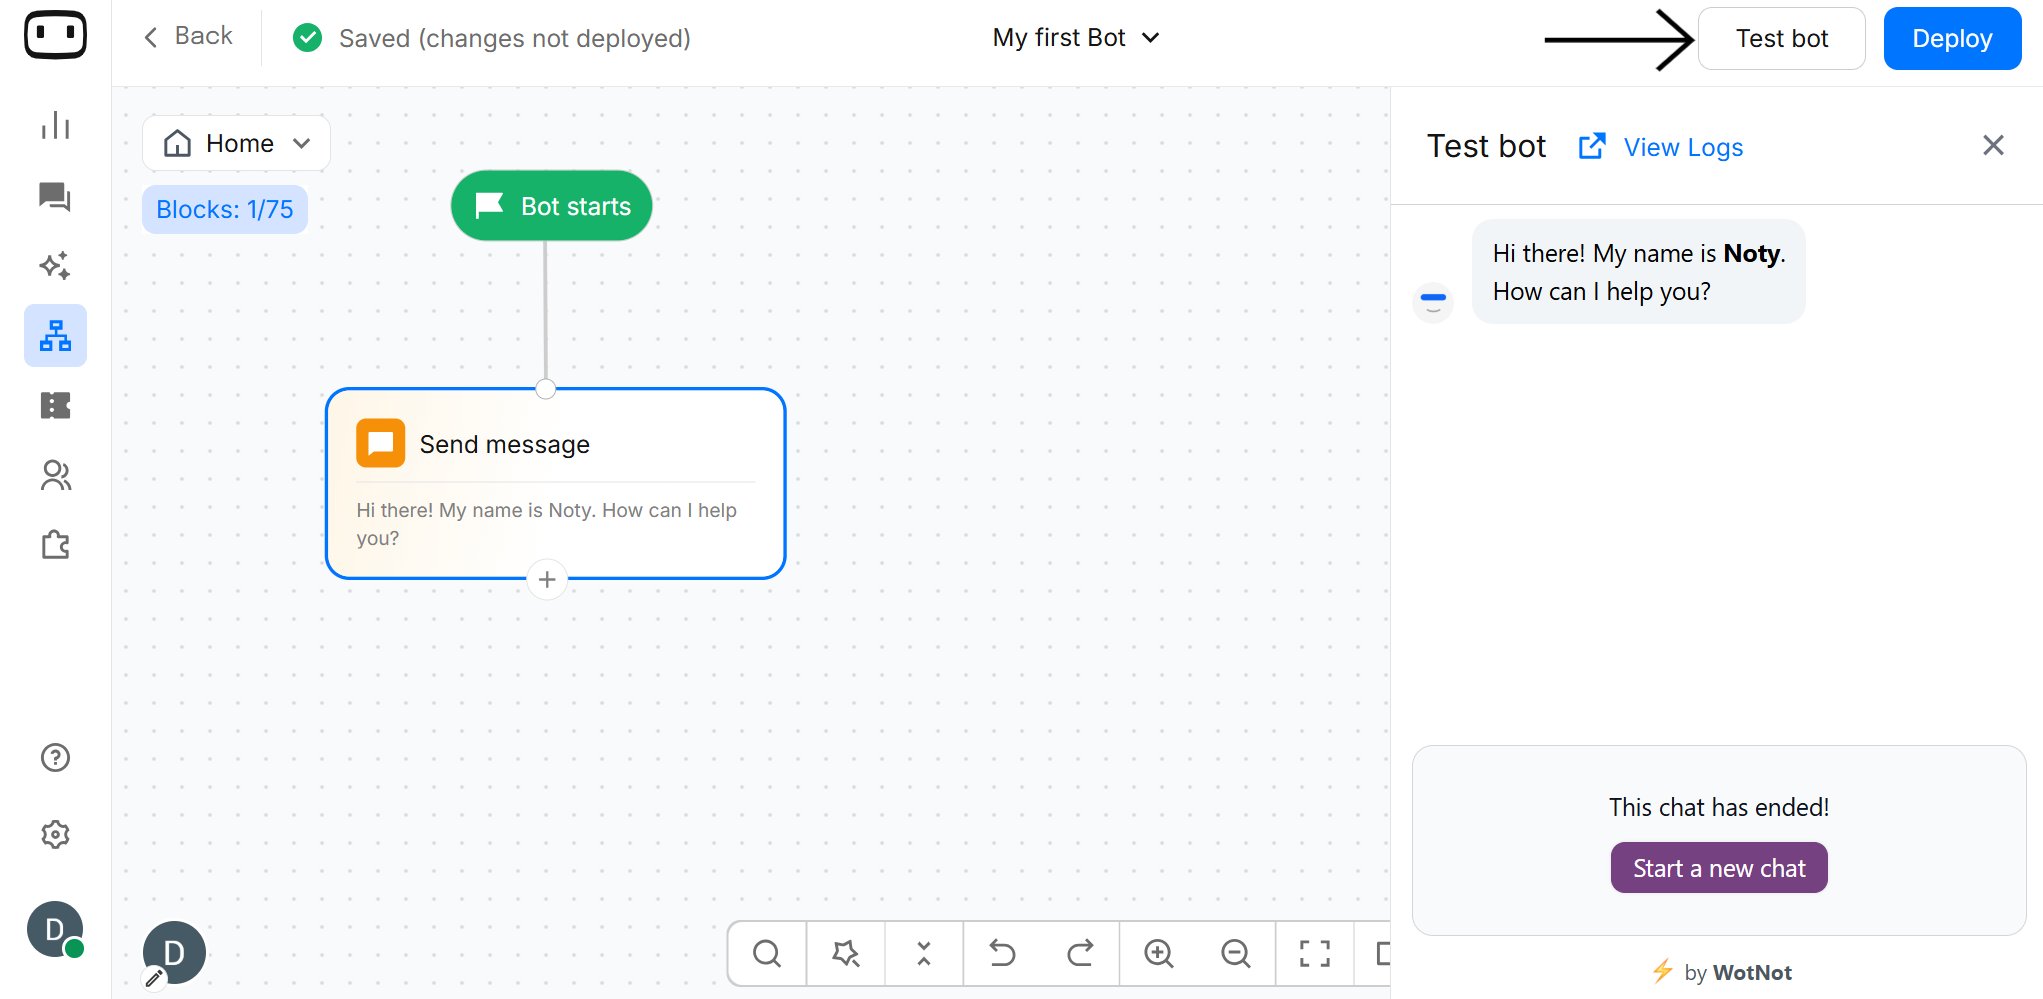
The navigation bar provides controls for managing your bot, including importing and exporting bot configurations, testing your bot, publishing changes, and accessing version history.Test bot
Use Test to test the bot and interact with the conversation flow before publishing.- Doing this will open a drawer from the right with your chatbot flow, allowing you to test your bot directly within the Canvas.
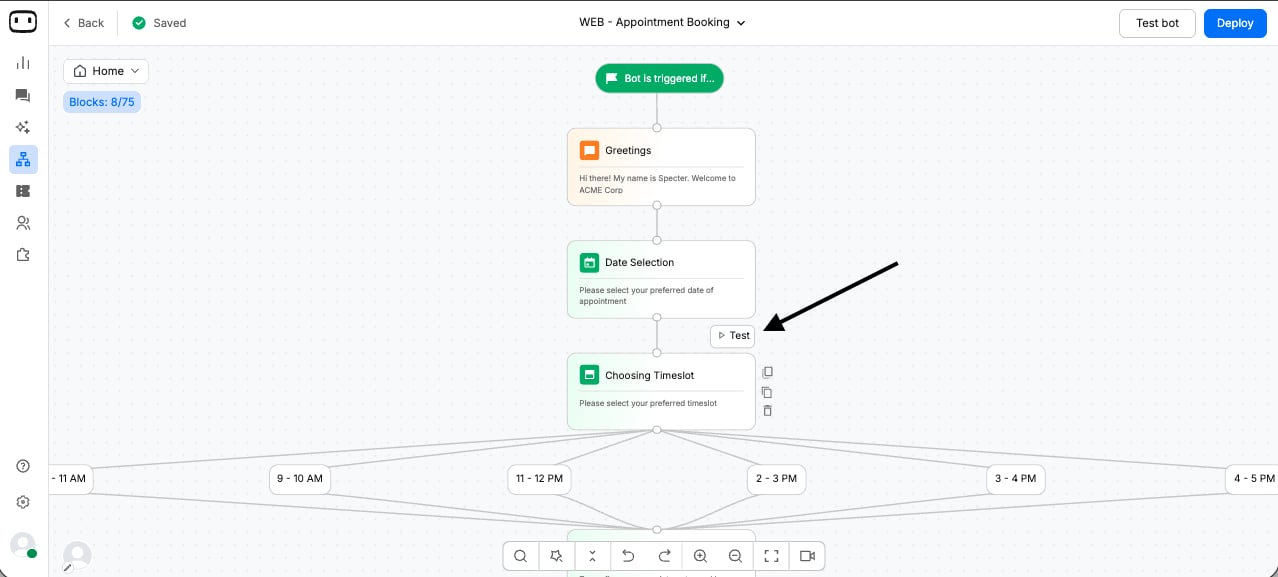
- You can also test the chatbot from a specific point in the flow. Hover over the Action Block you want to start from and click Test. This allows you to skip the blocks that are already working correctly and focus on testing the changes you’ve made.
Deploy bot
Use Deploy to publish the configured bot so the latest version can be used by visitors.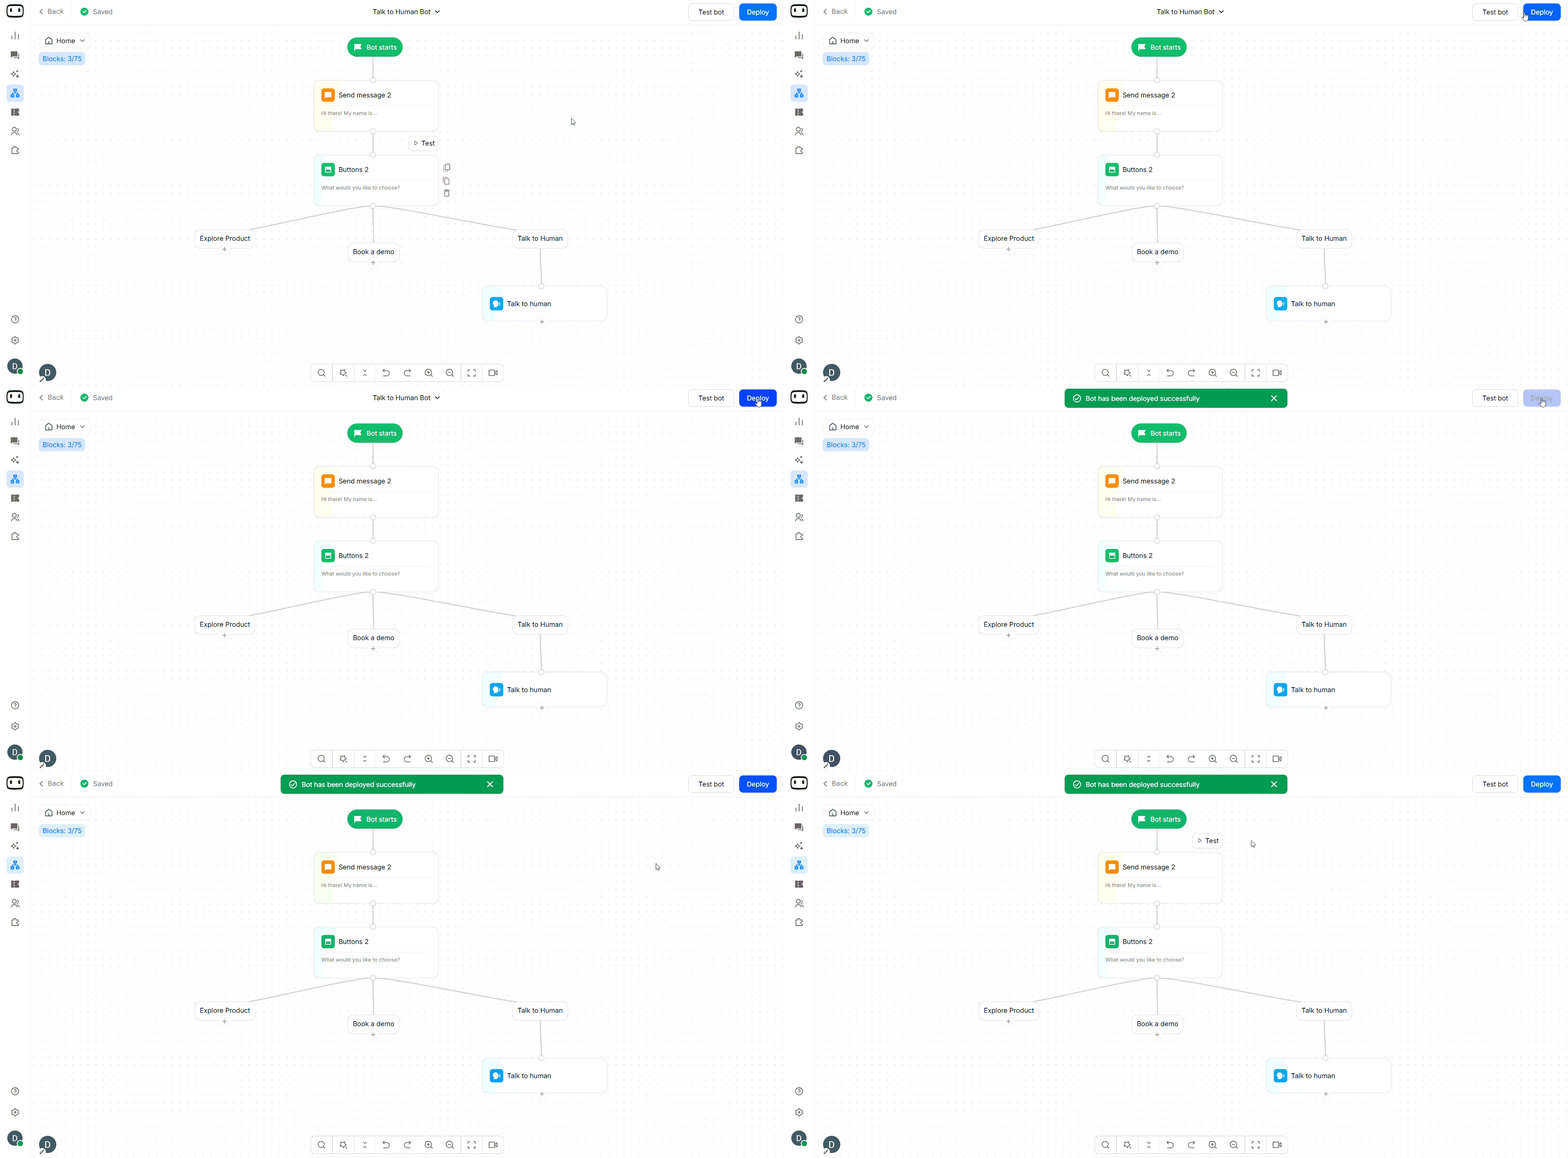
Version Control
Publishing your bot creates a version of the bot that can be used as the published version. Version history helps you keep track of previous versions and return to an earlier configuration when needed.- Open the bot’s version history from the Bot Builder by clicking on Bot name.
- Select a previous version to review its configuration and understand what was included in that version.
- Preview the selected version before deciding whether to use it again.
- Select the version you want to restore and use the Restore option.
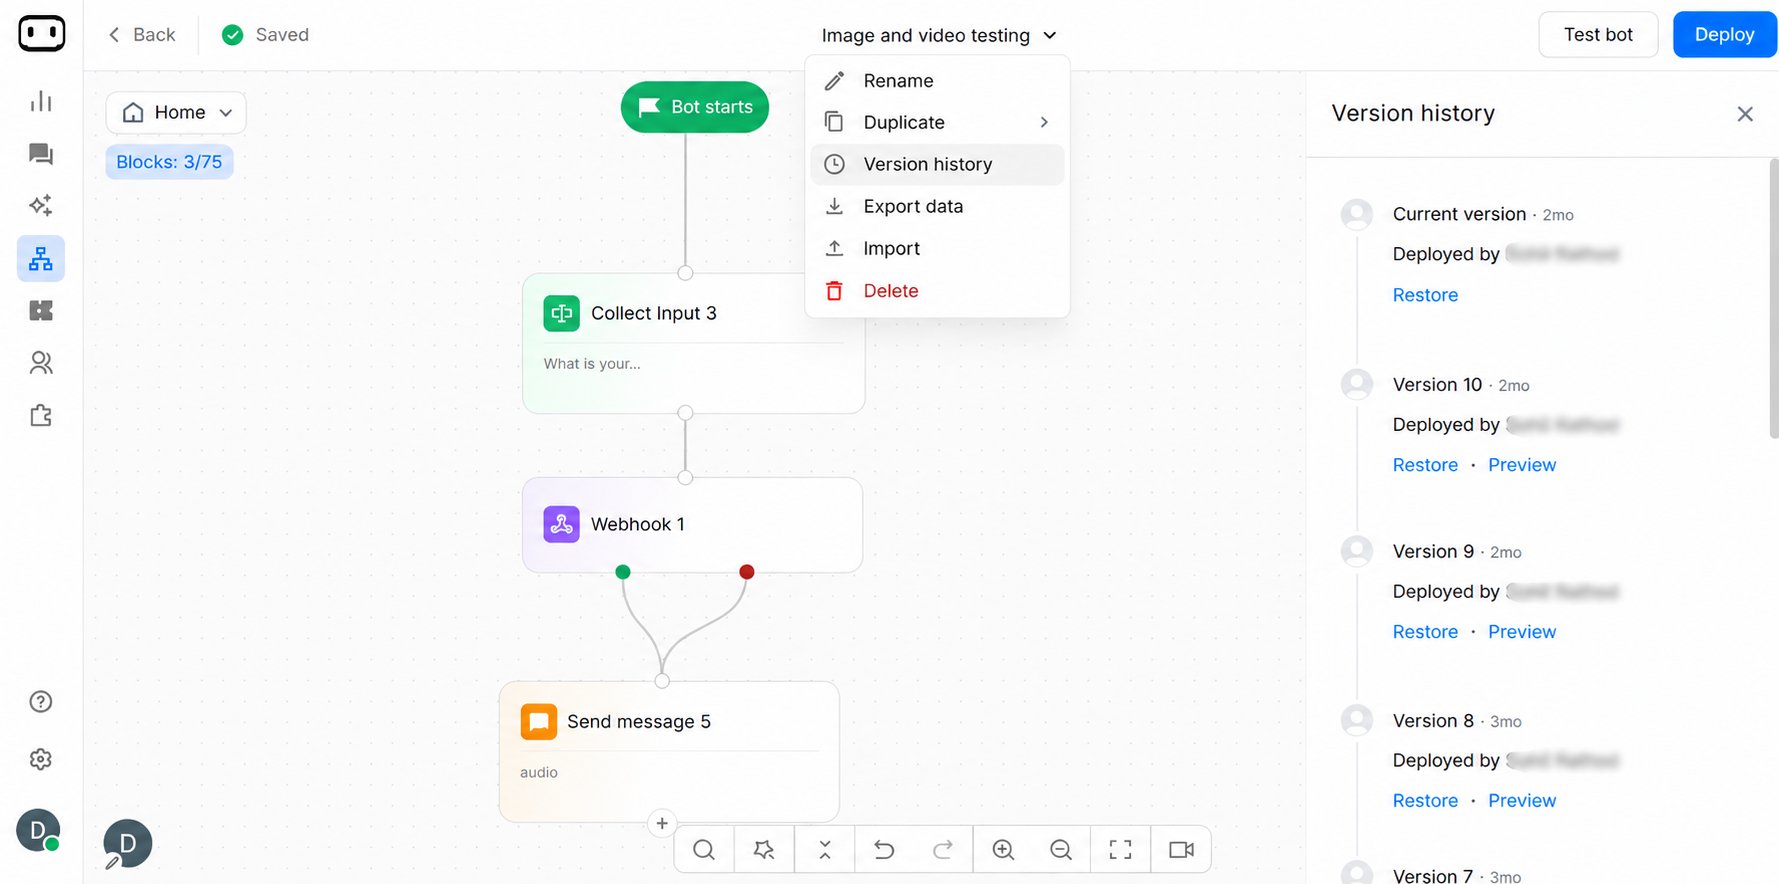
Restoring a version affects the bot configuration you are working with. Review the restored version before publishing it to make sure the correct version is live. A restored version should not be treated as an automatic change to the currently live bot until it is published.
Duplicating a bot
You can clone a deployed bot when you want to reuse an existing bot instead of building the same flow again. WotNot supports cloning a bot from one channel to another.- Go to Bot Builder and find the bot you want to duplicate.
- Hover over the bot and click Menu to view the available actions.
- Click Clone and select the channel for the copied bot.
- Open the copied bot and review its configuration before making any changes.
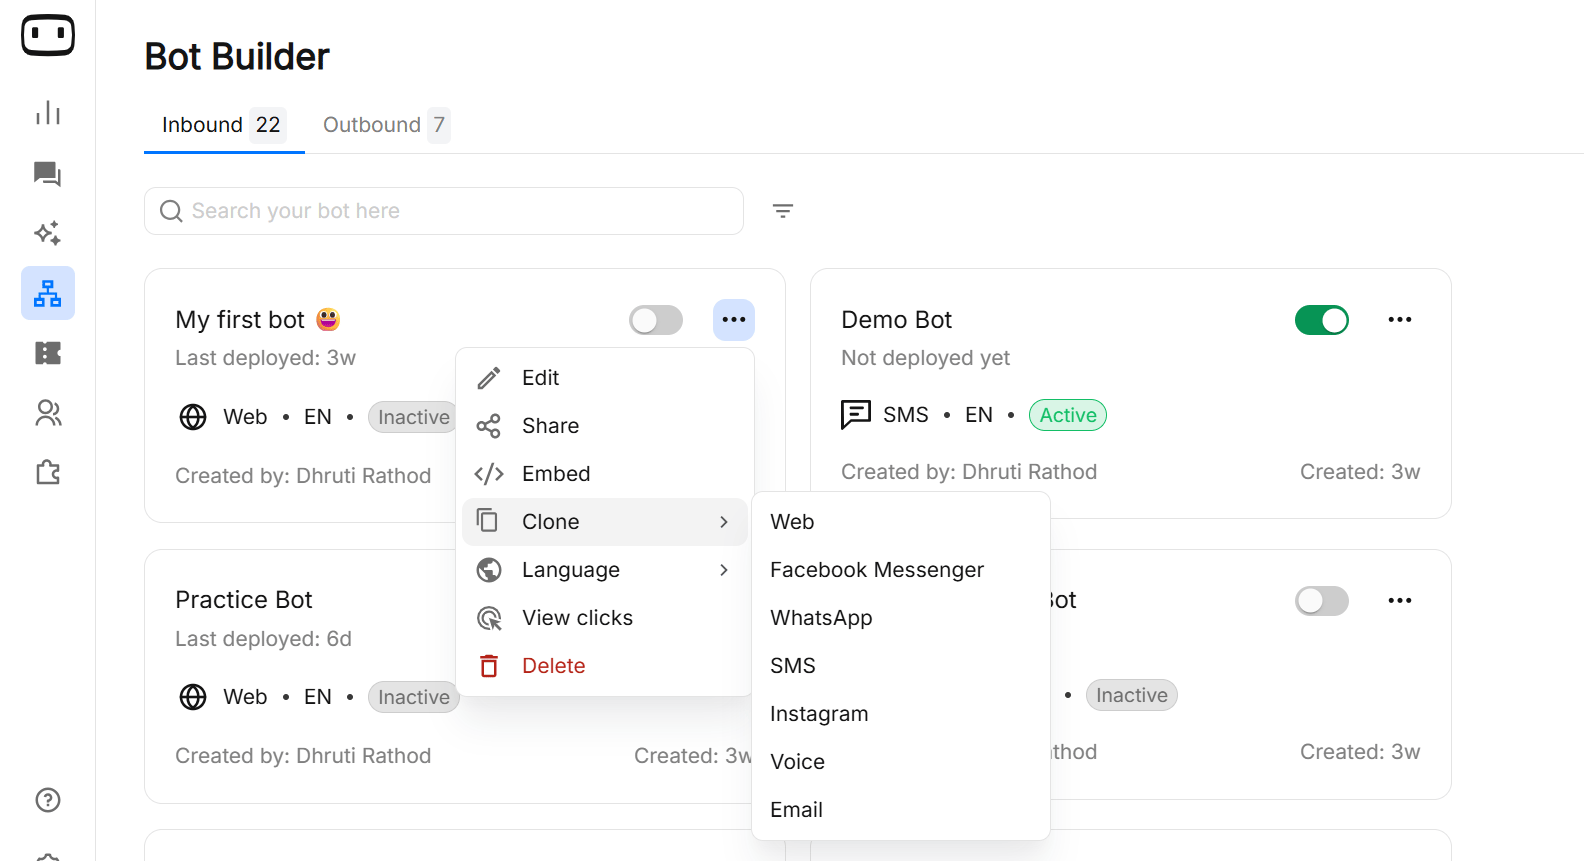
The bot must have been deployed at least once before it can be cloned. When cloning between channels, some action blocks may not be compatible with the destination channel. WotNot displays warnings for incompatible blocks, and the copied bot is created with a Copy of prefix that you can rename.
Exporting and Importing bots
Export and import functionality can be used to move or reuse bot configurations. Because the current WotNot Help Center does not document the export/import workflow or the exact behavior of imported files, verify the current product behavior before publishing this section.Export bots
- Go to Bot Builder and open the bot you want to export from Bot Builder
- Click on the bot name and select Export data
- The exported file will be downloaded and you can check the downloaded file in your computer

Import bots
- Open any bot in Bot Builder, or select Create a bot from scratch.
- Click the bot name and select Import.

- Upload the export file and follow the on-screen instructions.

- Review the imported bot’s configuration before publishing it.
Only JSON files are supported.
Managing edit access
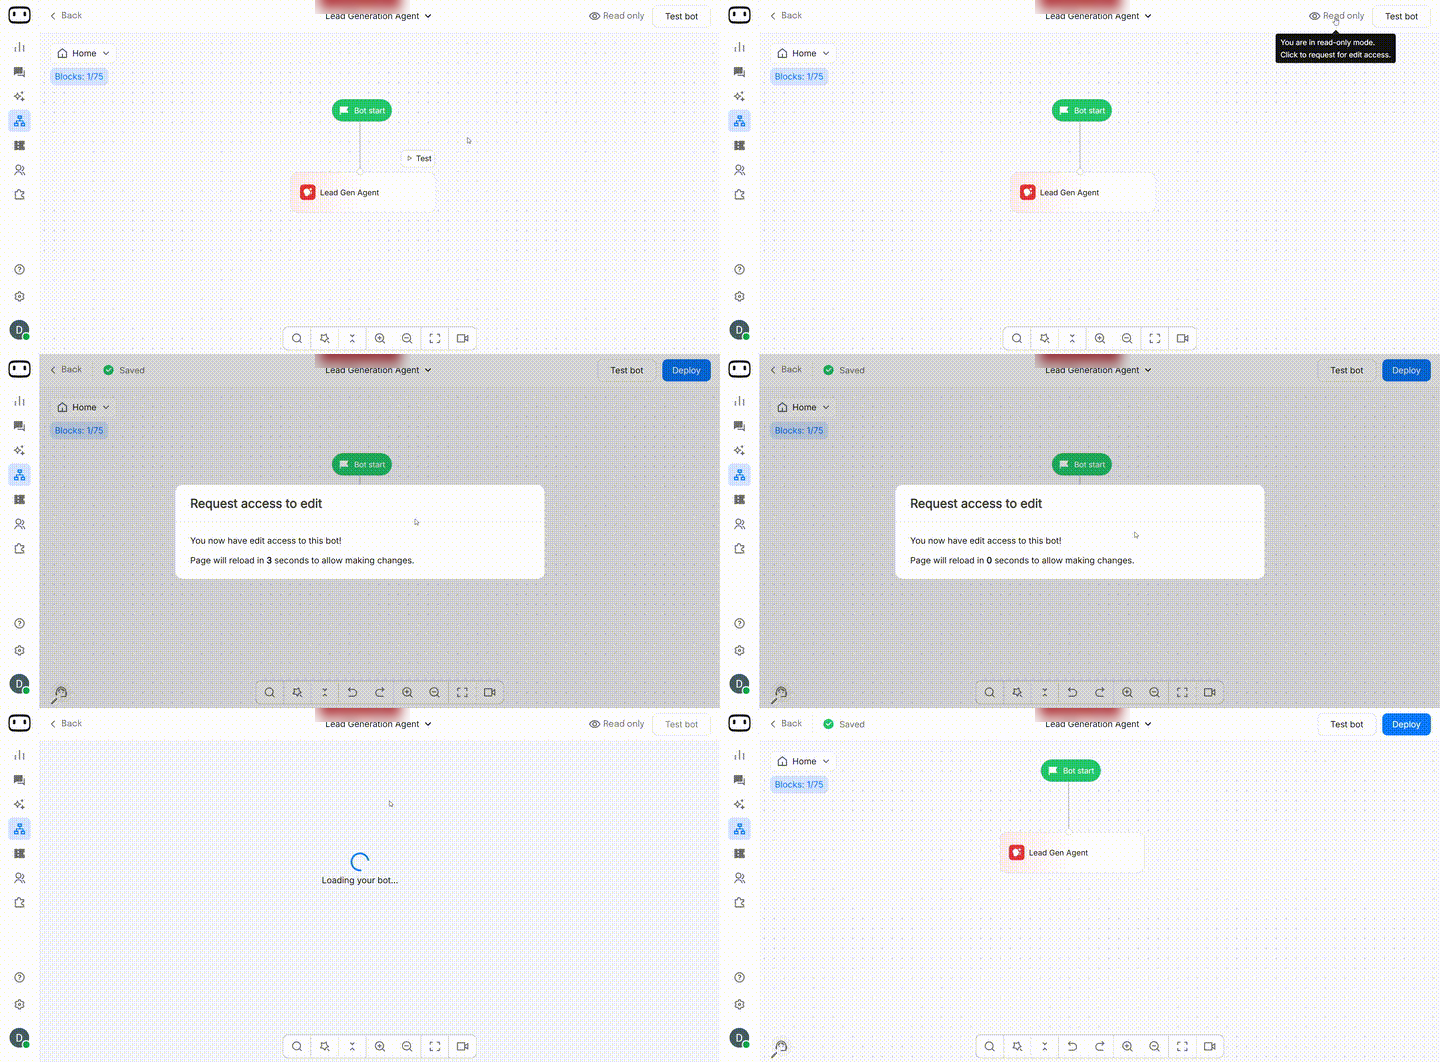
Bot Builder supports read-only access so that multiple users can view a bot while edit access is controlled. By default, the initial user has EDIT access, while additional users have READ-ONLY access.- If you are in read-only mode, click Read Only in the Bot Builder.
- Your request is submitted and is sent to the current editor for approval.
- If you are the current editor, review the request and choose whether to Approve or Decline it.
- If approved, the requester receives confirmation and the page reloads with edit access. If declined, the requester remains in read-only mode.