

Available on the WhatsApp channel.
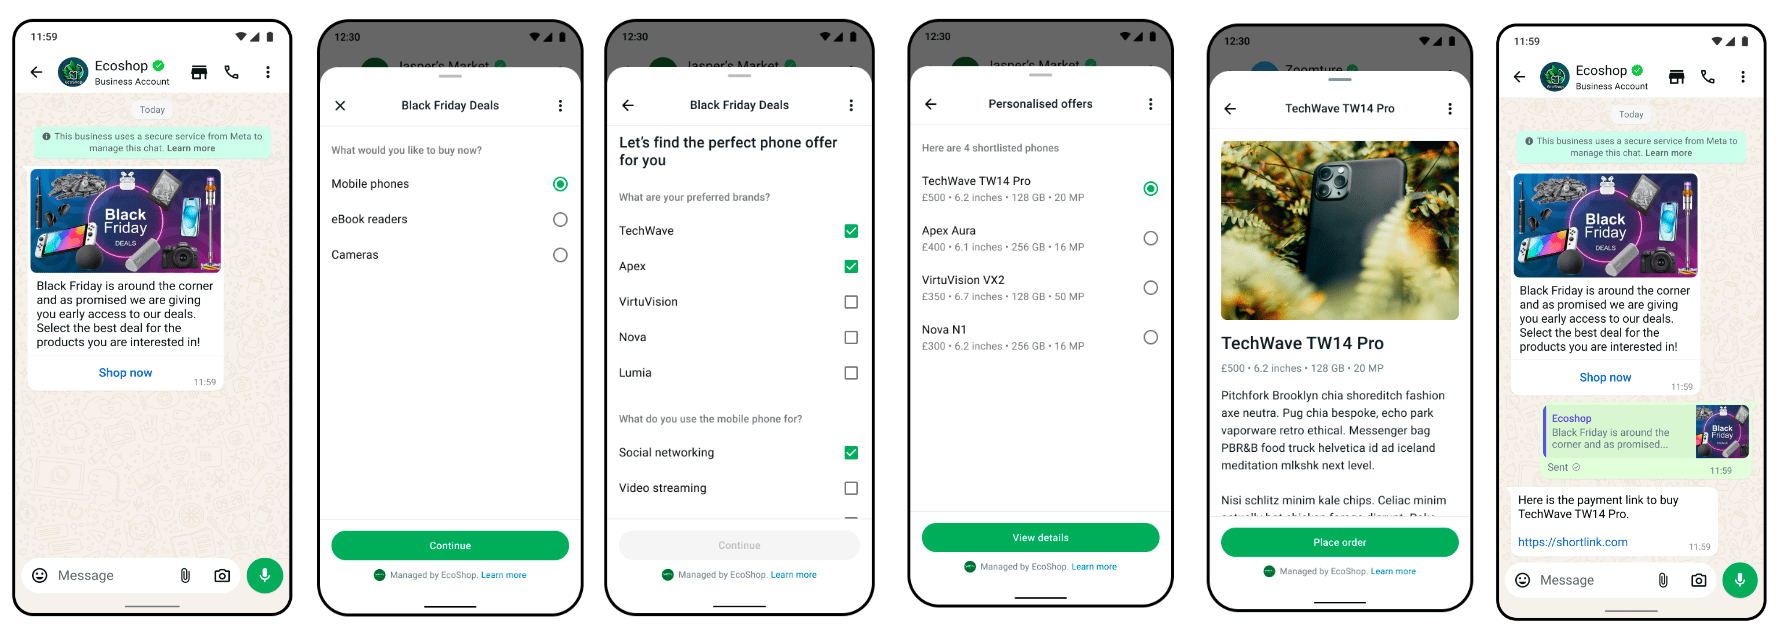
- building lead qualification sequences
- customer support troubleshooting trees
- booking workflows
- multi-step forms.
The WhatsApp Flow itself is created and configured in Meta’s WhatsApp Manager. WotNot does not provide the Flow builder. You create and publish the Flow in Meta, then select that published Flow in WotNot and configure how data is passed into and returned from it.
Using the WhatsApp flow block
To add a WhatsApp Flow to your bot:- Open your bot in Bot Builder.
- Drag the WhatsApp flow action block onto the canvas.
- Connect the block to the relevant part of your conversation flow.
- Open the block configuration.
- Select the published Flow from the dropdown.
- Select the screen from which the Flow should start.
- Configure any data that should be passed from WotNot into the Flow.
- Map the Flow’s response fields to WotNot variables.
- Configure the button that users click to open the Flow.
- Deploy the bot.

Configurations
Header
Shows the text in a bold format — making it look like a title. It is an optional field.Footer
The text is displayed in a small grey color format. Mostly used to display a disclaimer to the user when selecting the option from the list.Body
The text will be the question associated with showing the list of options. For example, “Select the service you are interested in”.Error message
If the user types a random text instead of clicking the button, this error message will be sent.Button Name
Set the text displayed on the button that opens the WhatsApp Flow. For example:- Start
- Continue
- Book now
- Submit details
Button name cannot be empty.

Flow Creation
- Log in to Meta Business Manager and open WhatsApp Manager.
- In the left navigation menu, go to Account tools → Flows.
- Click Create flow.
- You will see the Create flow screen with fields for the Flow name, category, and template.
-
Enter a name for your Flow in the Name field.
For example:
Feedback -
Select a suitable Category.
For example:
Shopping -
Choose how the Flow will communicate with your backend:
- Without endpoint – Use this when the Flow does not need to communicate with an external backend.
- With endpoint – Use this when the Flow needs to send or receive data through a backend endpoint.
- Select a Flow template.
- For a feedback form, select Get feedback.
- Click Create.

- After creating the Flow, Meta opens the Flow editor.
- The editor contains three main areas:
- JSON editor – Used to define the Flow structure and components.
- Run button – Used to render and test the Flow.
- Preview panel – Displays how the Flow will appear to users inside WhatsApp.
- You can modify the JSON to customize the Flow.
- Click Run.
- Review the Flow in the preview panel.
- Verify that all questions, fields, and navigation behave as expected.
- Check the Flow JSON errors indicator at the bottom of the editor.
- Fix any validation errors before publishing.
- Click Save.

- Once the Flow has been tested and saved, click Publish in the top-right corner of the Flow editor.
- Meta displays a confirmation dialog explaining that the Flow will be published.
- Click on Publish.

- Your flow is now published.
- You can also check the status of the flow as it is published or not.

Flow Selection
Add the WhatsApp flow action block on the bot builder and configure it.
Starting Screen
Select the screen where you want the user to enter the WhatsApp Flow. The available screens are taken from the selected Flow. Choose the appropriate screen based on where you want the user to begin their journey. For example, if your Flow has a SIGN_UP screen, selecting SIGN_UP starts the Flow from that screen when the user clicks the button.
Flow token
The Flow token is a custom value passed to the WhatsApp Flow when it is launched. WhatsApp sends this value back to your configured Flow endpoint with requests from that Flow. This lets your backend identify the current Flow and retrieve any additional information needed to process the user’s submission.In the Flow token field, enter the value you want to pass to the WhatsApp Flow.

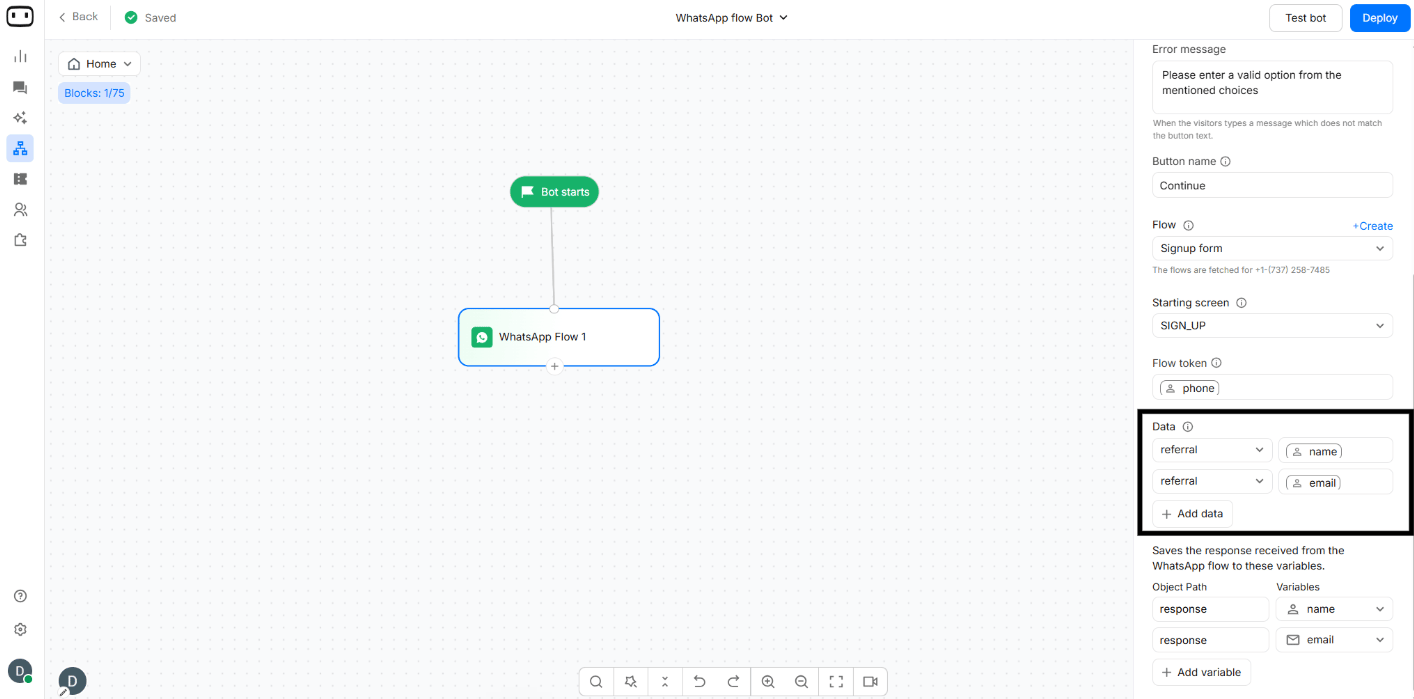
Pre-filled data
Define the values or variables that should be passed to the corresponding fields in the WhatsApp Flow. Use prefilled data when you already have information about the user and want to display it in the Flow instead of asking the user to enter it again. Select the field from the Flow and map it to a WotNot variable or value. This allows you to pass existing conversation data into the Flow and prefill the relevant fields. For example, if the Flow has a Name field, you can map it to thename variable so the user’s existing name is automatically passed to the Flow.
Save response to variables
Response mapping defines how the data submitted by a user in a WhatsApp Flow is received and stored in variables after the Flow is completed. This allows you to use the information collected through the Flow in the next steps of your bot, such as sending a personalized message, applying a condition, or passing the data to a function.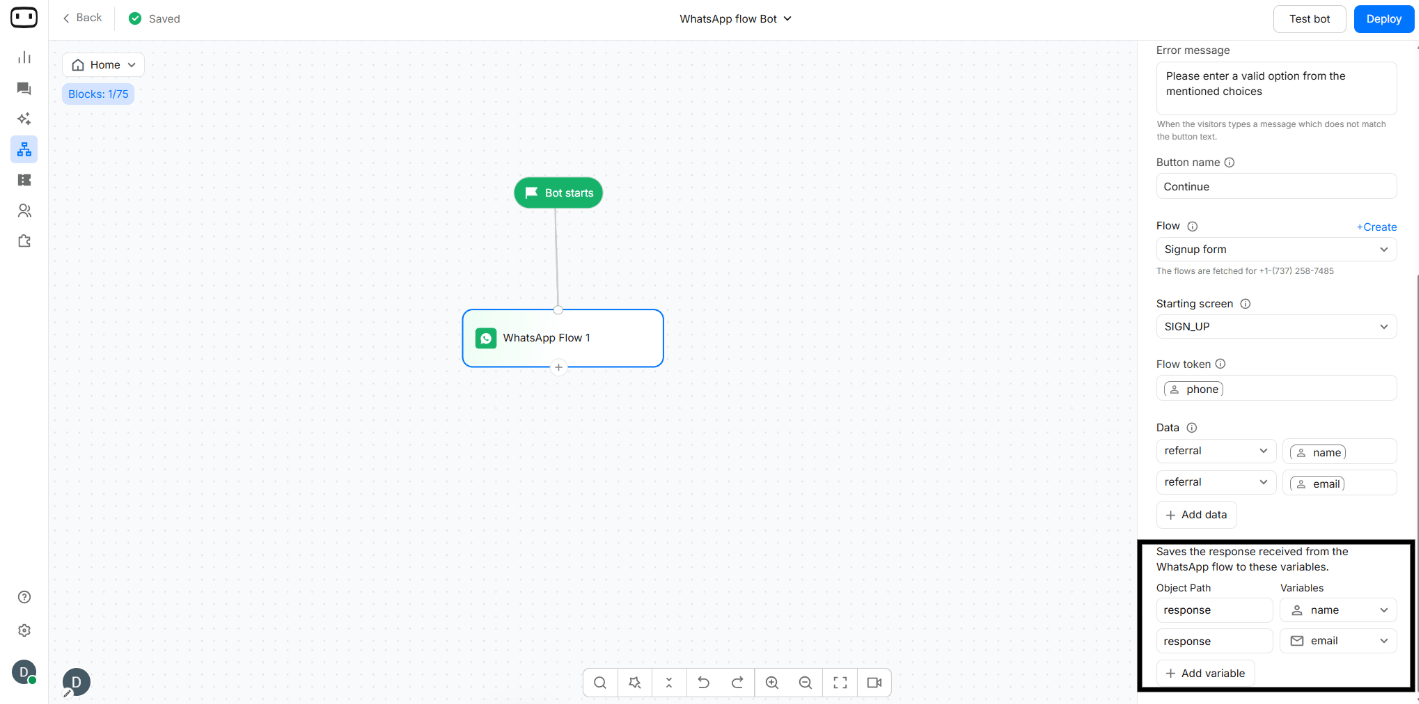
Output Paths
The WhatsApp Flow block provides different paths based on what happens when the user interacts with the Flow.Flow completed
The Flow completed path is triggered when the user successfully completes and submits the Flow. Connect this path to the next step in your conversation, such as:- Sending a confirmation message
- Calling a function with the submitted information
- Updating a contact
- Continuing to another part of the conversation
Flow abandoned or expired
The Flow abandoned or expired path is triggered when the user does not successfully complete the Flow, such as when the Flow is abandoned or expires. Connect this path to an appropriate fallback, such as:- Asking the user to try again
- Offering an alternative way to provide the information
- Returning the user to the previous conversation step