

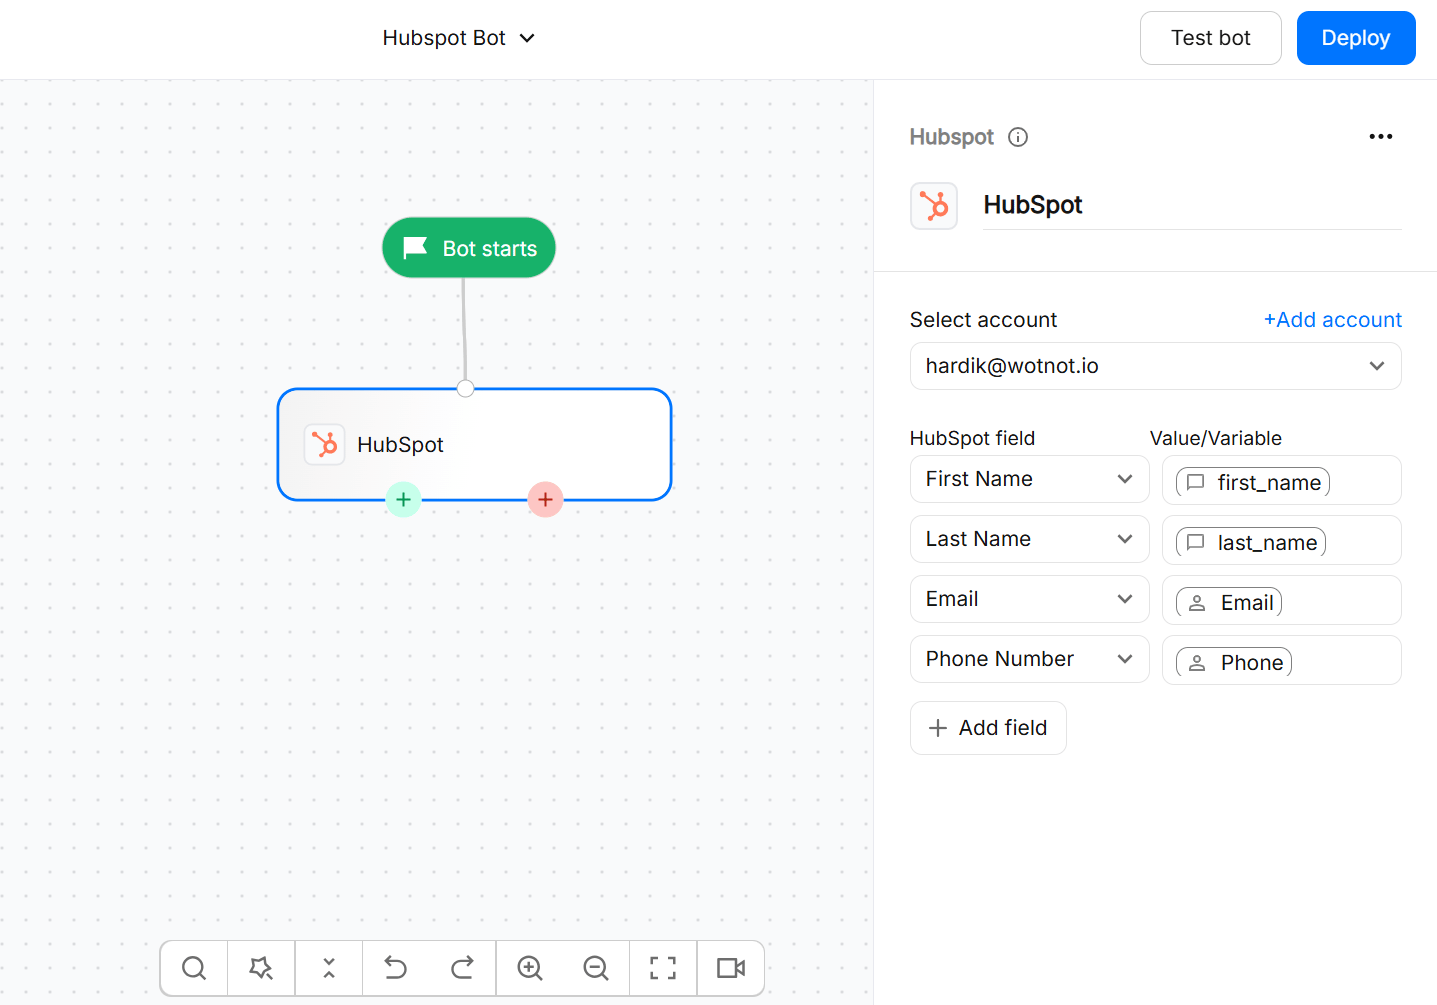
The native HubSpot integration currently supports creating Contact records.
The HubSpot integration is available on the STARTER plan and above.
What you can do
The native HubSpot integration lets you create a Contact in HubSpot using information collected during a chatbot conversation. The integration currently supports the following operation:The native integration currently supports Contact creation only. It does not provide Contact lookup or fetch operations, and it does not create Companies or Deals.
Before you start
Make sure you have:- A WotNot Starter plan or above.
- Access to the HubSpot account you want to connect.
- WotNot variables containing the information you want to send to HubSpot, such as
name,email, andphone. - Any custom Contact properties you want to populate already created in HubSpot.
If you are mapping custom HubSpot properties, create them in HubSpot before configuring the WotNot action block. Use the property’s internal name when the mapping requires it, rather than assuming the display label is the property name.
Connecting HubSpot
Follow these steps to connect your HubSpot account to WotNot:- Open your chatbot in the Bot Builder.
- Click + to add a new action block.
- Select HubSpot.
- Click + Add account.
- A HubSpot authentication window opens.
- Select the HubSpot account you want to connect.
- Review and authorize the requested permissions.
- Return to WotNot and confirm that the HubSpot account is connected.
- Select the connected HubSpot account from the account dropdown.
- Map the HubSpot properties to the corresponding WotNot variables.
Using HubSpot in a flow
Once your HubSpot account is connected, add the HubSpot action block at the point in your chatbot flow where you want to create the Contact.- Open the chatbot in the Bot Builder.
- Click +.
- Select the HubSpot action block.
- Select your connected HubSpot account.
- Map the HubSpot properties to the WotNot variables containing the required values.
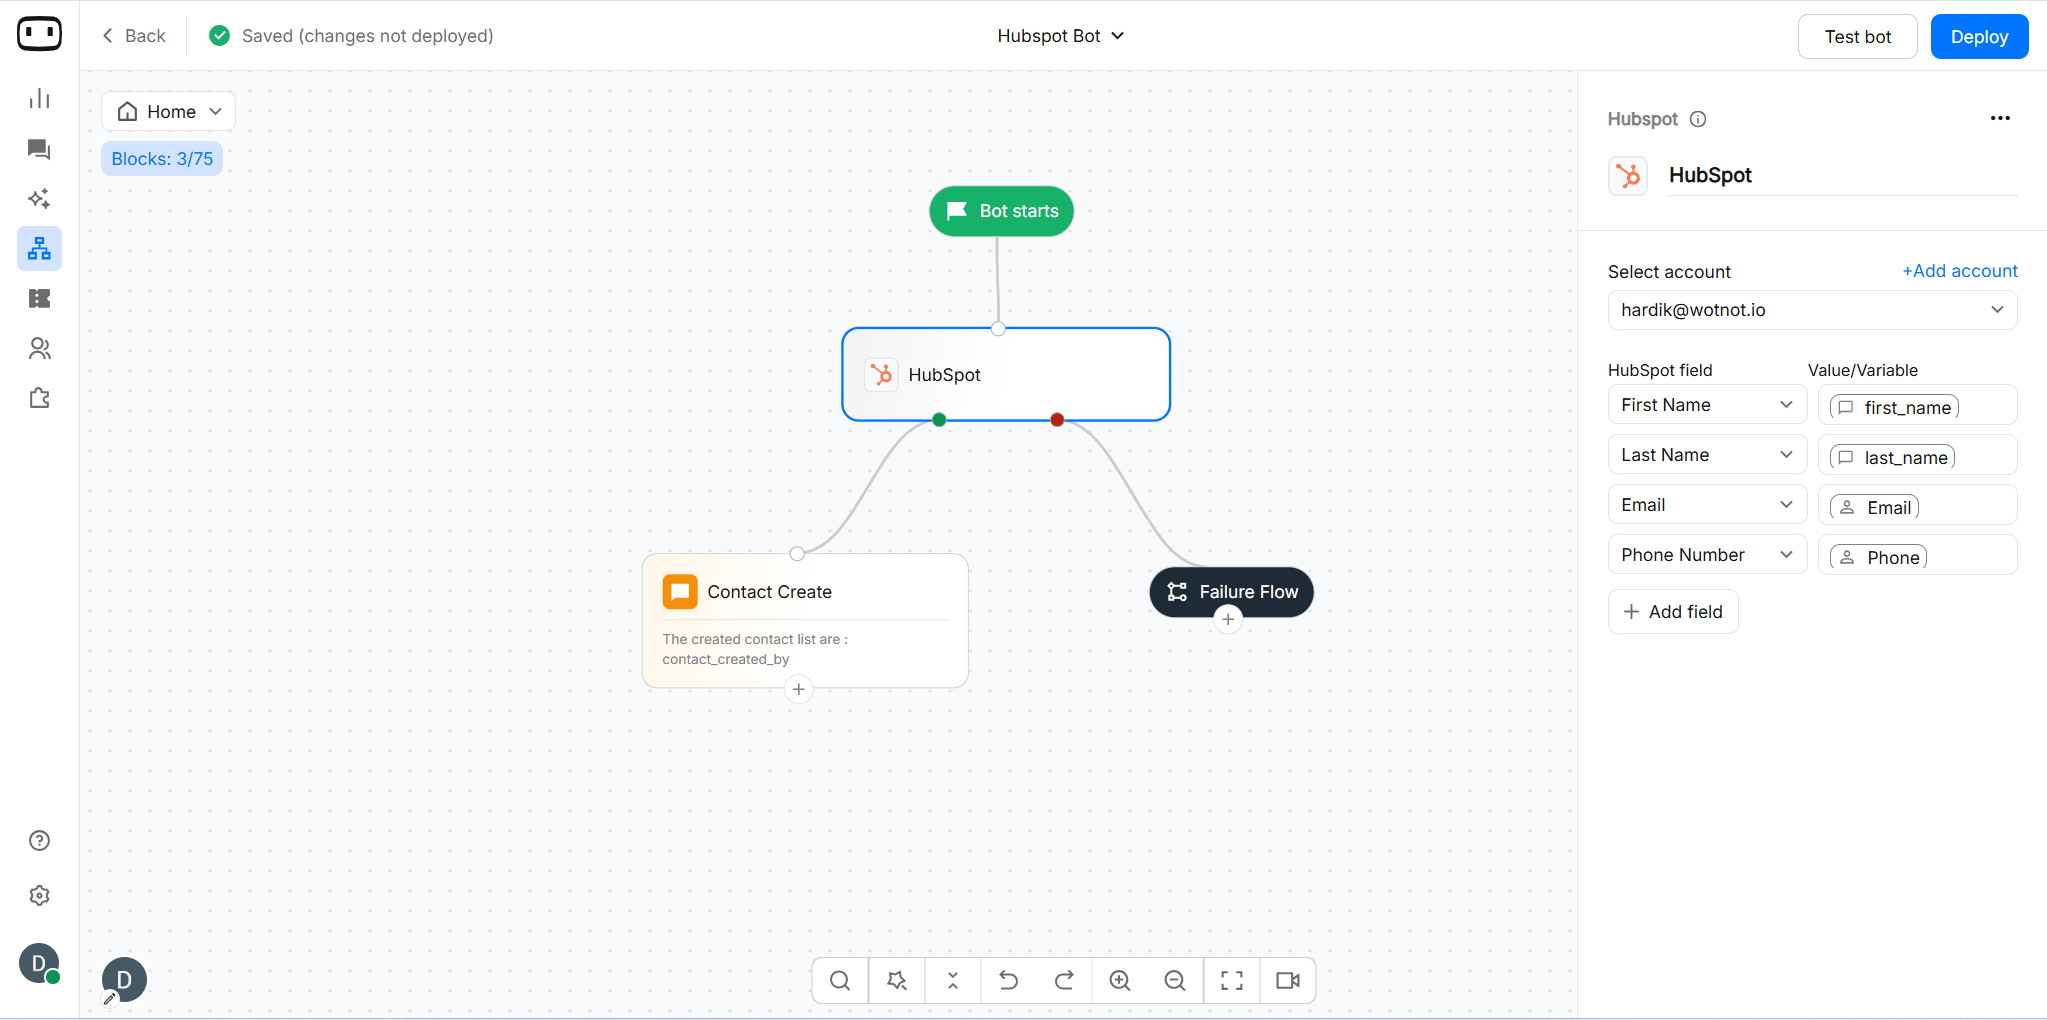
- Continue the flow through the appropriate output path.
SUCCESS
The Contact was successfully created in HubSpot. The chat flow continues through the SUCCESS path.
FAILURE
The Contact could not be created. The chat flow continues through the FAILURE path.
Viewing execution logs
You can view the result of each HubSpot action execution from: App Market → HubSpot → LogsMapping fields
Map each HubSpot property to the WotNot variable that contains the value you want to send. For example, if your chatbot collects a visitor’s first name, last name, email, and phone number, map those variables to the corresponding HubSpot Contact properties.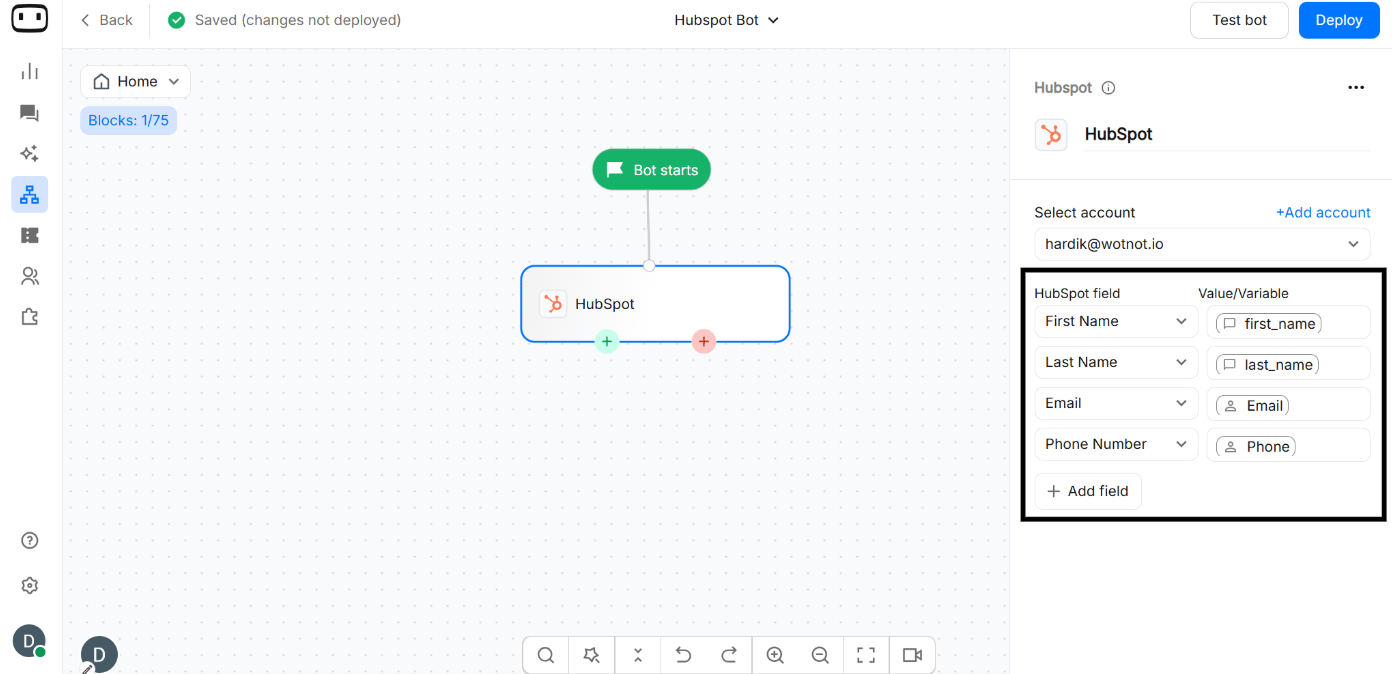
HubSpot requires at least one of email, firstname, or lastname when creating a Contact. We recommend collecting and mapping the visitor’s email whenever possible because HubSpot uses email as a unique identifier for Contacts.
HubSpot property names
HubSpot properties have both a display label and an internal property name. For example:
When mapping fields, make sure you use the property expected by the HubSpot integration. A mismatch between the display label and internal property name can cause the request to fail.
Custom properties
You can also map custom Contact properties created in your HubSpot account. Before mapping a custom property:- Create the property in HubSpot.
- Confirm that the property exists on the Contact object.
- Use the correct HubSpot property name when configuring the WotNot action.
- Make sure the value stored in the WotNot variable matches the property’s expected format.
You can map up to 50 fields in a HubSpot action block.
Empty values
If a mapped WotNot variable is empty, WotNot sends the available value for that field. If HubSpot requires a property that is missing or empty, Contact creation can fail. If the Contact is not created:- Check the FAILURE path.
- Open the HubSpot execution logs.
- Check which property caused the error.
- Make sure the corresponding WotNot variable contains a valid value before the HubSpot action runs.
Troubleshooting
The HubSpot connection no longer works
The HubSpot connection no longer works
The HubSpot authorization may have expired or been revoked. Reconnect the HubSpot account and authorize the requested permissions again.
I get an insufficient scopes or permissions error
I get an insufficient scopes or permissions error
The connected HubSpot account may not have granted the permissions required by the integration. Reconnect the account and make sure all requested permissions are authorized.
The Contact is created but some properties are blank
The Contact is created but some properties are blank
Check the field mapping and make sure the corresponding WotNot variable contains a value before the HubSpot block runs. Also verify that you mapped the correct HubSpot property.
A duplicate Contact is created
A duplicate Contact is created
Check the email value being sent by WotNot and compare it with existing Contacts in HubSpot. HubSpot uses email as a unique identifier for Contacts, but the WotNot native action is designed to create a Contact rather than provide a general-purpose duplicate-checking or upsert workflow.
A property value is rejected
A property value is rejected
Verify that the value matches the HubSpot property’s expected format. This is especially important for dropdown, radio-select, and other restricted property types. Also check that you are using the correct internal property name.
The Contact creation fails because a required field is empty
The Contact creation fails because a required field is empty
Make sure at least one of the required Contact properties is populated. For HubSpot Contact creation, at least one of
email, firstname, or lastname must be provided.The request hits a rate limit
The request hits a rate limit
HubSpot applies API usage and rate limits based on the app and HubSpot account configuration. If the integration is being used at high volume, check the HubSpot account’s API usage and the WotNot execution logs. A rate-limit response can prevent the Contact from being created.
Disconnecting HubSpot
To disconnect a HubSpot account from WotNot:- Go to your Dashboard → App Market.
- Open the HubSpot integration settings.
- Click Remove next to your connected HubSpot account.