

- Create tickets
- Get ticket status
Push and Fetch
- Push: Create a Freshdesk ticket from your WotNot chatbot.
- Fetch: Retrieve the status and other ticket details from Freshdesk and use them in the conversation.
A Freshdesk plan with API access is required. The integration is available on the Starter plan and above.
What you can do
WotNot’s Freshdesk action block provides separate SUCCESS and FAILURE paths so you can handle successful API responses and errors separately. SUCCESS — when the Freshdesk API gives a successful, the chat flow will proceed here. FAILURE — when the Freshdesk API does not give a response, the chat flow will proceed here.Before you start
Make sure you have the following before connecting Freshdesk to WotNot:- Admin or appropriate access to your Freshdesk account.
- Your Freshdesk account Helpdesk URL: You need your Freshdesk helpdesk URL, for example
https://yourcompany.freshdesk.com. You can get it from https://www.freshworks.com/freshdesk/signup/?utm_source - Your Freshdesk API key: You need the API key associated with your Freshdesk agent profile.
- Any custom ticket fields that need to be mapped**:** If your flow needs to populate custom fields, create those fields in Freshdesk before configuring the mapping in WotNot.
- Requester information: The required information for creating a ticket, such as the requester’s email, subject, and description.
Connecting Freshdesk
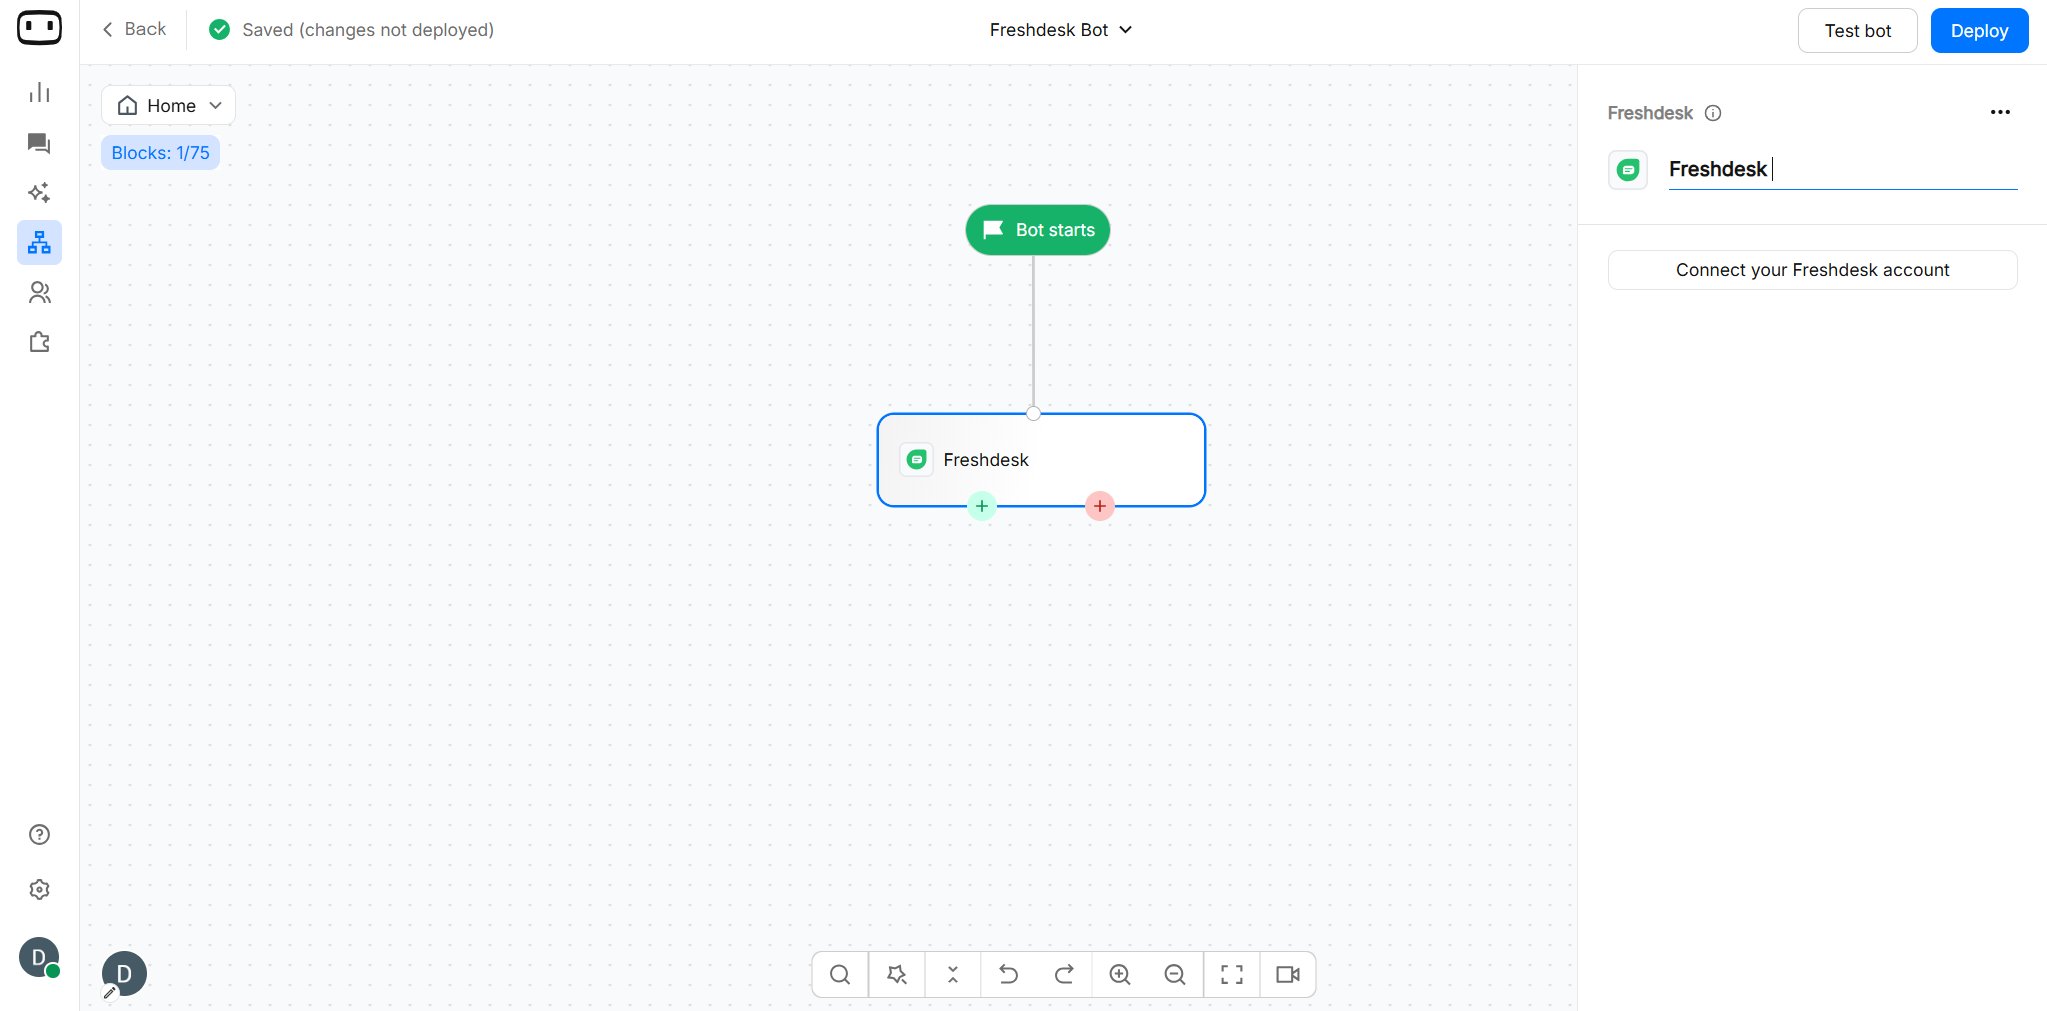
There are two ways through which you can connect your Freshdesk account with WotNot;- Using the ‘Freshdesk’ action block: On the action block, click on ‘Add Account’
1
Open Freshdesk in WotNot
- Go to App Market.
- Search for Freshdesk.
- Click Add Account.
- You can also open a Freshdesk action block in the Bot Builder and click Add Account.

2
Enter your Freshdesk account details
Enter the following information:
3
Find your Freshdesk API key
The API key is available from your Freshdesk profile:
- Log in to Freshdesk.
- Click your profile picture in the top-right corner.
- Select Profile Settings.
- In the right-side panel, click View API key.
- Complete the verification step if prompted.
- Copy the API key and paste it into WotNot.
4
Save the connection
Save the Freshdesk account after entering the required details.Once connected, you can select this account from the Freshdesk action block when building your chatbot flow.
Using Freshdesk in a flow
Create a ticket
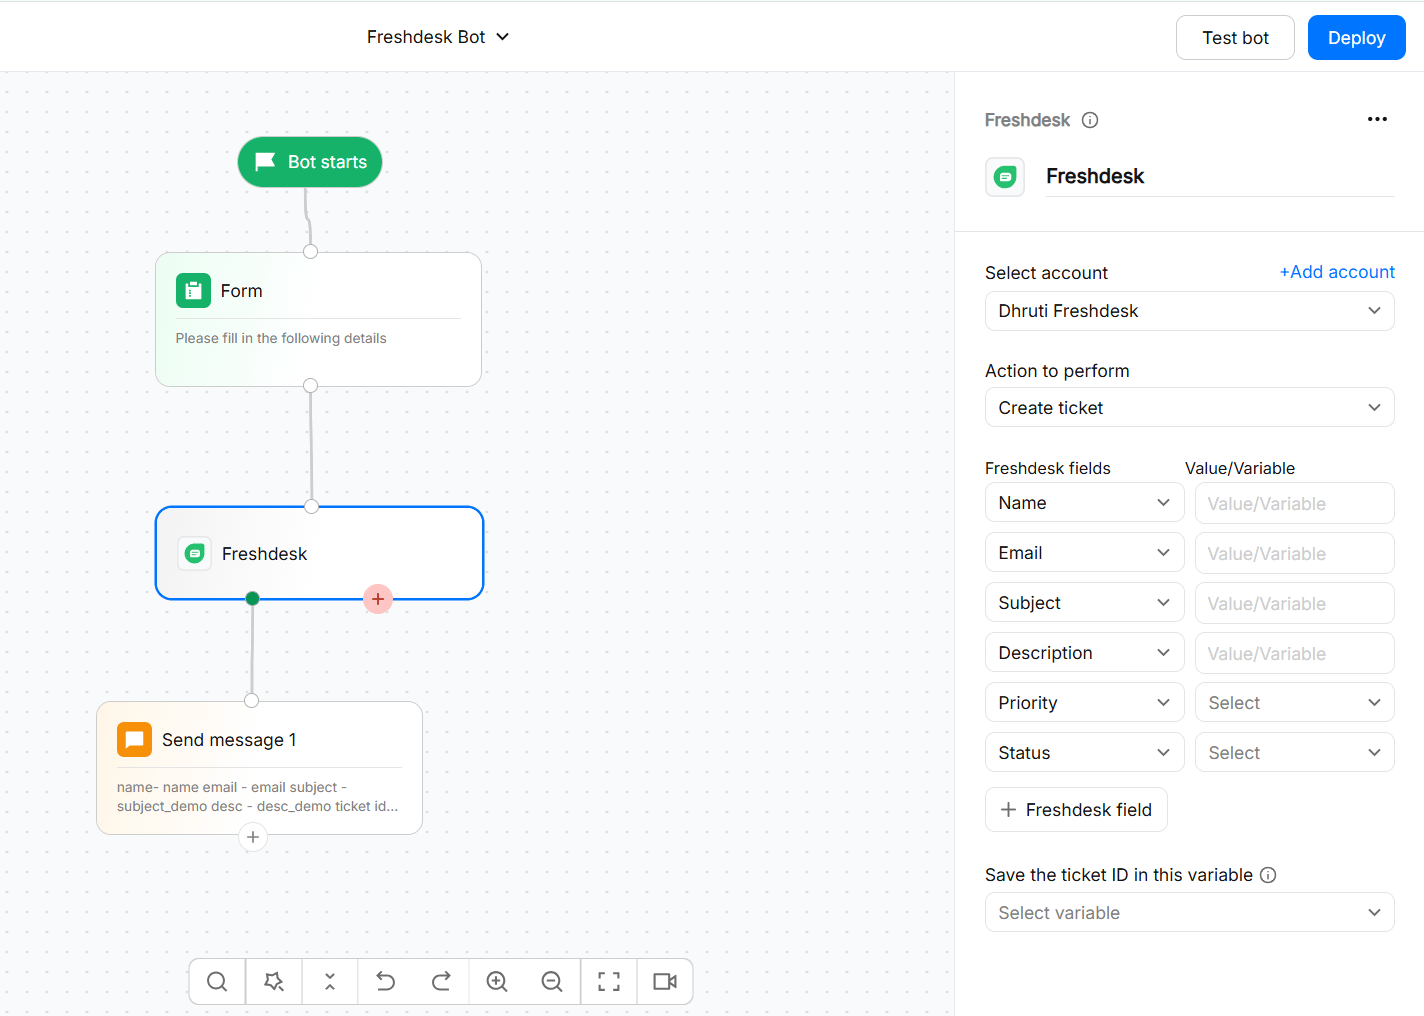
Use Create ticket when you want to send information collected during a conversation to Freshdesk.1
Add the Freshdesk action block
- Open your chatbot in the Bot Builder.
- Click + to add an action block.
- Select Freshdesk.
- Select the connected Freshdesk account .
- Select Create ticket from Action to perform.
2
Collect the ticket information
Before the Freshdesk action block, collect the information you want to send to Freshdesk.
3
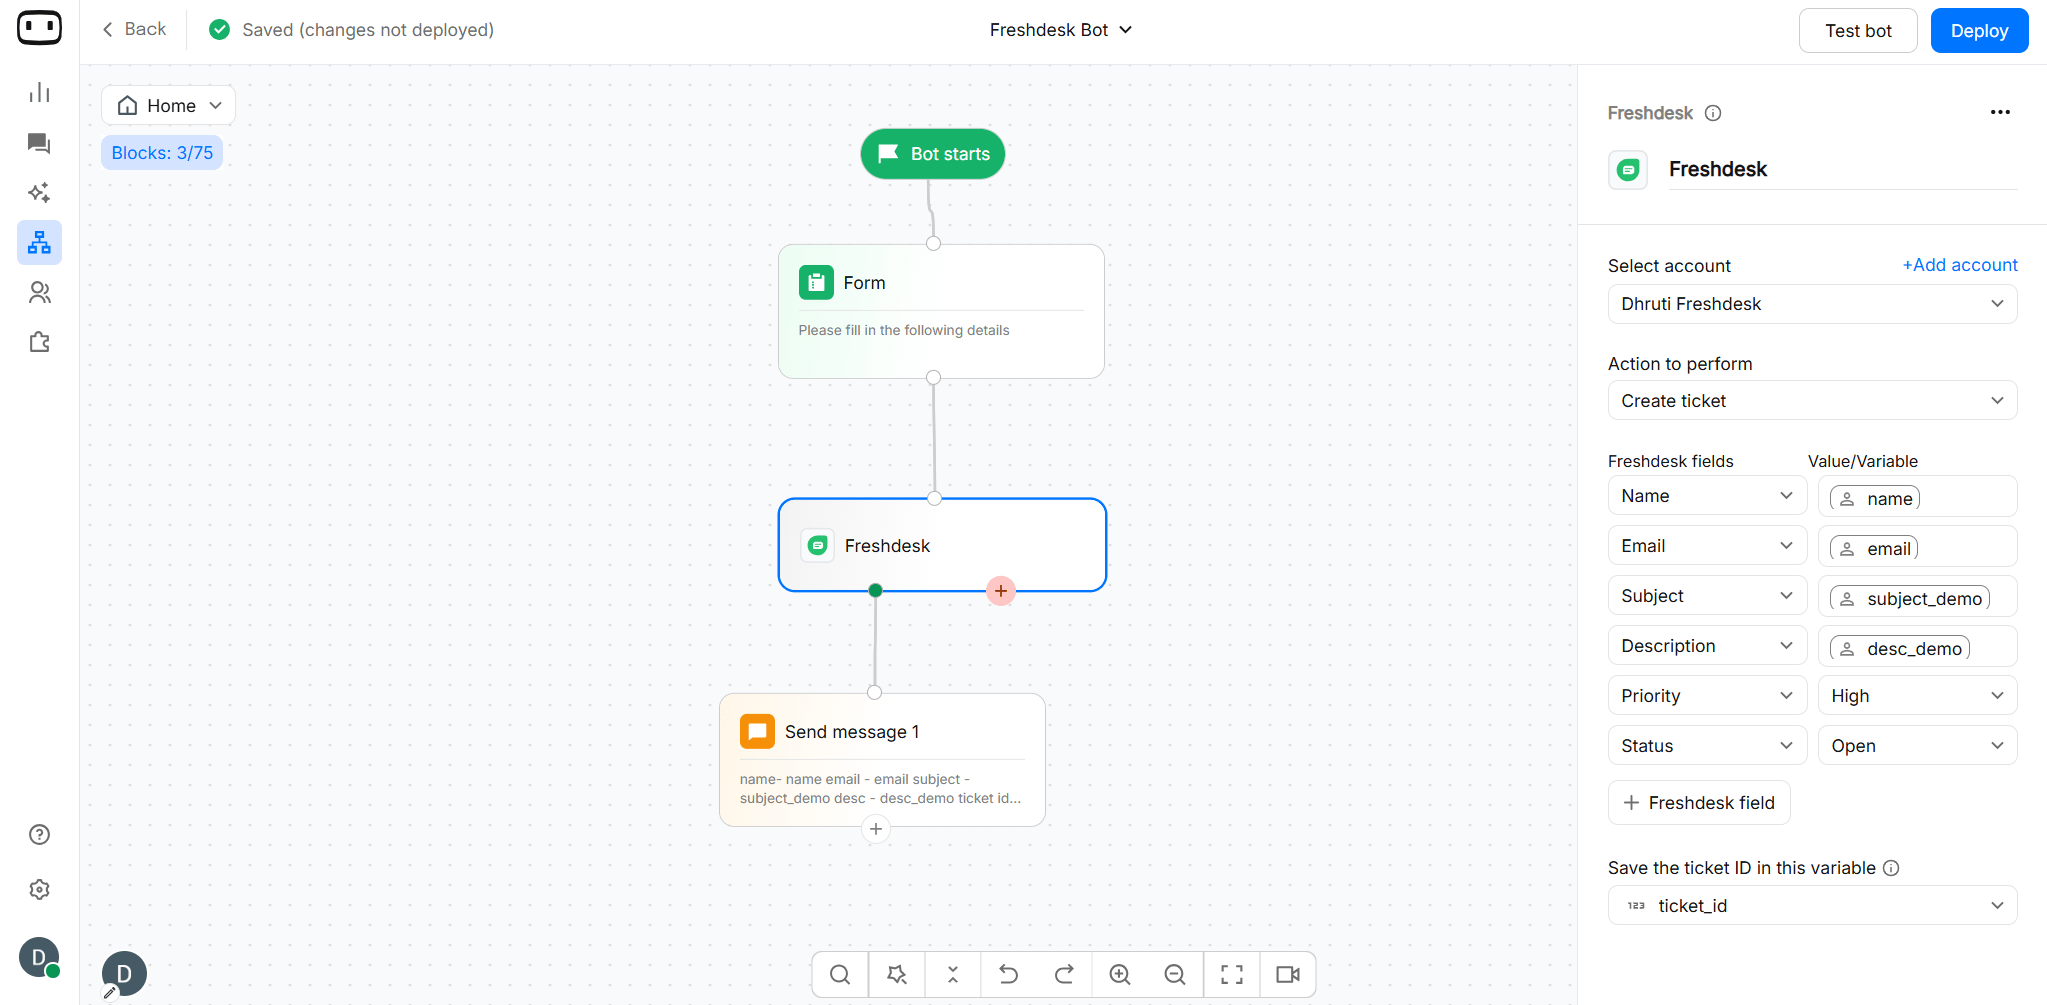
Map the fields
Map each Freshdesk field to the WotNot variable containing the corresponding value.For example: Freshdesk Email →
#email- If a field that you expect to see is missing, refresh the action block configuration. WotNot loads the available Freshdesk fields from the connected account.
4
Save the ticket ID
Map the Freshdesk ticket ID returned after successful creation to a WotNot variable.You can then use that variable in a Send Message block, for example:
Your ticket has been created successfully. Your ticket ID is #ticket_id.This allows the user to keep the ticket number for future status checks.
Get ticket status
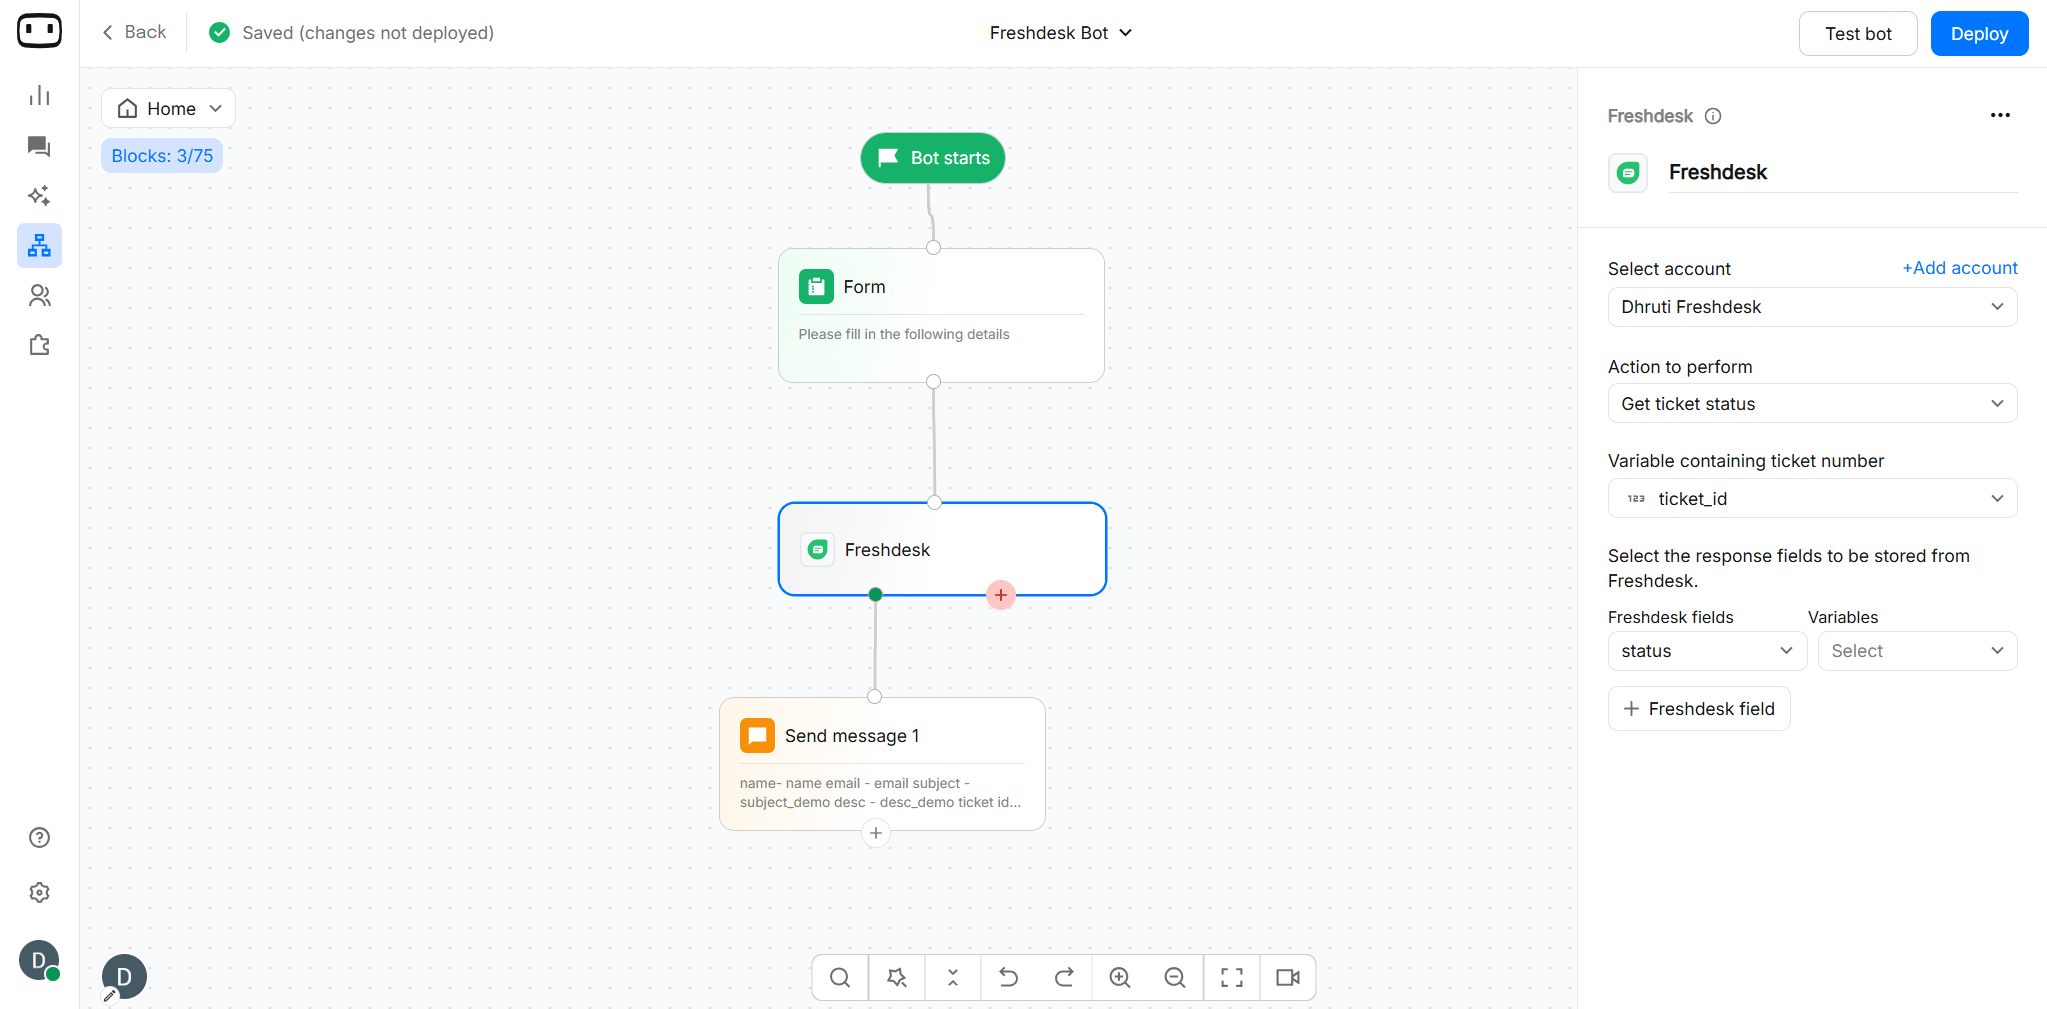
To fetch the ticket status using the Freshdesk integration, follow these steps:- Connect/Choose the freshdesk account
- Choose “Get ticket status” as action
- Choose the variable containing the ticket number (Before this action block executes, make sure you collect and store the ticket number in a variable)
- Map the freshdesk fields you want to store into variables
Mapping fields
Map the information collected in your flow to the corresponding Freshdesk fields.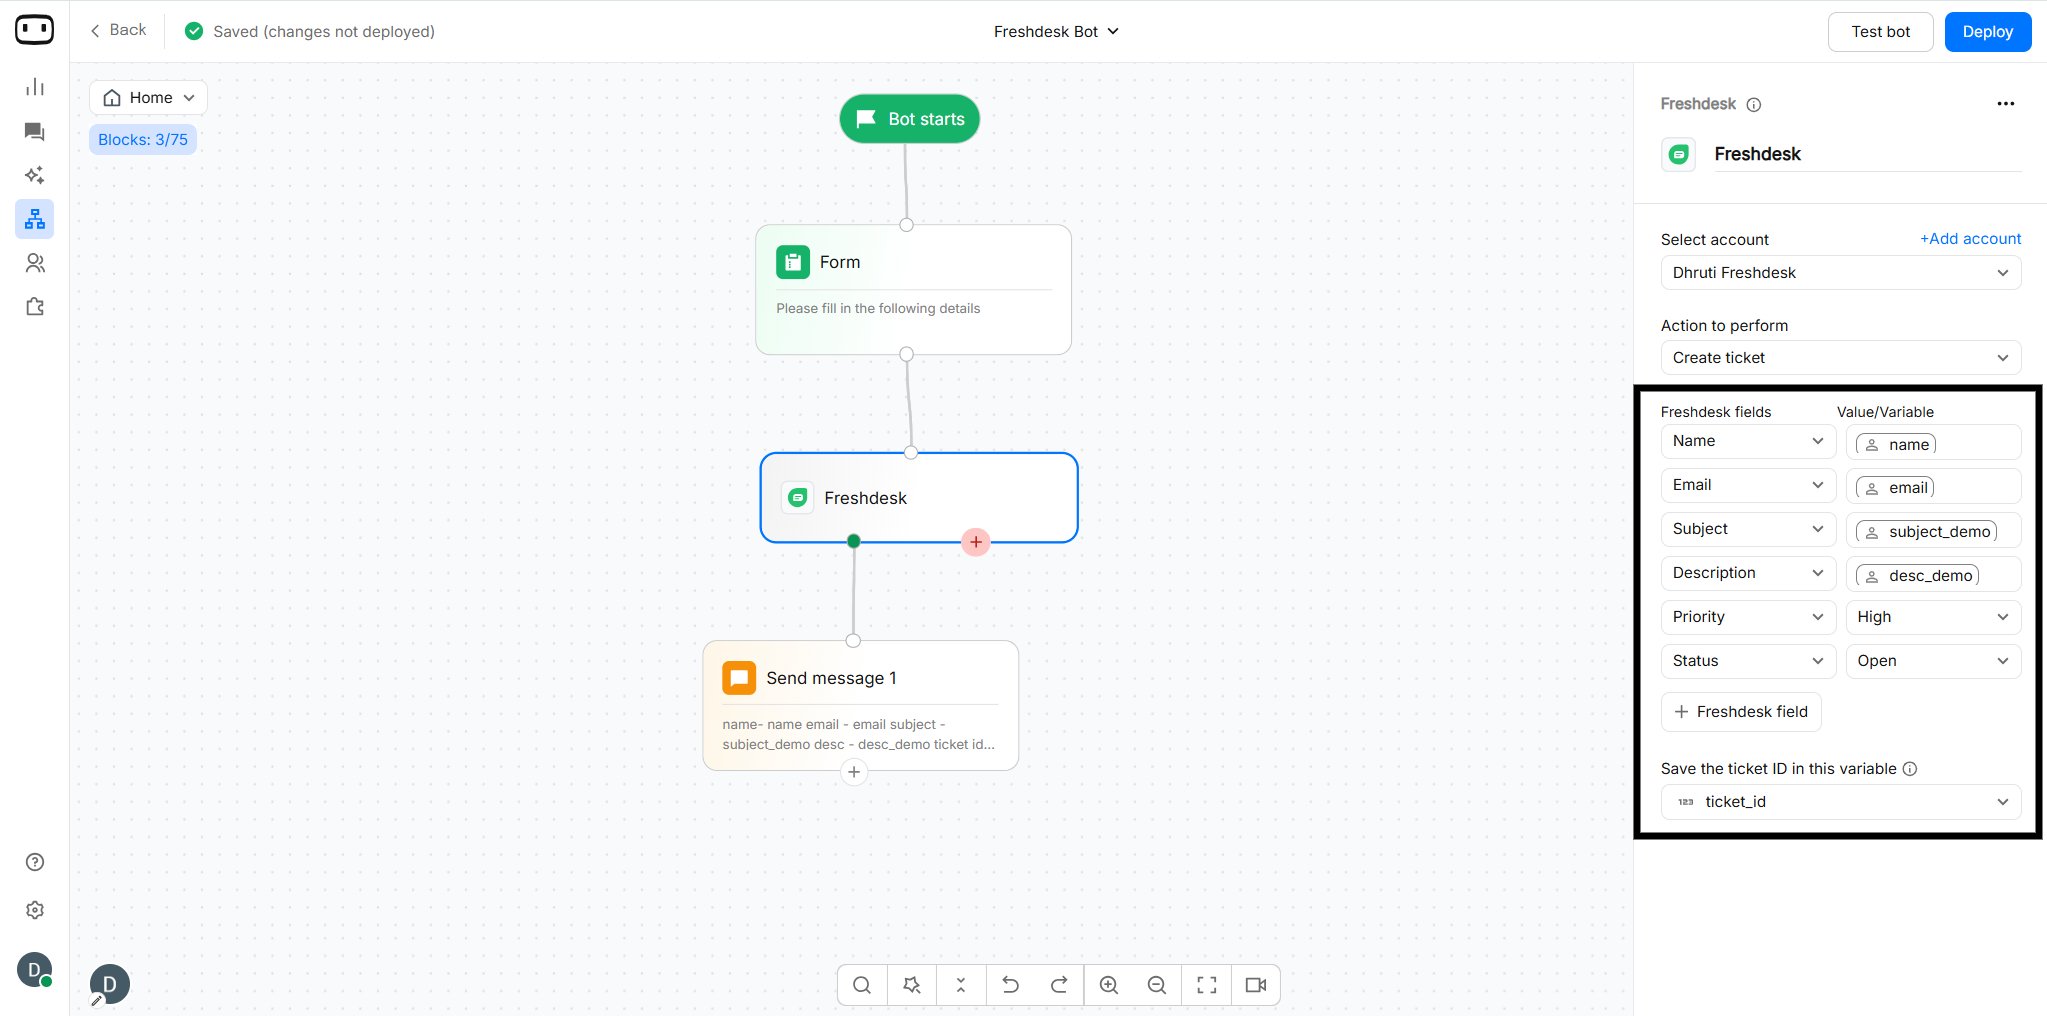
Troubleshooting
The Freshdesk API key is invalid
The Freshdesk API key is invalid
The API key may be incorrect, reset, or no longer valid.Go to Freshdesk → Profile Settings → View API key and copy the current API key. Then open the Freshdesk integration in WotNot and replace the existing API key with the new one.Make sure the API key belongs to a Freshdesk user with the required permissions.
The Freshdesk subdomain is incorrect
The Freshdesk subdomain is incorrect
Check the Helpdesk URL entered while connecting Freshdesk to WotNot.Use your Freshdesk account URL in this format:
https://yourcompany.freshdesk.comMake sure you are using the correct Freshdesk account and subdomain. Do not enter a specific ticket URL or another Freshdesk page URL.The ticket is rejected because the requester email is missing
The ticket is rejected because the requester email is missing
Freshdesk requires the requester’s email address when creating a ticket through the WotNot integration.Before the Create ticket action runs:
- Collect the user’s email address.
- Store it in a WotNot variable.
- Map the variable to the Freshdesk Email field.
The priority or status value is rejected
The priority or status value is rejected
Freshdesk uses numeric values for ticket priority and status in its API instead of the labels displayed in the Freshdesk interface.For Priority, use:
- Low —
1 - Medium —
2 - High —
3 - Urgent —
4
- Open —
2 - Pending —
3 - Resolved —
4 - Closed —
5
3 for High priority instead of High.The ticket status lookup returns no result for a valid ticket
The ticket status lookup returns no result for a valid ticket
Make sure the value passed to Get ticket status is the correct Freshdesk ticket ID.Check the following:
- The ticket ID is stored correctly in the WotNot variable.
- The variable is populated before the Freshdesk action runs.
- The ticket belongs to the connected Freshdesk account.
- The correct Freshdesk account is selected in the action block.
The Freshdesk API rate limit has been reached
The Freshdesk API rate limit has been reached
Freshdesk limits the number of API requests that can be made within a specific time period. If the limit is exceeded, Freshdesk can return a 429 Rate Limit Exceeded response.Avoid triggering multiple Freshdesk API requests unnecessarily within a short period. If your chatbot handles a high volume of requests, review your Freshdesk API usage and plan limits.If Freshdesk provides a retry interval, wait for that period before sending another request.