

- Android SDK — provides a native chat experience for Android apps.
- iOS SDK — provides a native chat experience for iOS apps.
- Webview — loads the WotNot chatbot inside a webview and is generally the quickest option to deploy.
Developer required: Mobile app deployment requires development work. If you do not have access to an Android or iOS developer, use the Webview approach, which requires less native integration work.
Choosing an approach
If you are unsure which option to use, start with Webview. Move to a native SDK when you need deeper integration with your mobile application’s native experience.
Webview
Native SDKs are being worked on and are not available at the moment.To request for SDK, email us at hello@wotnot.io
Getting the URL
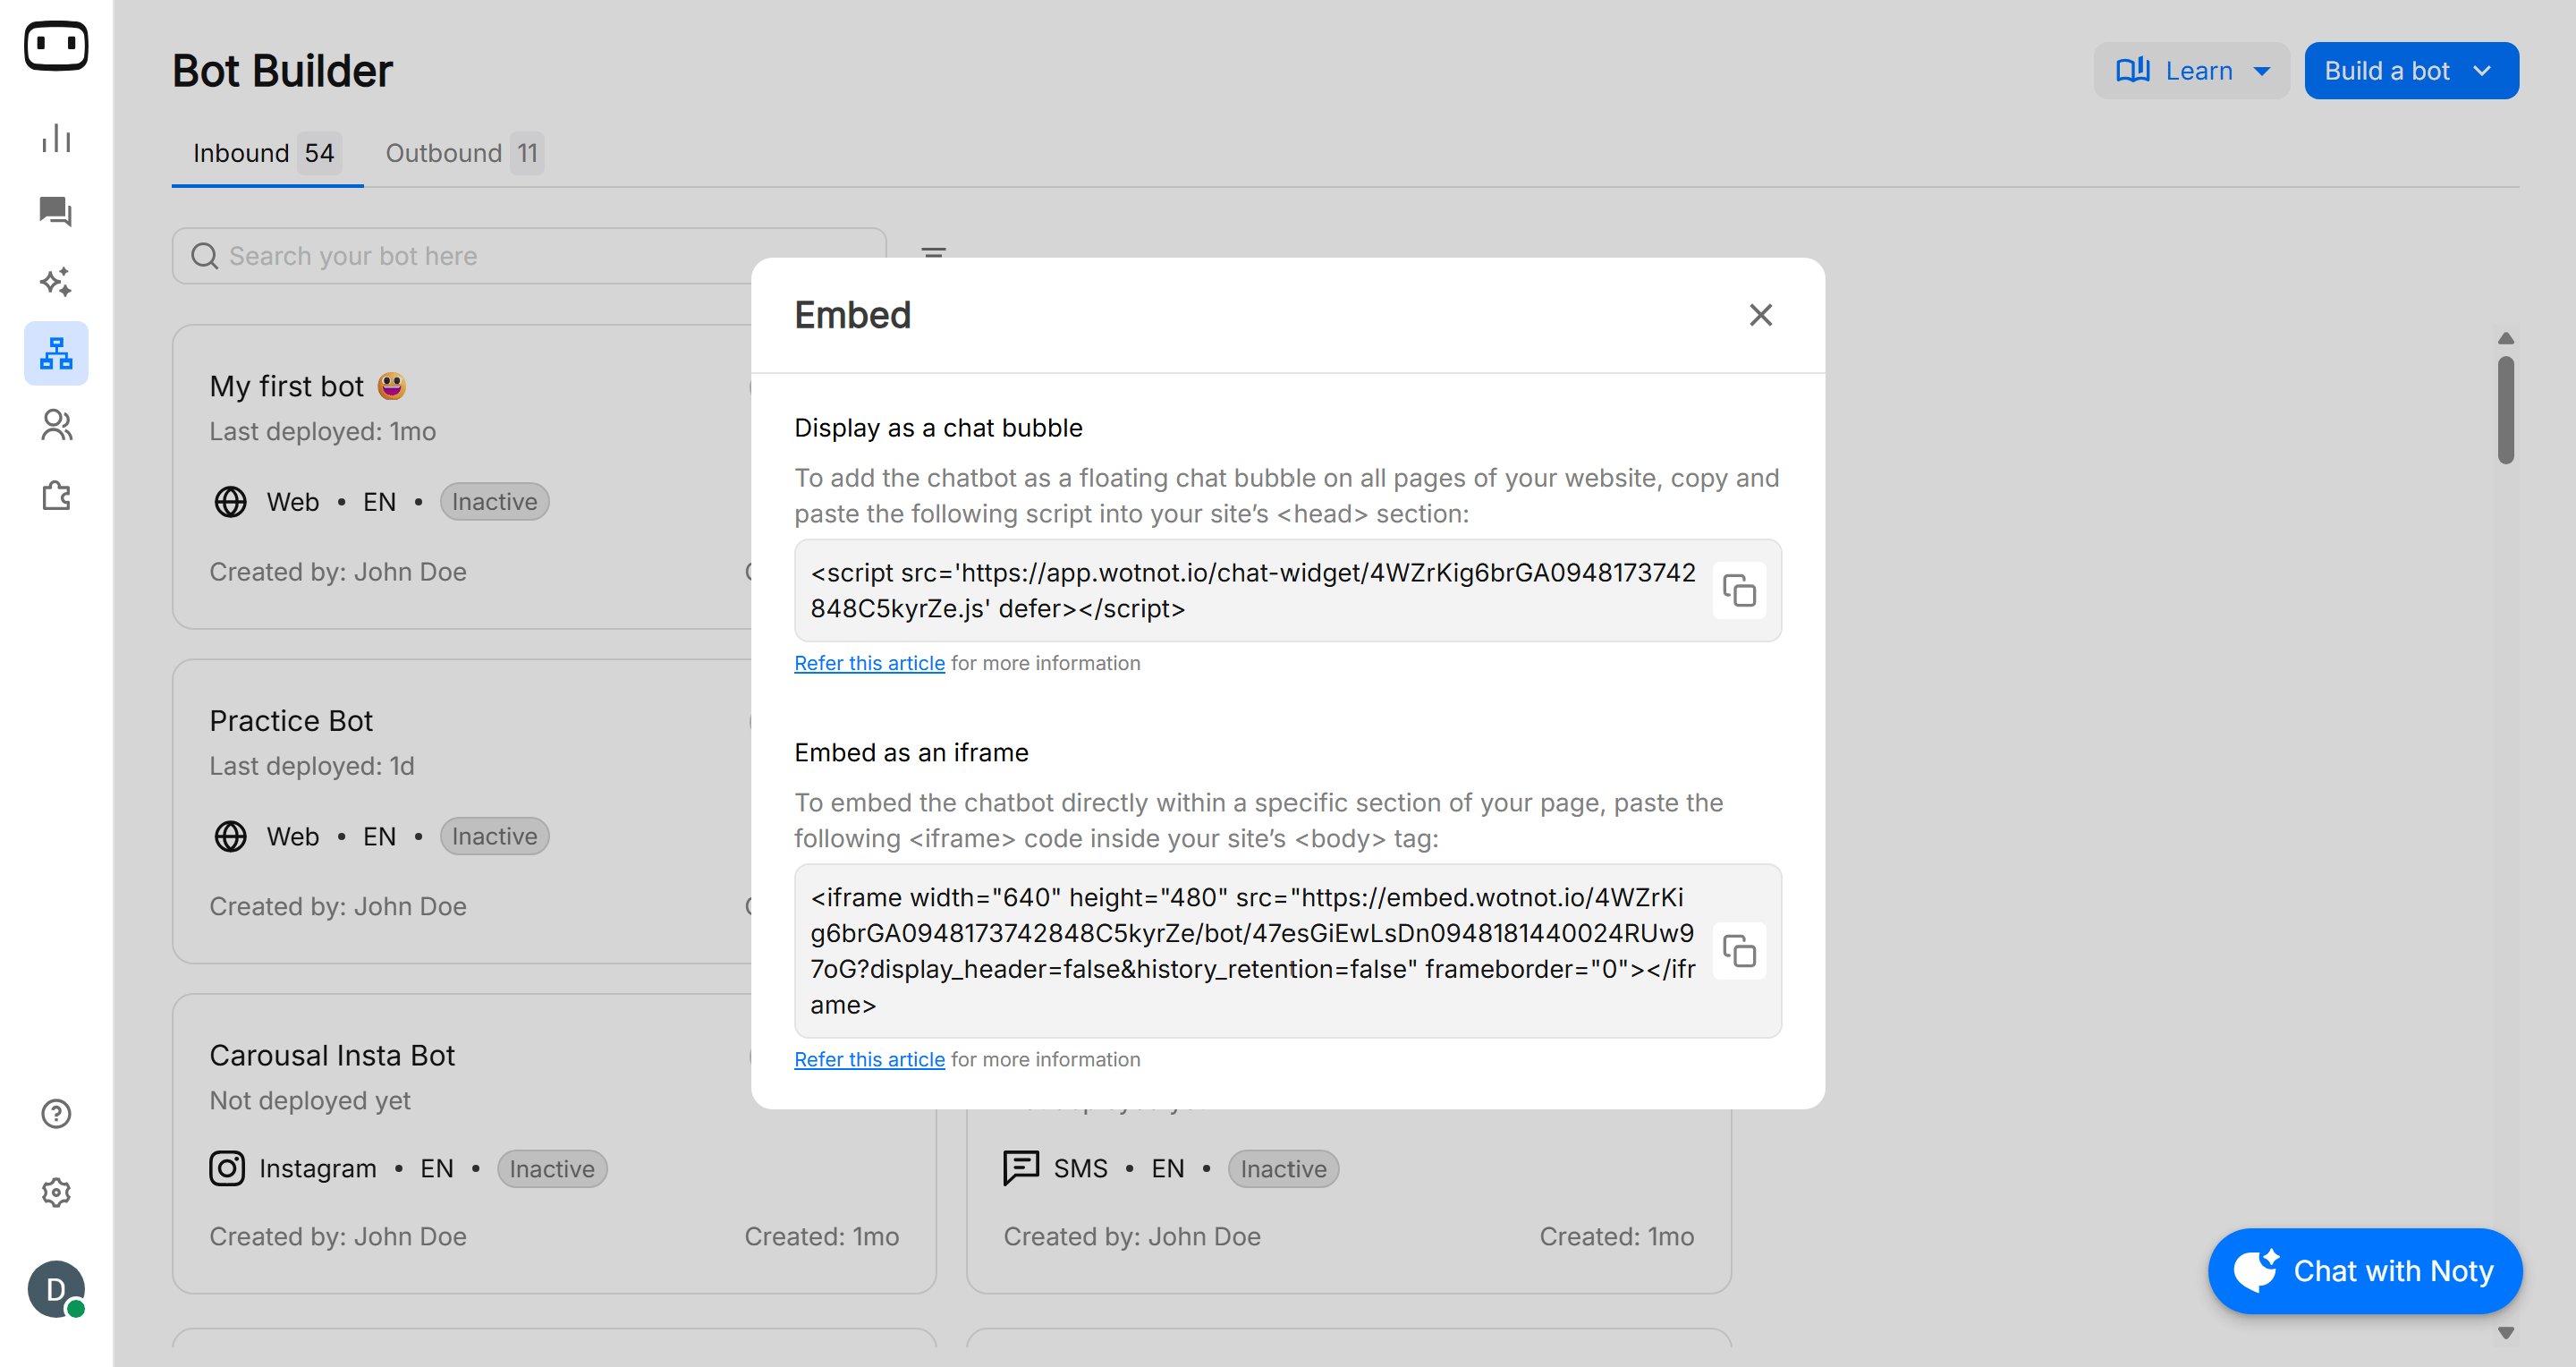
To display the chatbot in a web view inside your application, you need to create a new page and embed the chatbot code snippet.- Open the bot you want to deploy.
- Click the three-dot menu on the bot card.
- Select Embed.
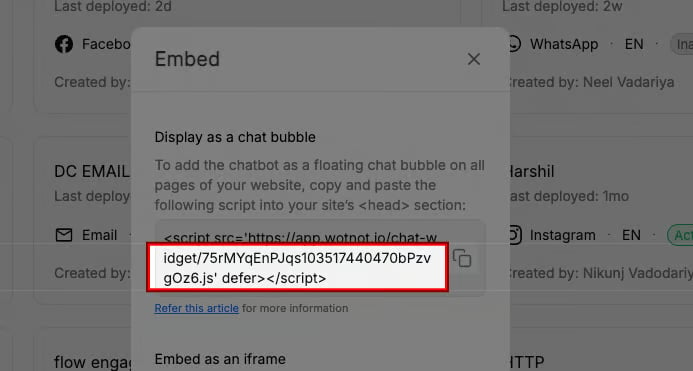
- Copy the chatbot-hosted URL or embed code.
- Use the chatbot bubble or an iframe depending on how you want the chatbot to appear inside your mobile application.
- Create a screen in your mobile application that contains a webview.
- Load the chatbot-hosted URL in the webview.
Implementation notes
A webview is simple to implement, but a few mobile-specific behaviours need to be handled by your application. On your mobile app, add a help icon or option on your menu that allows users to open this page. Doing this will open the chatbot-hosted page that you created in Step 1.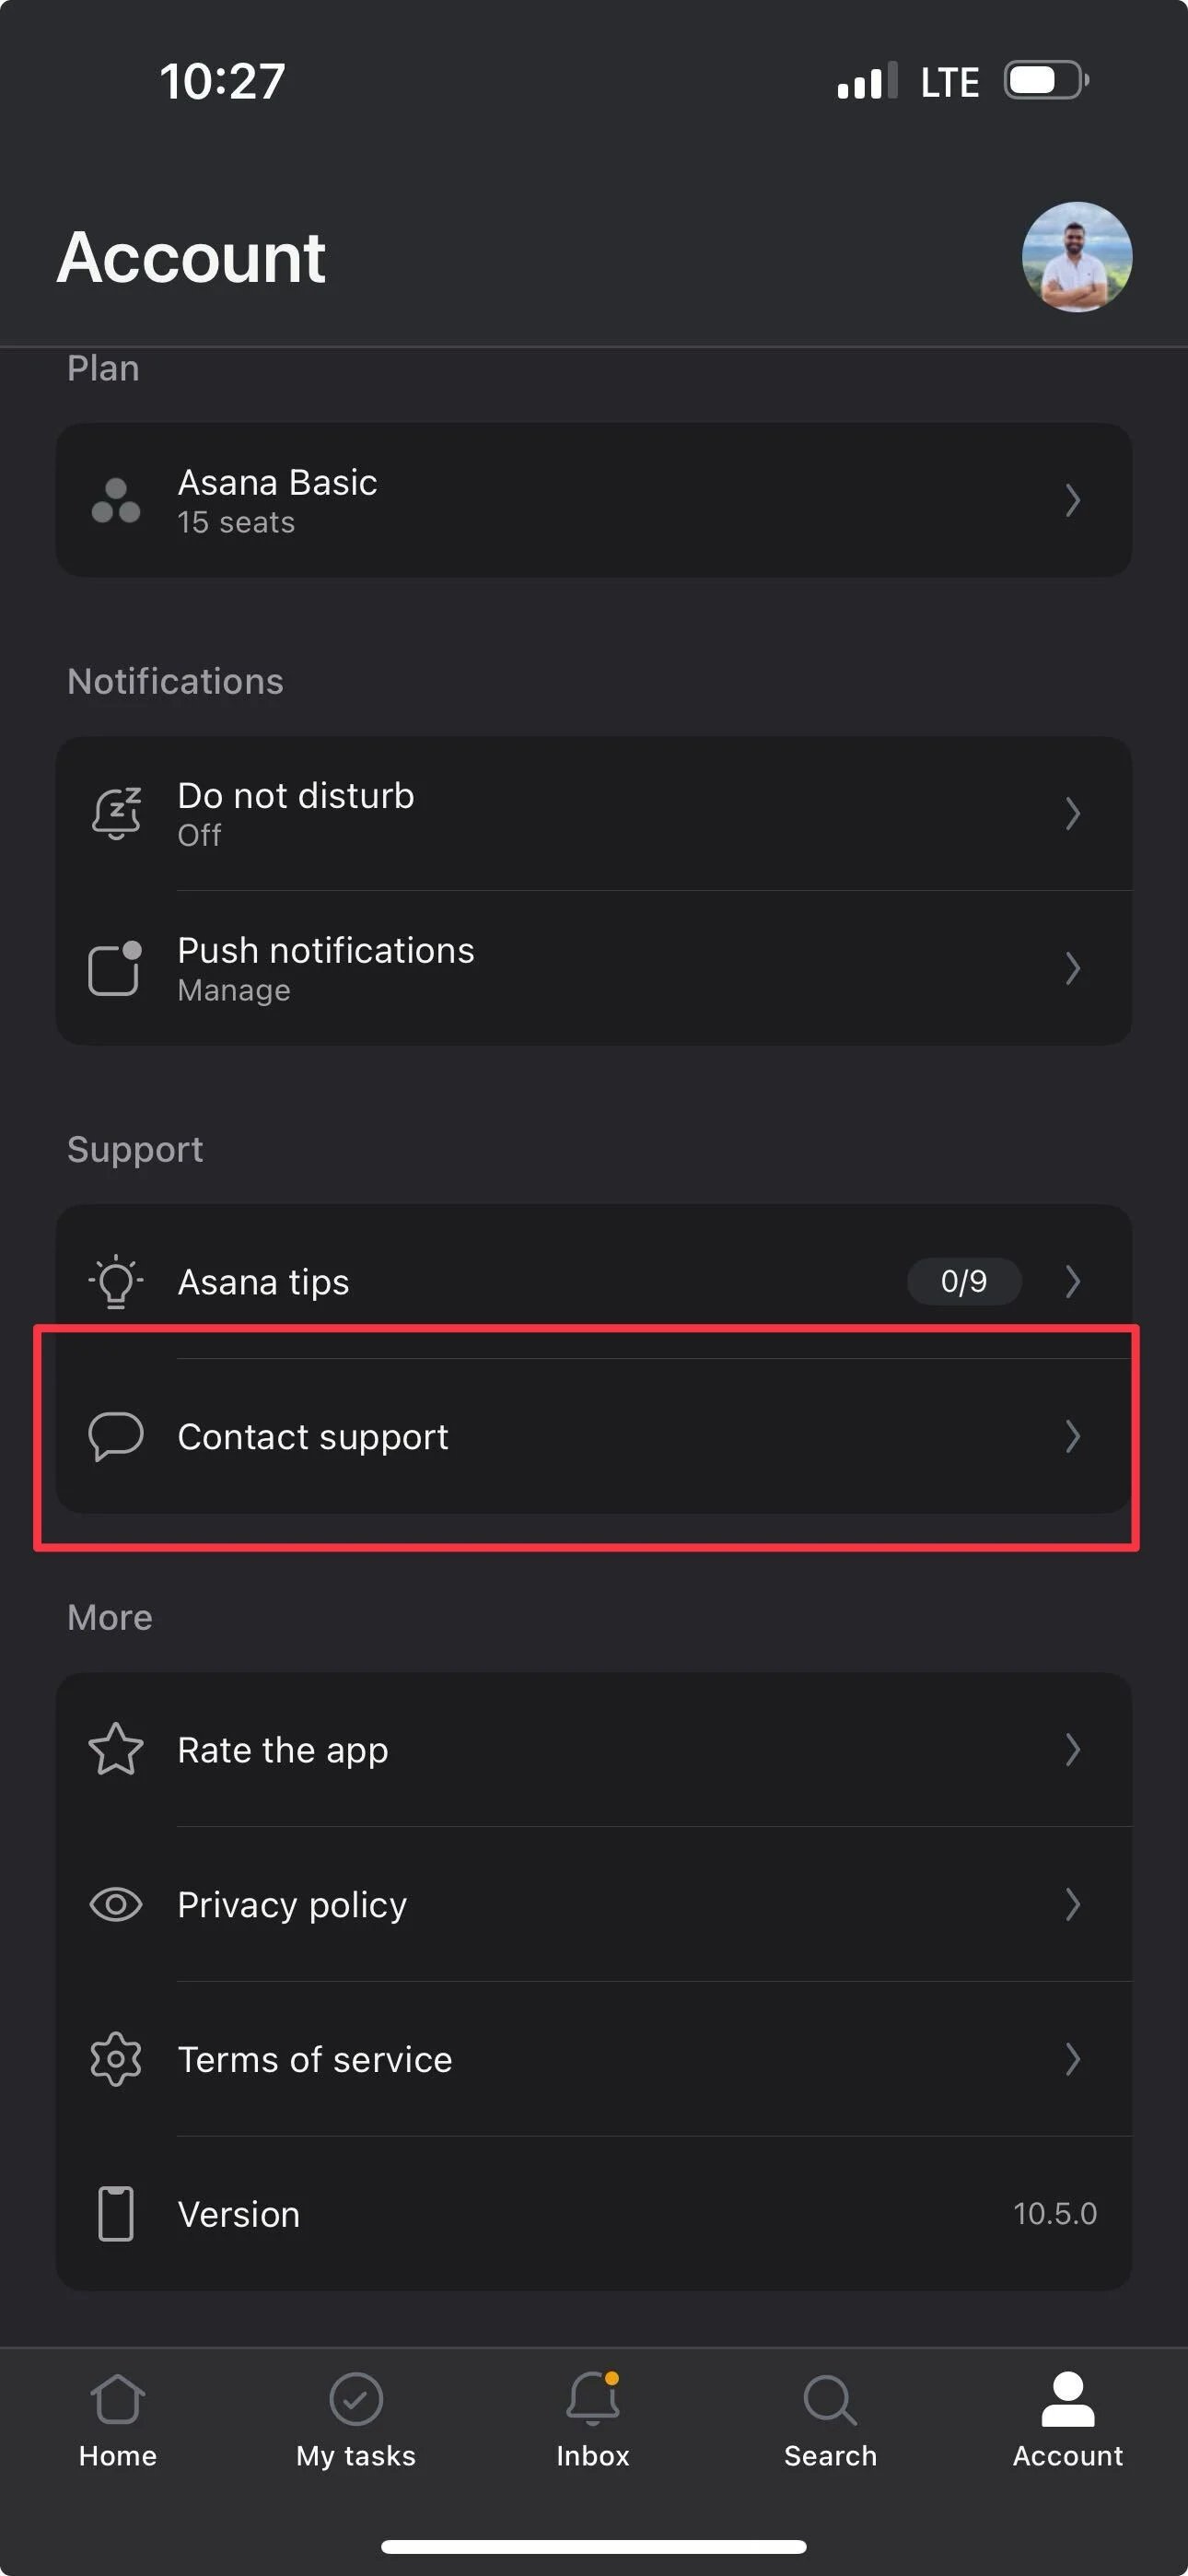
Passing user context
If your mobile application already knows information about the logged-in user, pass that information to the chatbot instead of asking the user to provide it again. Use the same user context or session data supported by the WotNot web deployment. For example, you may pass information such as:Android SDK
Installing
1
Add dependency
Add the WotNot SDK and required Android libraries in your app-level
build.gradle file:2
Sync Gradle
In Android Studio:
- File → Sync Project with Gradle Files
- Or use the toolbar sync button
3
Add required permissions
Add the following permissions to your
AndroidManifest.xml:SDK Configuration
Create a WidgetConfig The SDK requires aWidgetConfig object to initialize the chat widget.
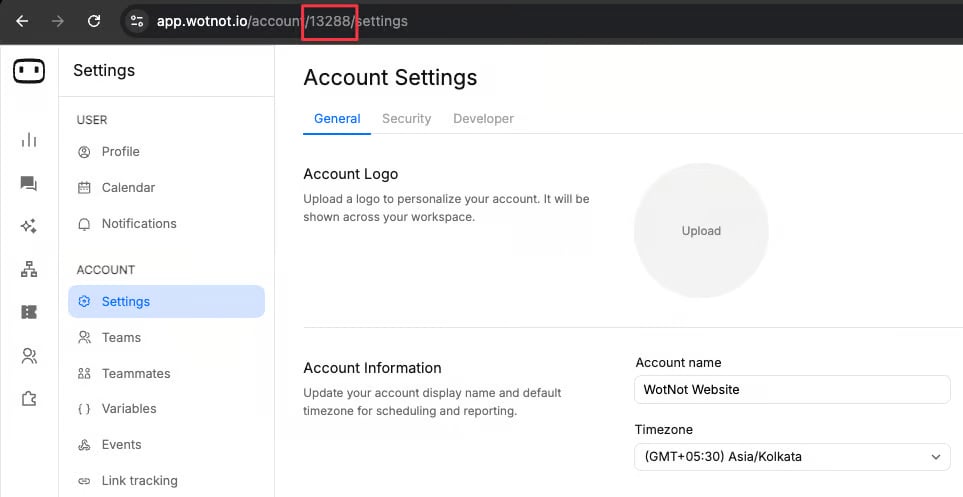
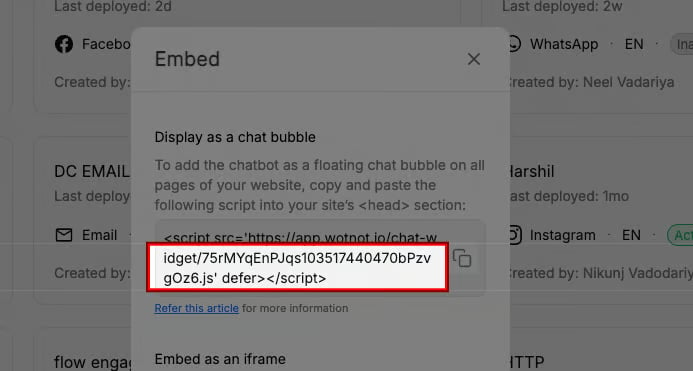
Where to find these credentials
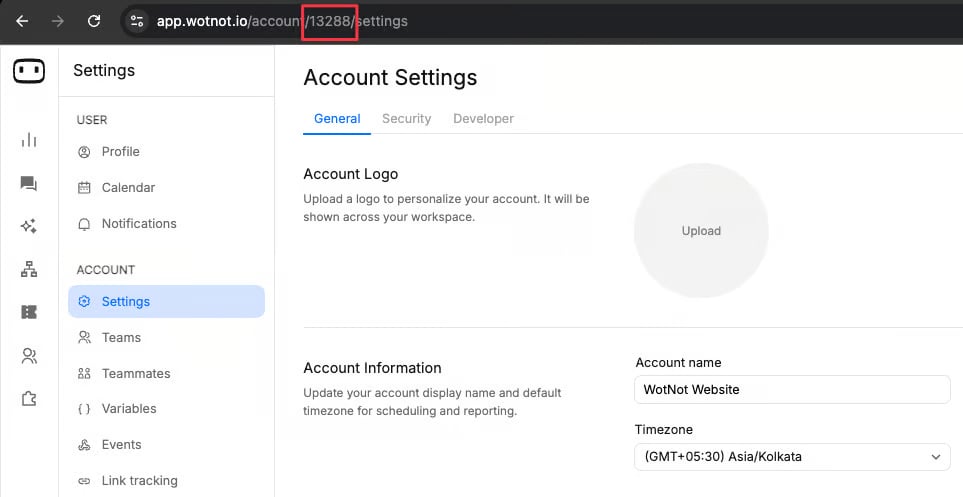
YOUR_BOT_ID — open the bot you want to embed, and copy the bot_id from the URL.
- If you don’t provide a visitorKey, the SDK auto-generates and persists one.
- It’s recommended to provide the unique visitor key, as it helps uniquely identify each visitor and maintain their chats and session history.
Initialize the SDK
Callwn.initialize() in your Application class or MainActivity.
Launching the chat screen
The SDK provides built-in functions to launch chat screens. All functions optionally supportuseAnimation = true
Conversation list screen:
Theme customization
You can fully customize the look of the chat widget usingWidgetTheme.
Theme options:
Applying a theme:
Passing user data
Opening and closing the chat
iOS SDK
Installing
Step 1: Add the SDK via Swift Package Manager (Recommended)
Supports Xcode 13+ for both SwiftUI and UIKit projects.1
Open Xcode → Add SPM Package
File → Add Packages…
2
Enter the SDK Package URL
In the dialog box that appears, paste the WotNotSDK repository URL into the search bar/text field.https://github.com/wotnotbot/ios-sdk
3
Configure dependency rule
- Rule: Up to Next Major Version
- Set the version to the required SDK version
This ensures you automatically get minor improvements without risking breaking changes.
4
Add the package
Click Add Package, and Xcode will fetch and integrate the SDK.
Step 2: Add required permissions
Add the following permission to yourInfo.plist:
Step 3: Import the SDK
Add this import wherever you use the widget:Configuration
Step 1: Create a WidgetConfig
ThisWidgetConfig object contains your bot credentials and optional UI settings.

Step 2: Initialize the SDK
Initialize inside yourApp struct or View
Launching chat screens (SwiftUI)
The SDK provides several functions that return SwiftUIView objects. These can be presented using NavigationLink, .sheet(), or other SwiftUI presentation methods.
Launch conversation list (Full Screen):
Opens the conversation in a full screen mode.
Theme customization
Customize colors for bubbles, text, accents, and error states. Theme colors reference:
Applying a custom theme:
Apply the theme after initialization:
Passing user data
Opening and closing the chat
Testing
Test the mobile integration in both an emulator/simulator and on a physical device.- Build and run your application using an Android emulator or iOS simulator.
- Open the screen containing the WotNot agent.
- Send several messages and verify that responses are displayed correctly.
- Close and reopen the chat and verify that conversation history behaves as expected.
- Test the same flow on a physical Android or iOS device.
- Push notifications, if enabled
- Mobile keyboard behaviour
- File selection and uploads
- Back navigation
- External links
- Screen orientation
- Network changes between Wi-Fi and mobile data
- Conversation persistence
Troubleshooting
Widget not loading in the webview
Widget not loading in the webview
Check that:
- JavaScript is enabled.
- The chatbot URL is correct.
- The webview has network access.
- The bot is active and published.
- Your application is not blocking the chatbot URL.
loadUrl().SDK build failure or dependency conflict
SDK build failure or dependency conflict
Check that:
- You are using a supported version of Android Studio or Xcode.
- The WotNot SDK version is compatible with your project.
- Required dependencies are available.
- Gradle or Swift Package Manager has completed dependency resolution.
- There are no conflicting versions of the same Android or iOS libraries.
User data not reaching variables
User data not reaching variables
Verify that:
- The visitor key is set correctly.
- The same visitor key is used for the intended user.
- The user or session payload contains the expected values.
- WotNot variables are mapped to the correct data fields.
- The SDK is initialized before the chat is opened.
Keyboard covering the input field
Keyboard covering the input field
This is usually caused by the application or webview not resizing correctly when the mobile keyboard opens.Check the keyboard and input configuration for the target platform and test on multiple screen sizes.For webview integrations, also test both portrait and landscape orientations.
Links opening inside the webview instead of the browser
Links opening inside the webview instead of the browser
Intercept links that should be opened externally and pass them to the platform’s browser instead of allowing the webview to navigate to them.This is particularly important for payment pages, external websites, app store links, and other destinations that should not remain inside the chatbot.
File upload not working on one platform
File upload not working on one platform
Verify that the platform’s webview or native SDK has the required file access configuration.Test the file picker on a physical device and check whether the selected file type is supported.If uploads work on one platform but not another, compare the Android and iOS webview or file-picker implementation rather than changing the WotNot bot configuration first.