

Live chat is where you can see real-time chats taking place between your agents and chatbots.
Use Live chat to monitor active conversations, join chats when a visitor needs help, manage assignments, and view information about the visitor and their conversation.
Live chat interface

- Nav bar — Find, organize, and filter conversations using views and labels.
- Chat list — See the conversations included in the selected view.
- Chat screen — Read the conversation and interact with the visitor.
- Information panel — View visitor details, conversation variables, labels, notes, and related chats.
Nav bar
Here, you can see the shortcuts to finding your chats.Default views
WotNot offers some default views like:- You - Chats assigned to you.
- Assigned - Chats currently in progress.
- Unassigned - No agent is assigned to the chat.
- Closed - Historically closed chats.
- SLA breached - Chats whose SLAs are breached
Custom views
Here you can customize and create your own views by defining your conditions.Labels
Label are used to tag conversations to remember them for later use. You can click on each label, to view the chats which are tagged with it.Views versus filters
Views and filters both narrow down the conversations you see, but they serve different purposes:- View: A saved, reusable set of conditions that you can return to later.
- Filter: A temporary way to narrow the currently displayed chat list.
Chat list
For the selected view you can see the list of chats.Chat card properties
Each chat card contains the following information:- Visitor name - Name of the visitor, by default, we provide a dummy number.
- Assignee - Who is currently chatting with the visitor.
- Location - Where is the visitor speaking from, based on their IP address.
- Channel - On which channel is this chat occurring.
- Visitor status - Is the visitor currently online on the page, offline, or away?
- SLA timer - Time left to send a reply to the visitor’s message.
- Last message - Last message exchanged in the chat.
Sorting and filtering
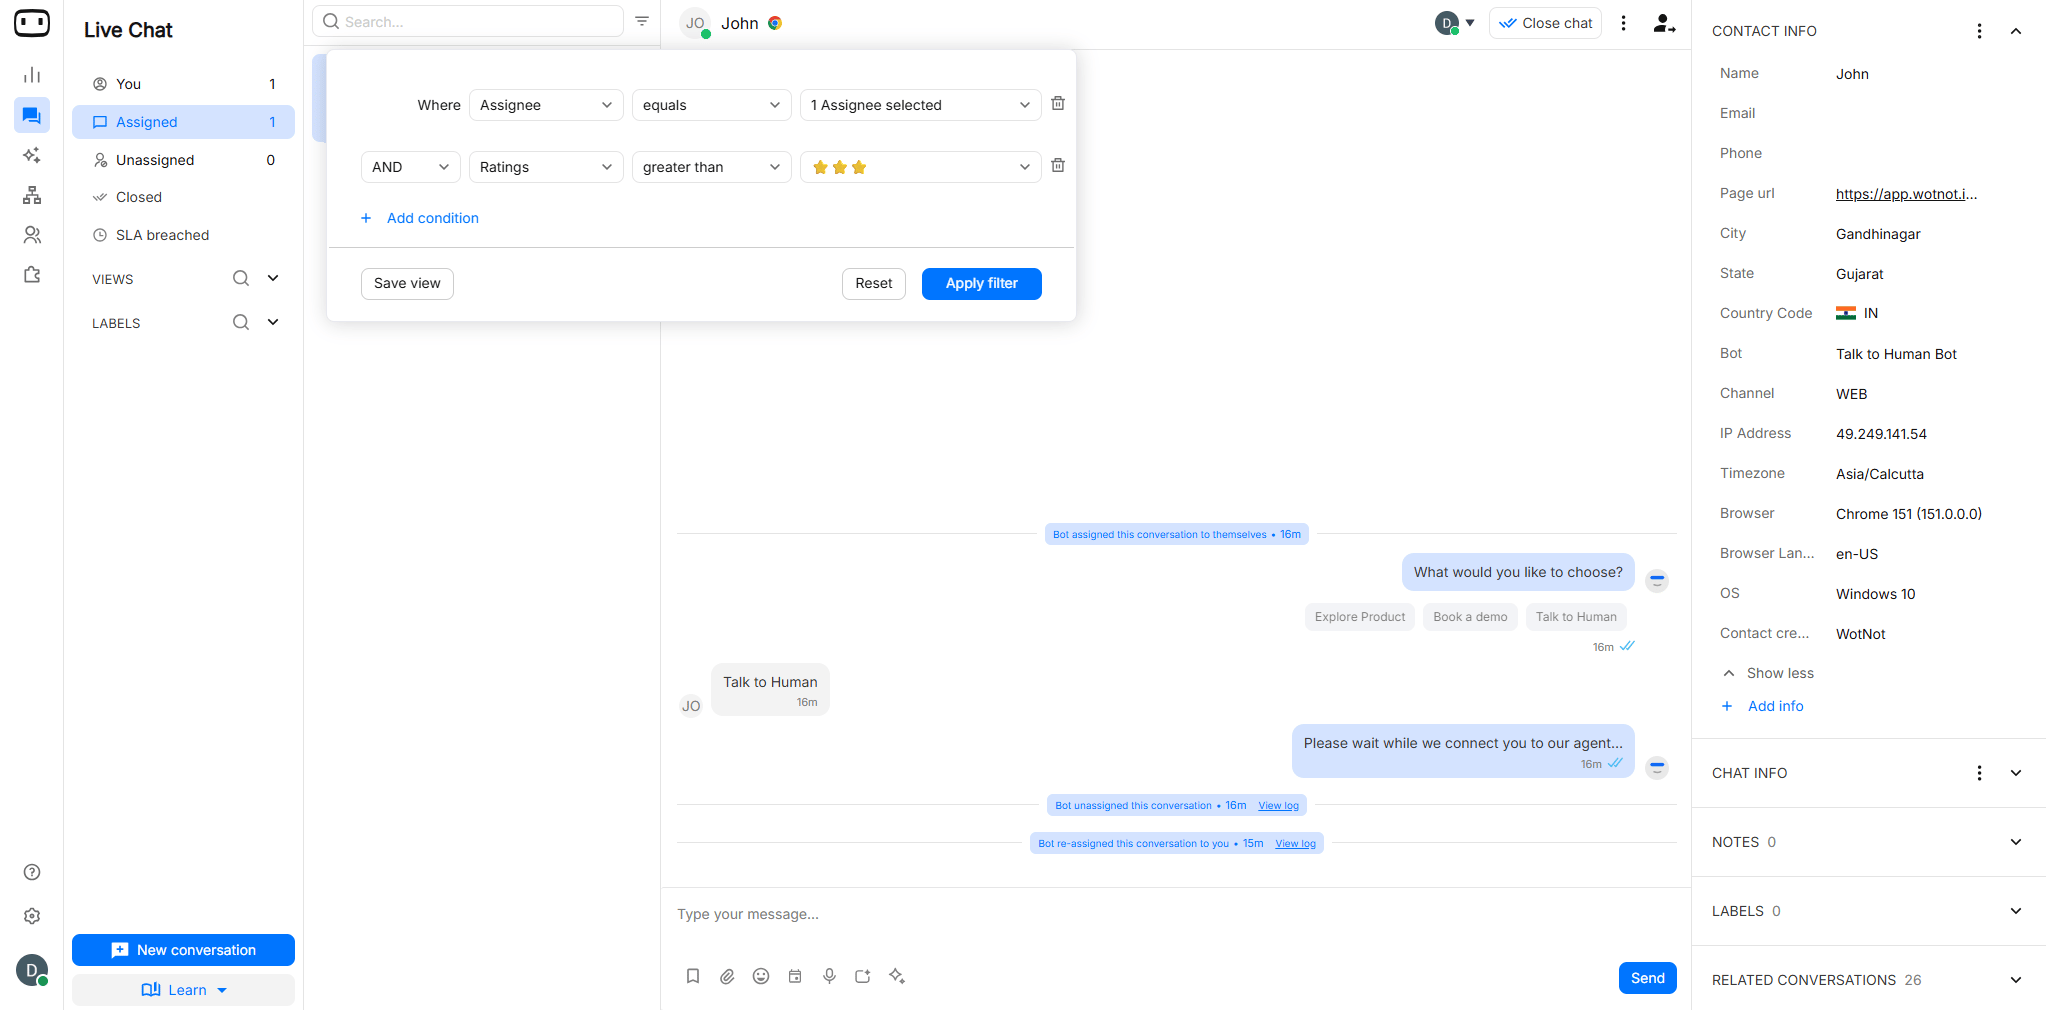
Use sorting and filters to find specific conversations within the selected view.- Click the filter icon next to the search icon.
- Select the condition and specify the value.
- Click Add condition to add another condition, if needed.
- Select AND or OR from the dropdown to combine the conditions.
- Click Save view.
- In the new card that appears, enter a name for the view.
- Click APPLY FILTER to save the view.
- Remove the filters when you want to return to the full list for the selected view.
Exporting chats
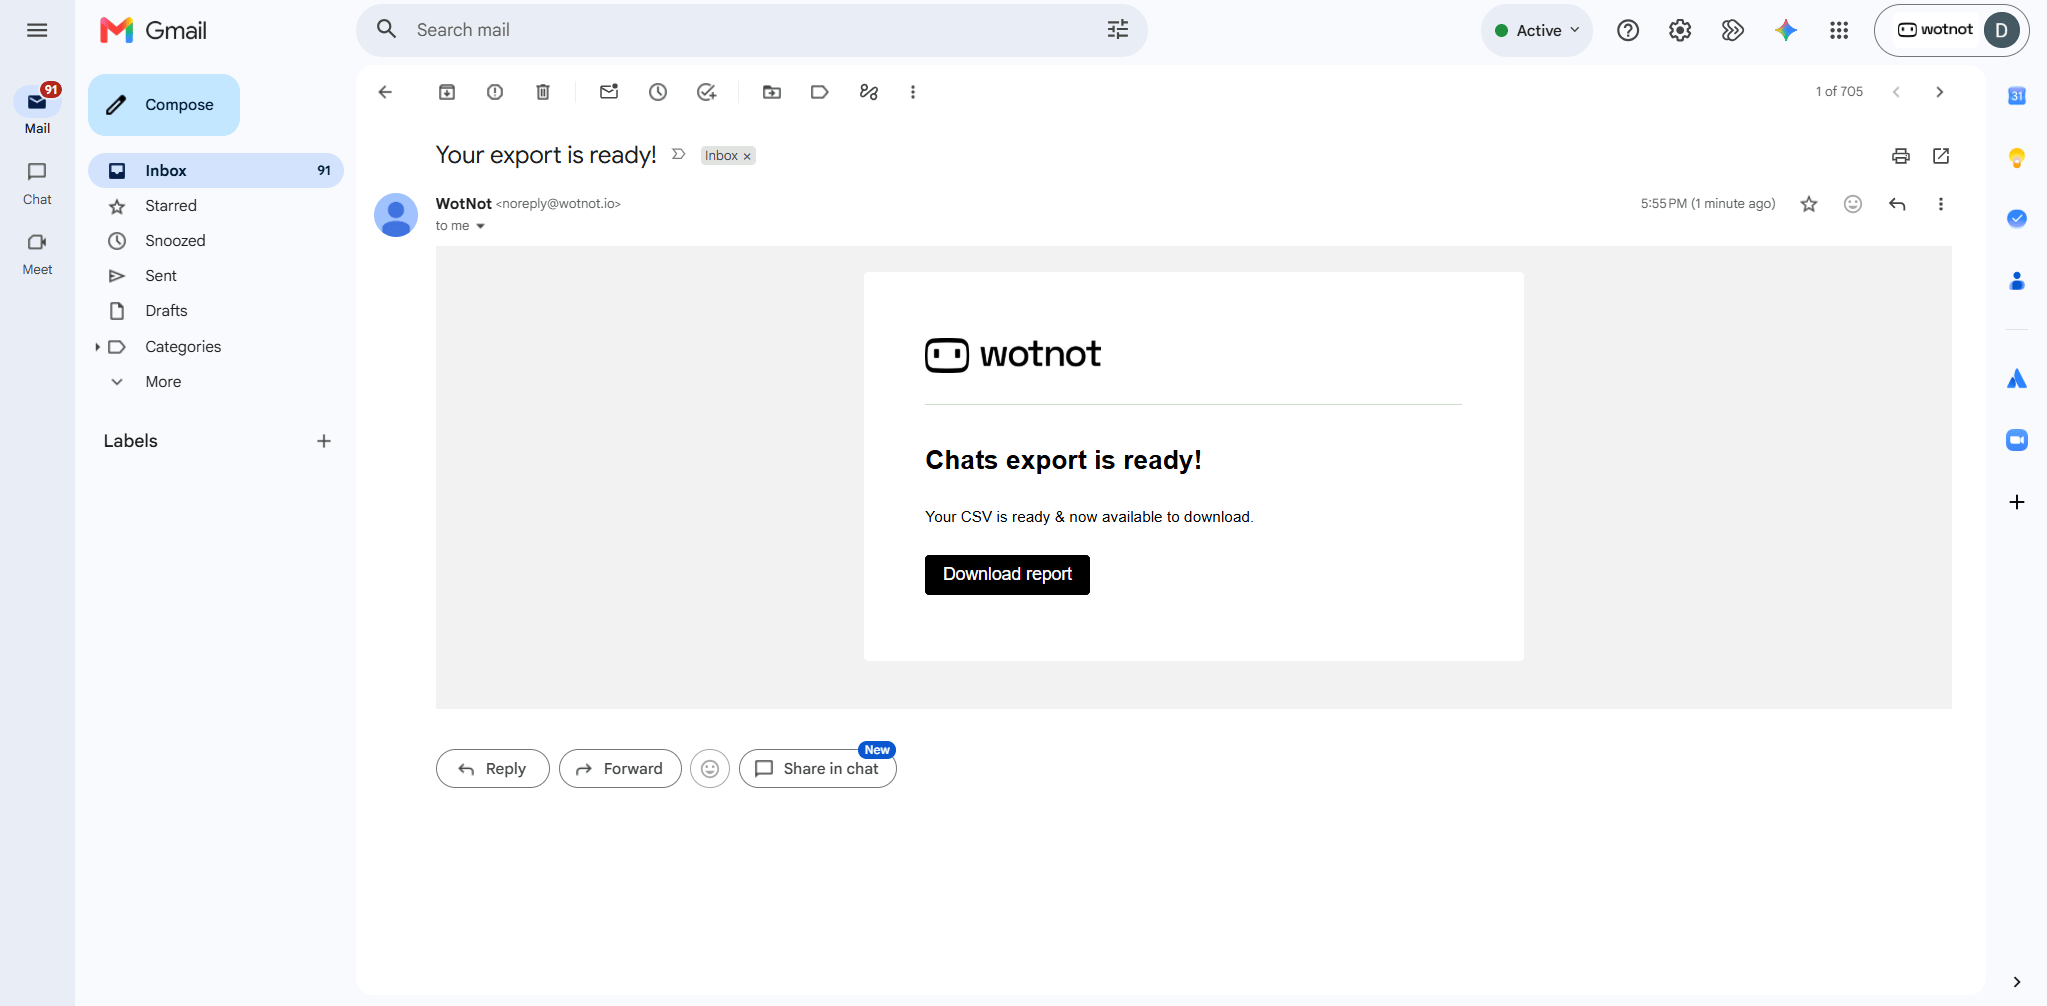
You can export chat data from the chat list for reporting or further analysis.- Click Export Data to export the data.
- A CSV file will be sent to your registered email address.

- Open your email inbox and download the CSV file from the email.
Chat screen
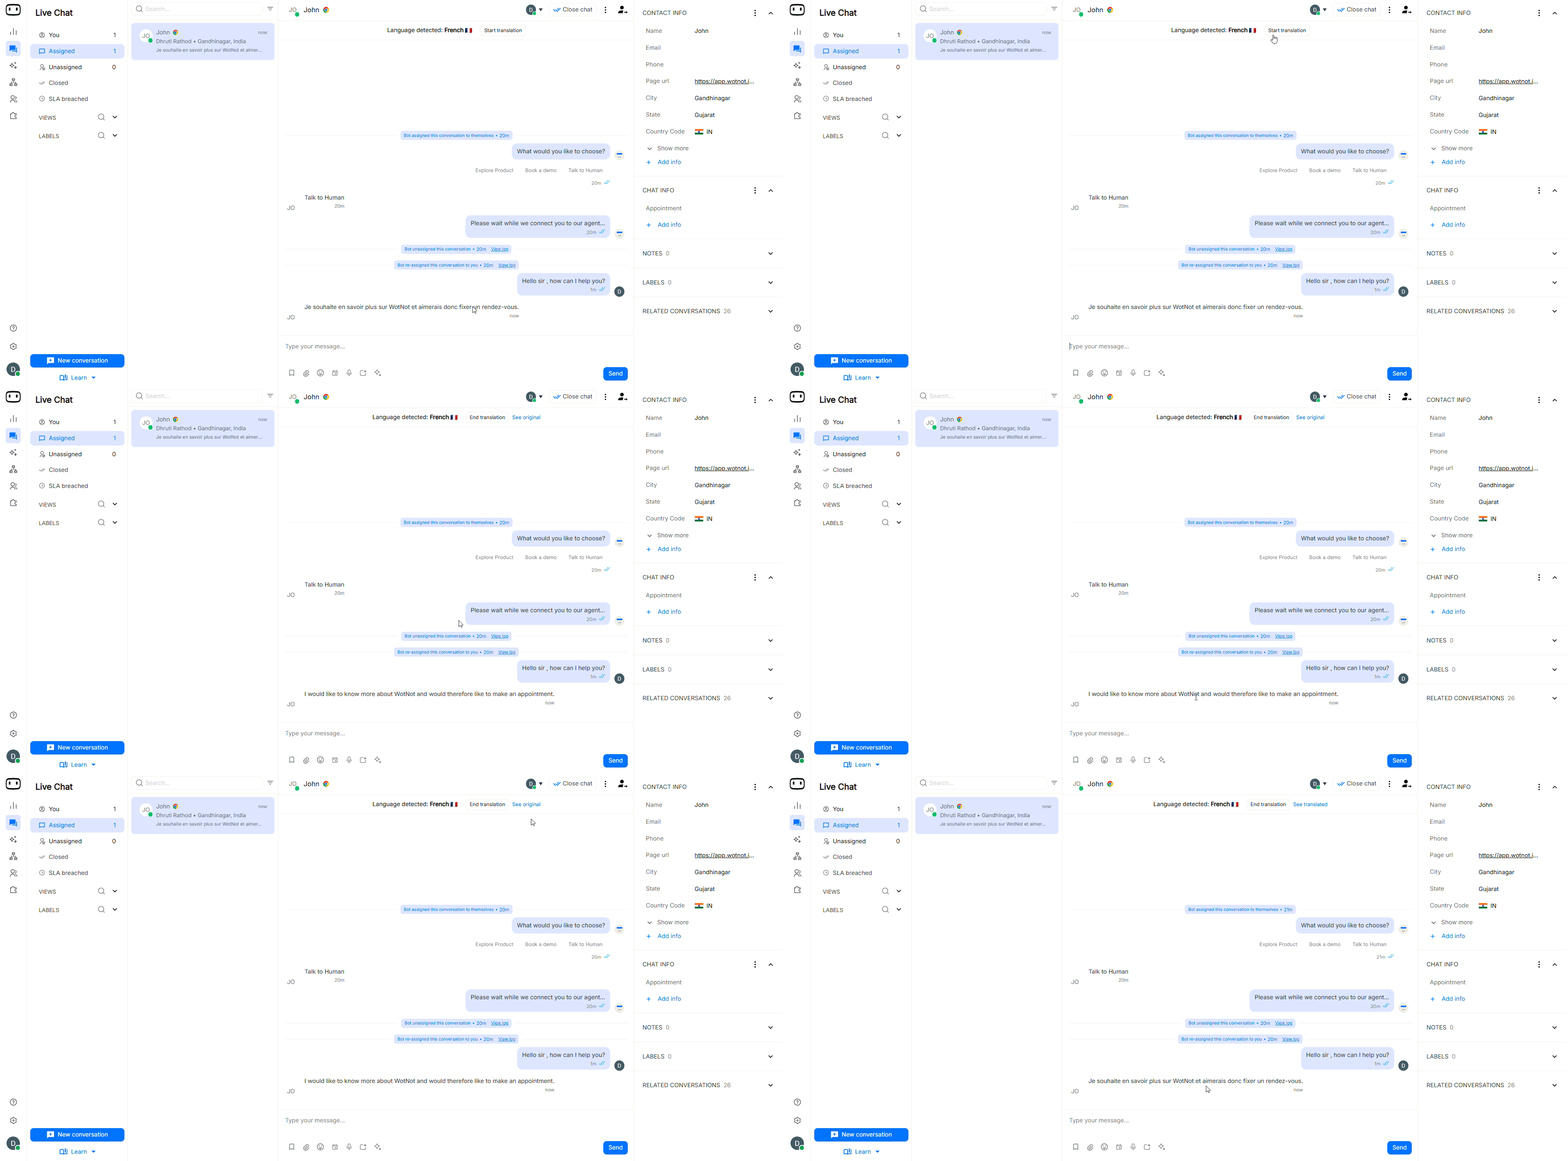
Here for the selected chat, you can see the conversation going on between the visitor and agent/bot. All the messages exchanged so far will be displayed here.Joining a conversation
If the chatbot is currently conversing with the visitor, you will not be able to send a message. If you want to take over the chat from the bot, click on the ‘Join conversation’ button and start typing your message.
Composer tools
Agents can use the tools in the message composer to respond faster and more effectively during live chats.AI features ‘AI Co-pilot’ and ‘Rewrite’ are available in the PREMIUM plan and above.
Changing the assignee
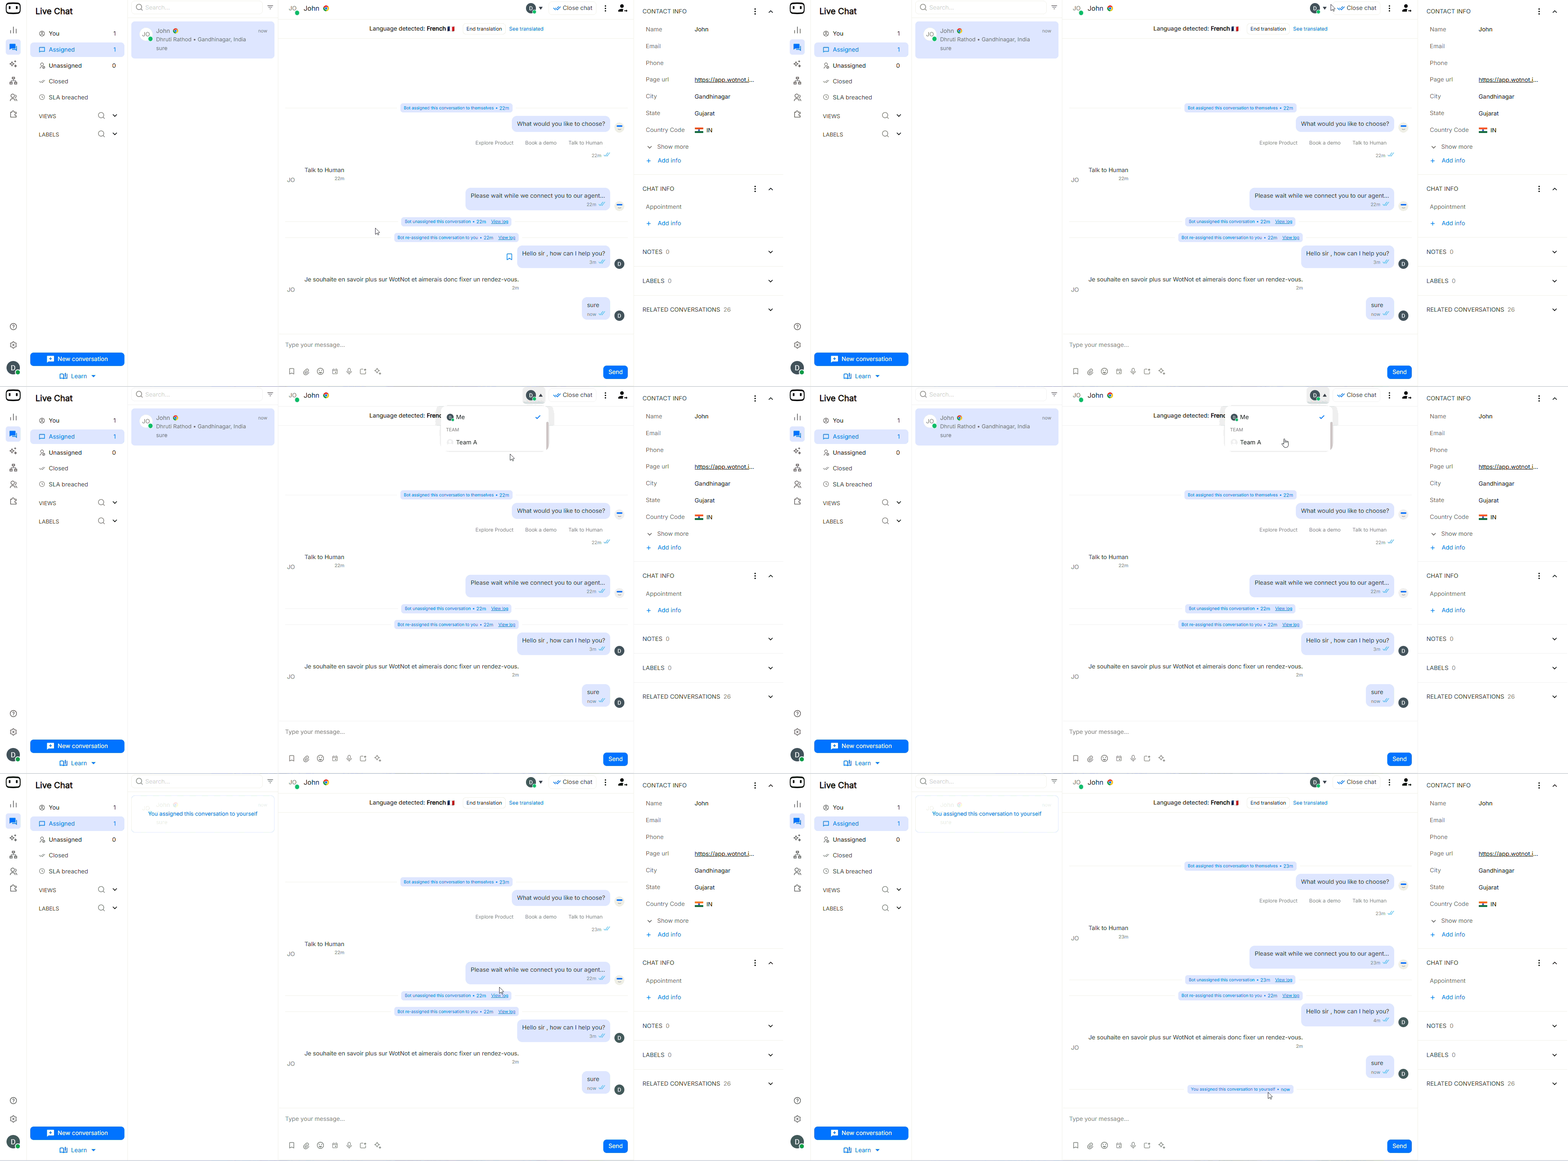
- Open the conversation from the chat list.
- Click the current assignee in the chat screen.
- Select the agent or team you want to assign the conversation to.
- The selected agent or team becomes responsible for the conversation.
Copying the transcript
You can copy the conversation transcript when you need to share or reference the conversation outside Live chat.- Open the chat whose transcript you want to copy.
- Use the transcript copy option available in the chat screen.
- When you copy it, the transcript is saved to your clipboard.
- Paste the copied transcript into the destination you need.

What is included in the transcript?
The copied transcript includes the complete conversation history, including:- Conversation start time and date
- Time zone
- Assignment events, such as when a bot or agent is assigned to the conversation
- Messages sent by the bot
- Messages sent by the visitor
- Messages sent by agents
- Timestamps for each message or event
- Agent assignment details, including when a conversation is reassigned
- Conversation events, such as when the chat is closed
Transcript format
The copied transcript follows this format:Closing a chat
Close a conversation when the interaction with the visitor is complete.- Open the conversation you want to close.
- Use the Close chat option in the chat controls.
- Your chat will be closed now & it appears in the Closed view.

Live chat Settings
Configure conversation management, SLA, AI Co-pilot, translation, and other Live chat settings.
Restart Conversation
In some cases, you can manually restart a conversation from the WhatsApp, SMS, or Email channel.- Click Restart Conversation in the conversation controls.
- A pop-up opens with the required fields.
- Enter the required information and confirm the action.
- The conversation is reopened manually and you can continue the interaction.
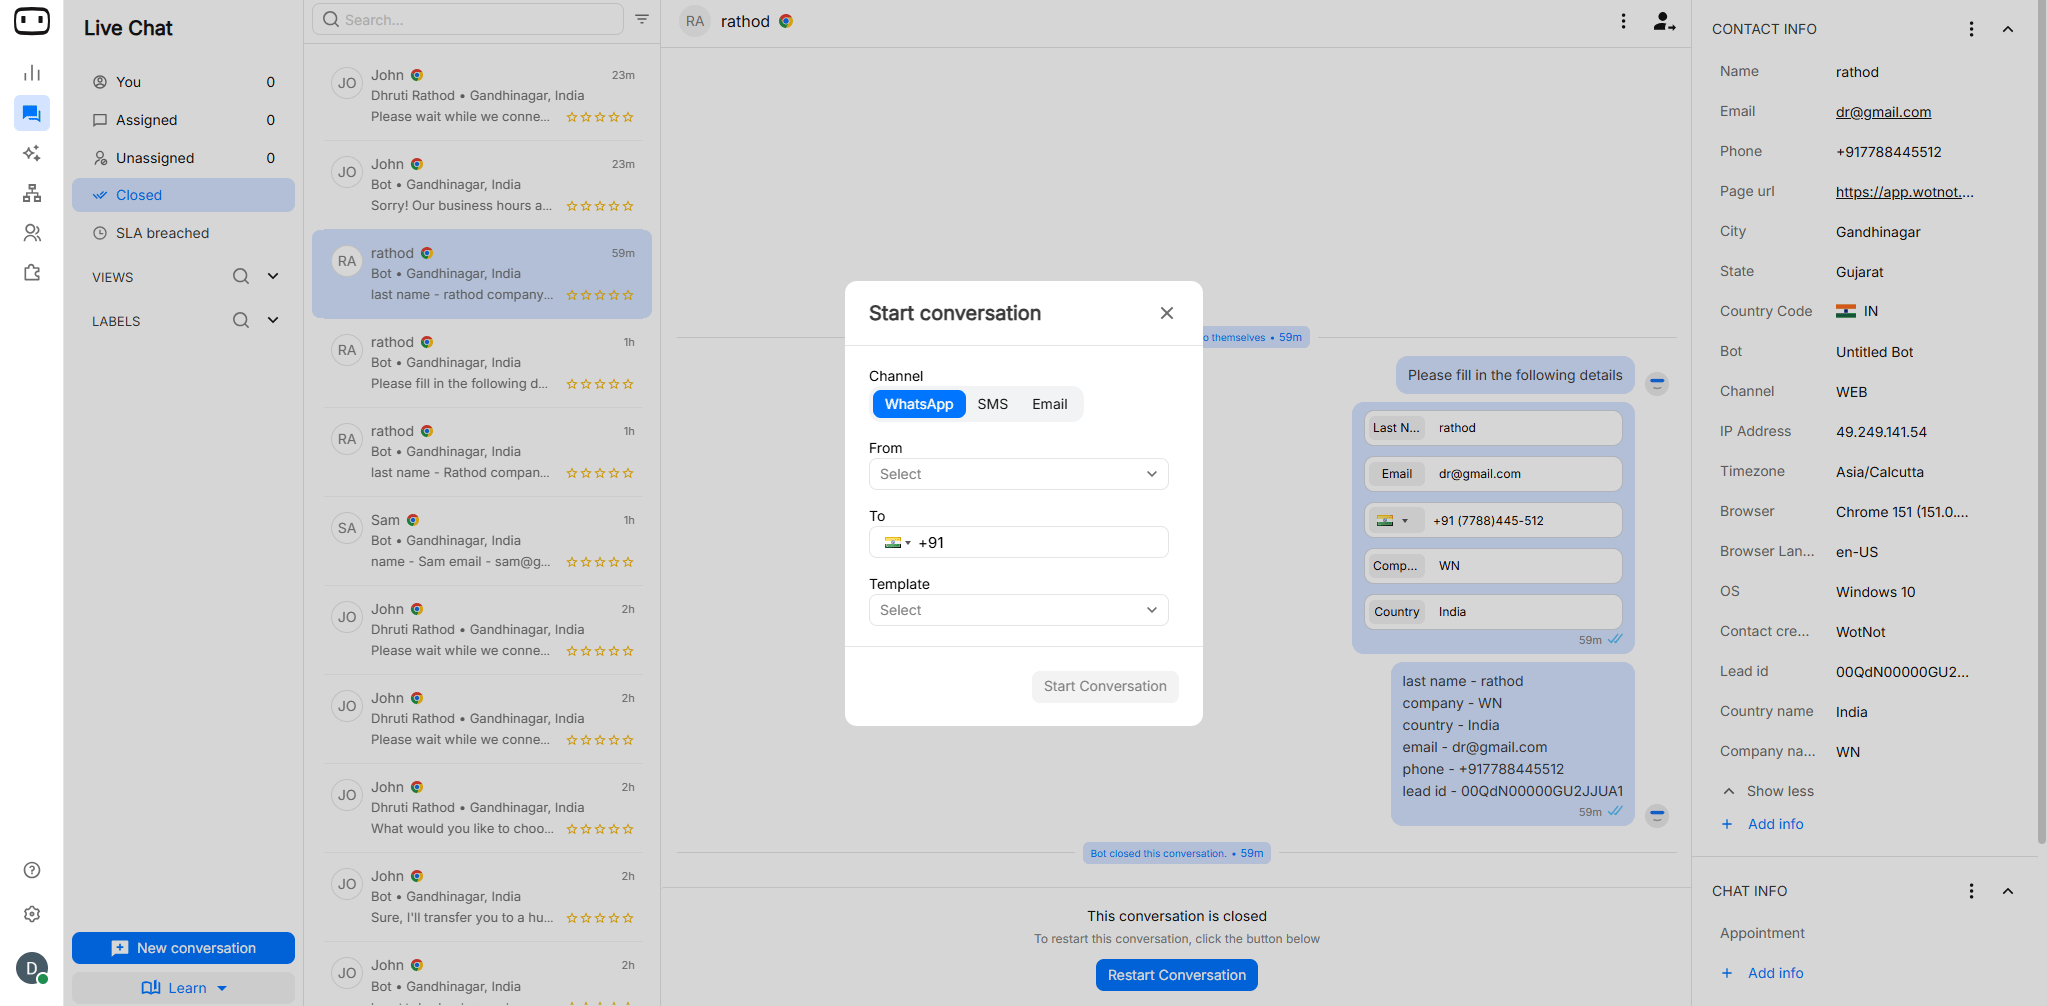
If contact information, such as a phone number or email address, is provided, you can restart the conversation from the Web channel. However, make sure the provided phone number or email address is configured correctly so the template can be sent to the user.
Information panel
The information panel shows details about the visitor and the current conversation.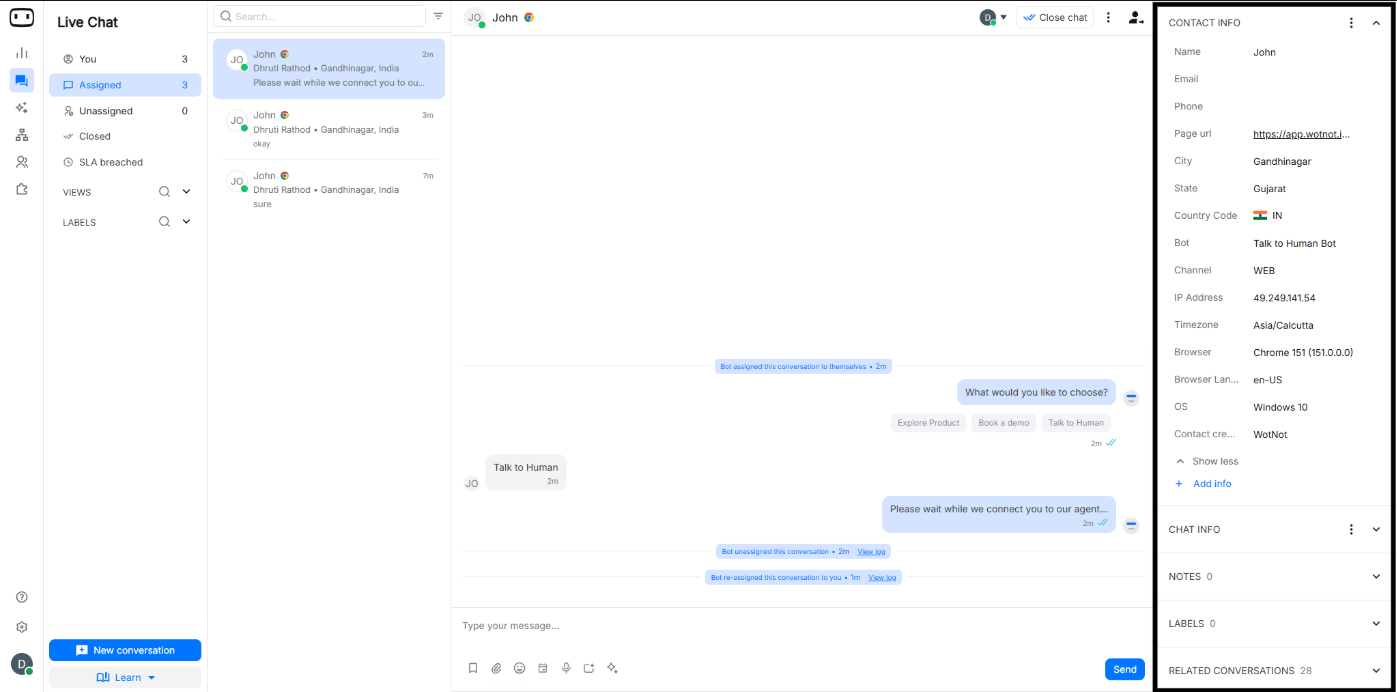
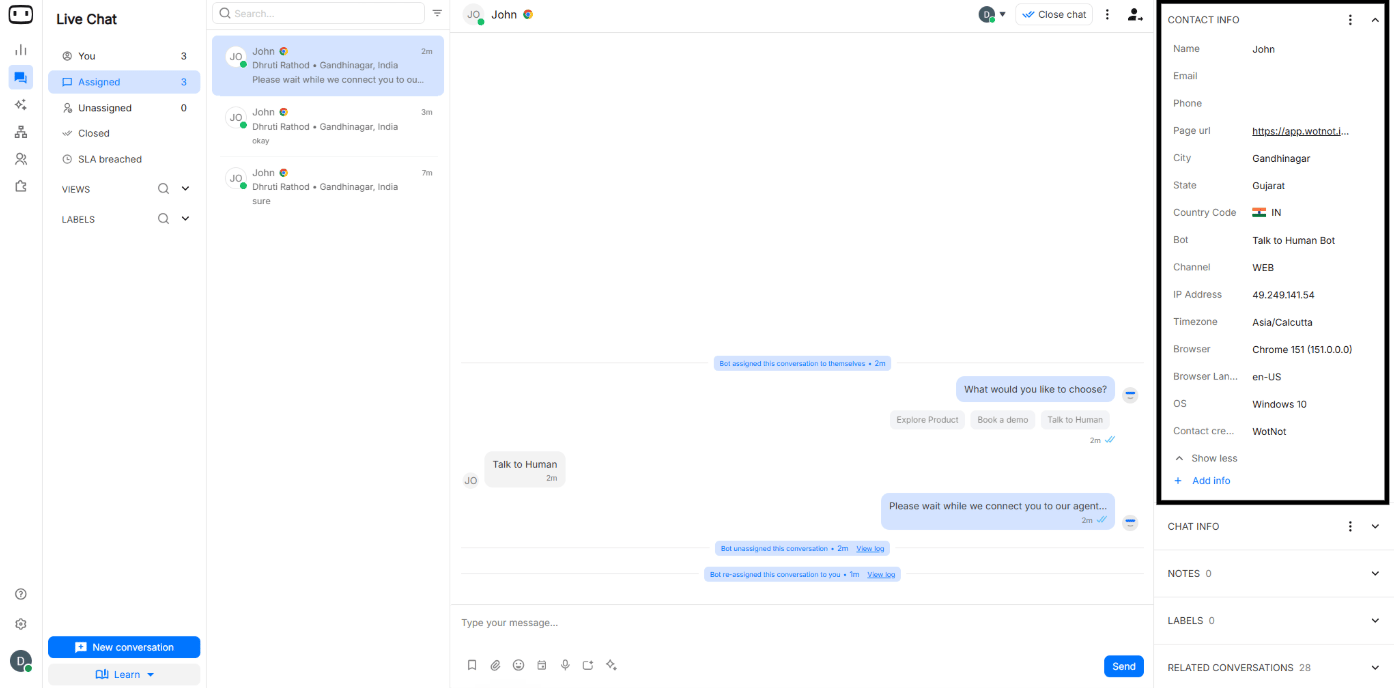
Contact variables
The contact information section contains details provided by the visitor as well as values detected by WotNot.Depending on the information available, this can include:
Depending on the information available, this can include:
- Name and contact details
- Browser
- Operating system
- Location
- Other contact attributes
Chat variables
Chat variables contain values captured during the current conversation. They are different from contact information: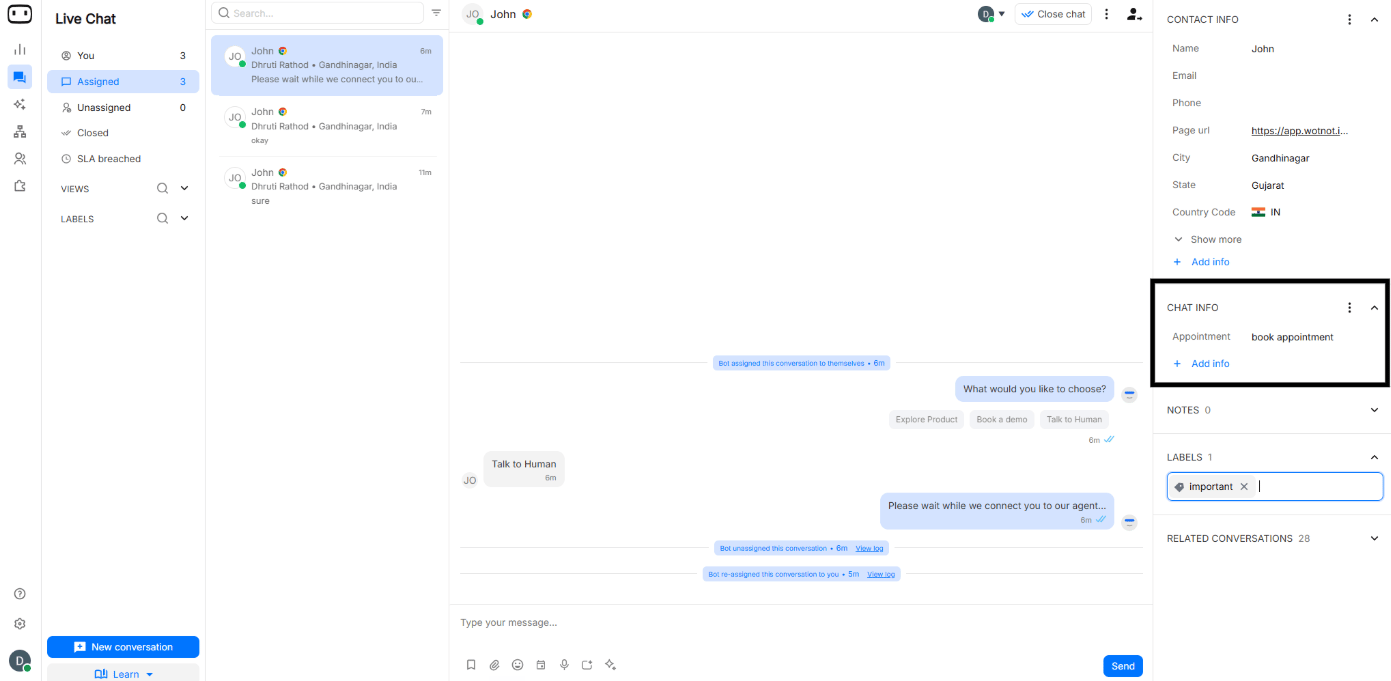
Choosing which variables appear
You can customize the fields displayed in the User information panel.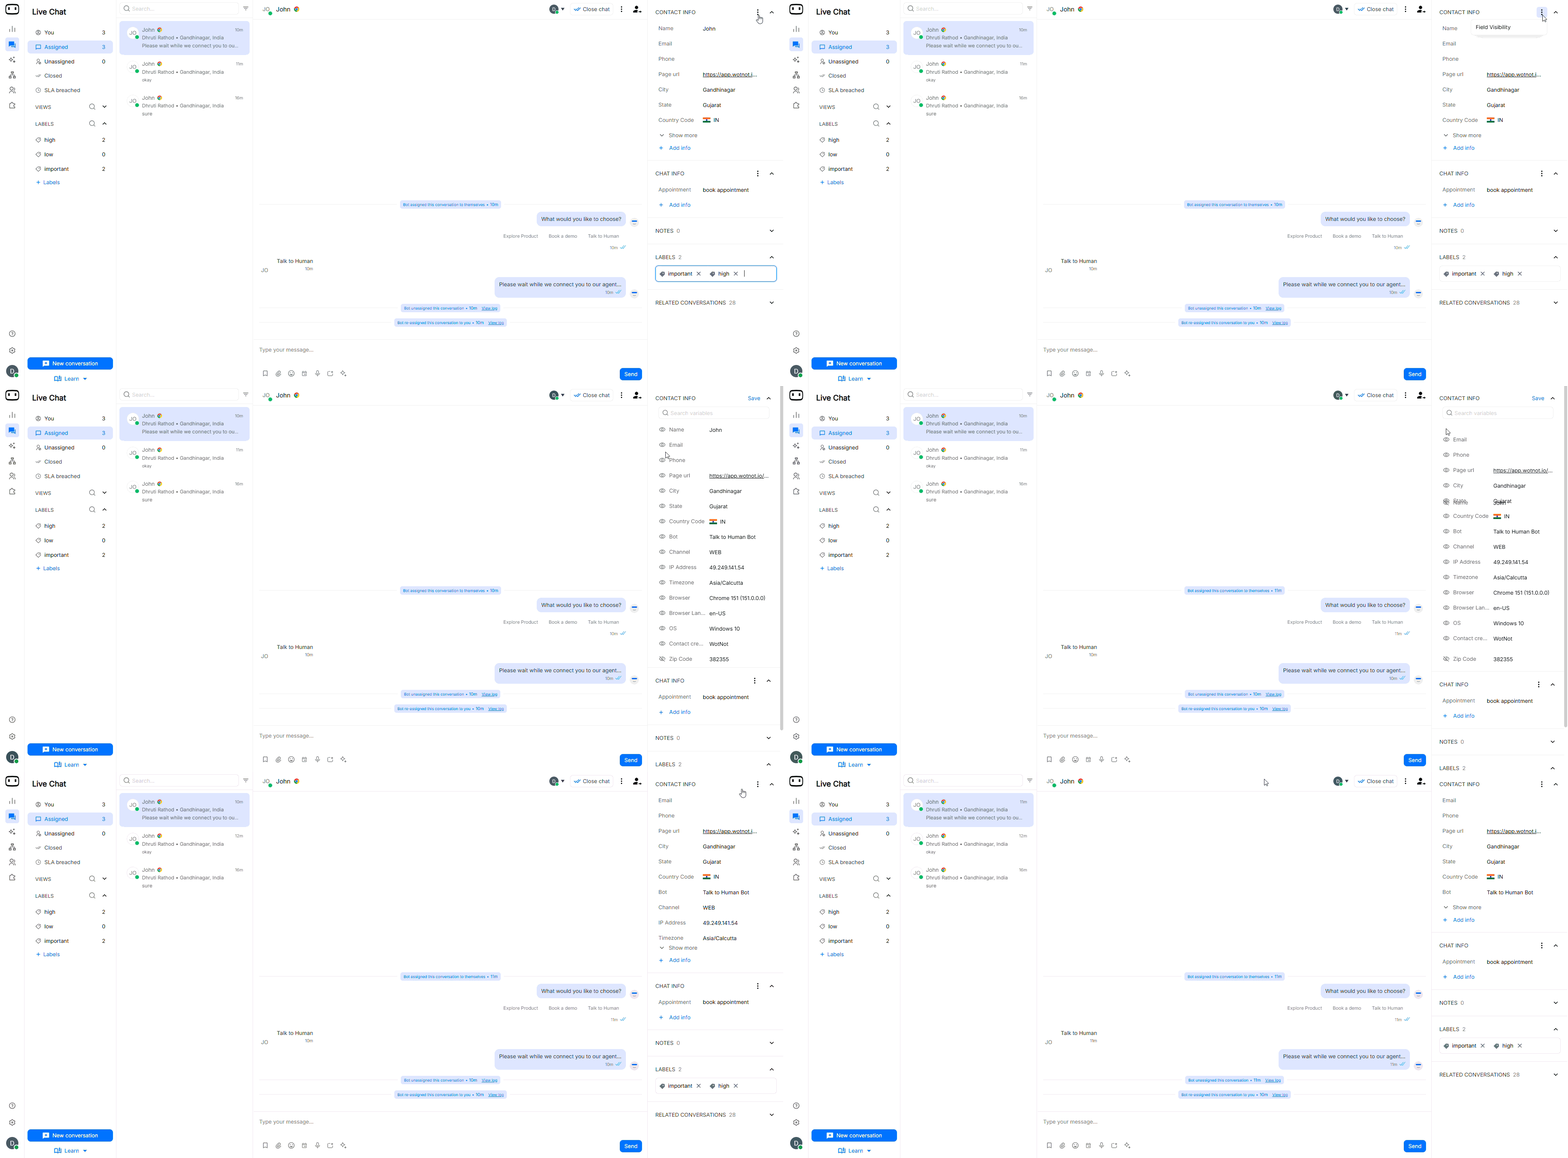
Labels
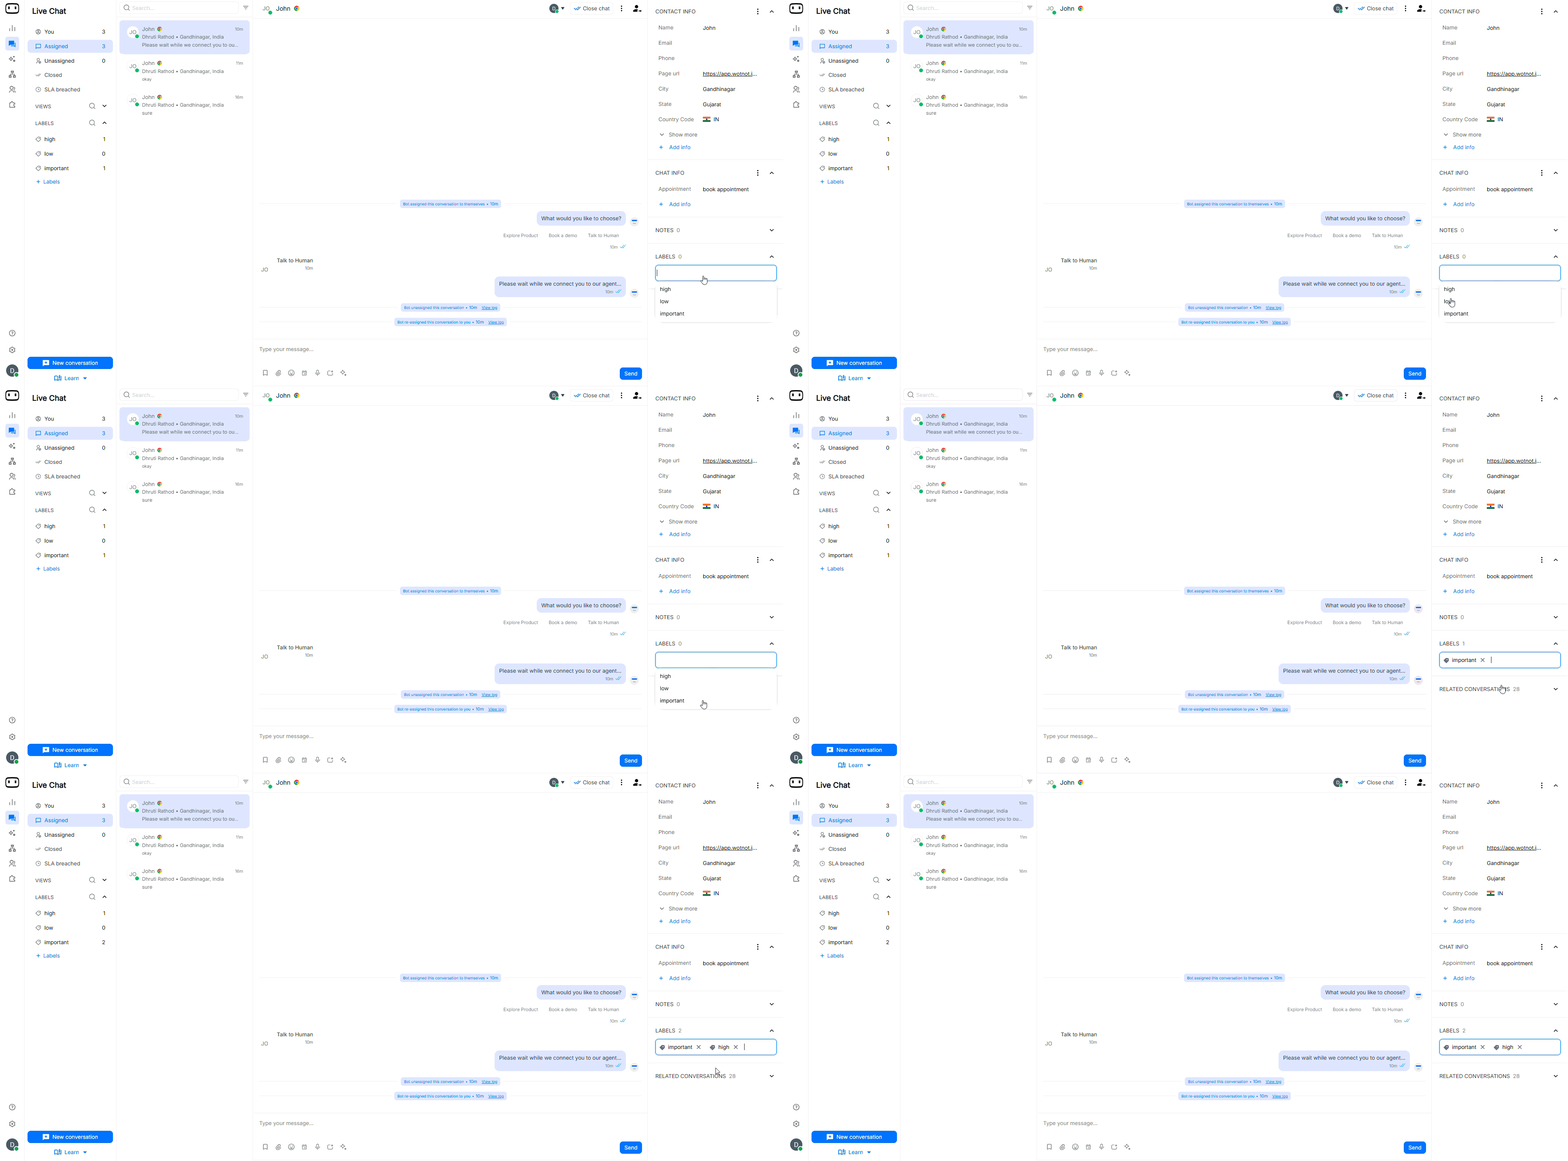
You can add a label to a conversation directly from the User information panel.Adding Labels
Learn how to create and add labels to conversations.
Notes
Notes added by agents about this conversation.Related chats
See the list of historical chats of this visitor with your chatbot/agent. We track the related chats using a cookie on the visitor’s browser.Related pages
Creating views
Create reusable views to organize and filter conversations.
Adding labels
Add labels to conversations to keep chats organized.
Saved replies
Create and use saved replies for common questions.
Voice transcripts
View and work with transcripts from voice messages.
Chat assignment log
Track changes made to chat assignments.
Live chat Settings
Configure Live chat settings and conversation behavior.