

Available on the STARTER plan and above.
- Ongoing campaign continues to run over time.
- Can target contacts who meet predefined conditions over time.
- It is suitable for continuous engagement and automated outreach.
- It trigger an outbound message automatically whenever new contact data arrives.
- Unlike a one-off campaign, you do not need to upload or select a fixed list of contacts each time you want to send a message.
How is an ongoing campaign triggered?
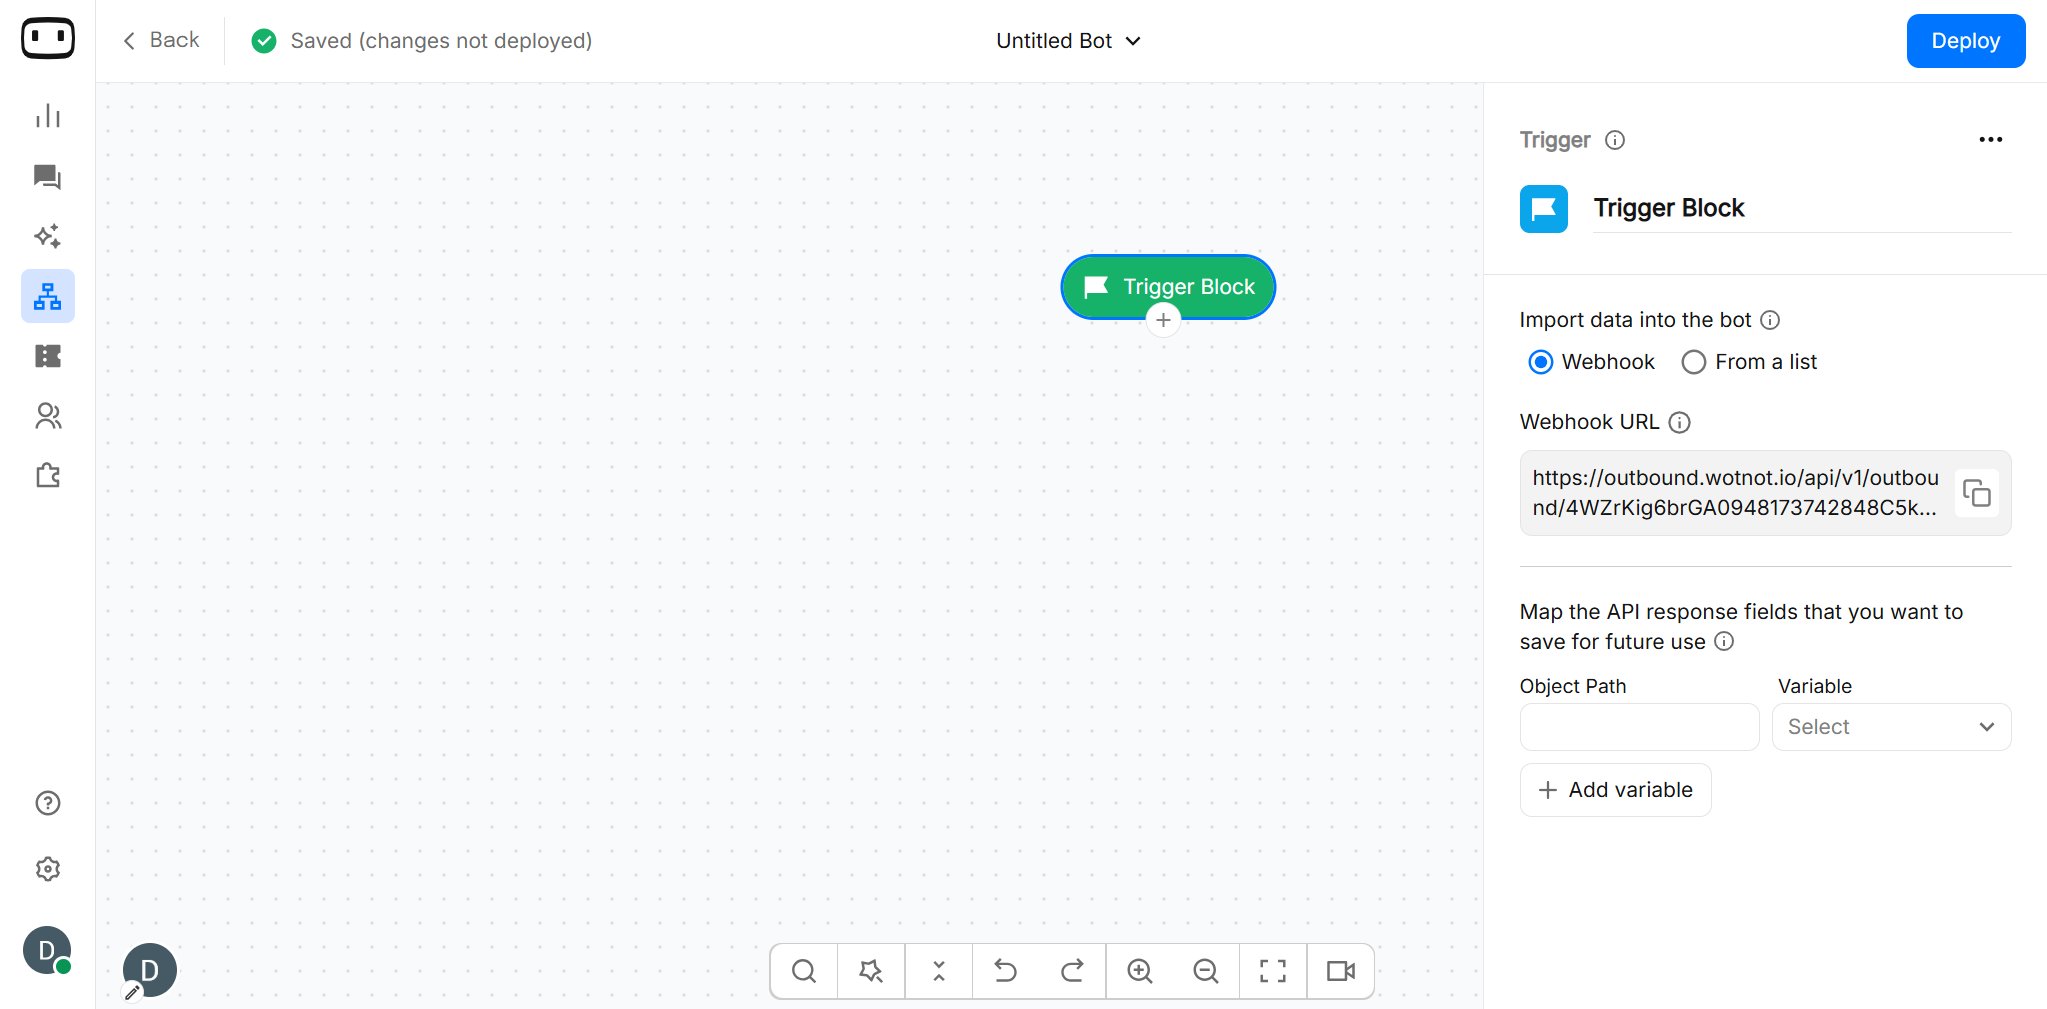
- An ongoing campaign is triggered by a webhook request from your system.
- When a new event occurs in your system, your application sends the contact information to the webhook URL generated for the ongoing campaign.
- WotNot receives the request, creates a new contact or matches the contact with an existing record, maps the incoming data to the configured variables, and starts the campaign flow.
Pre-requisites:
Depending on the channel you want to broadcast on, you would need,
Depending on the channel you want to broadcast on, you would need,
- Email API (Supported partner: TechAlpha) - SMS API (Supported partner:
Twilio) - MMS API (Supported partner: TechAlpha) - WhatsApp API (Supported
partner: Meta, 360dialog, Twilio, GupShup, TechAlpha, Unifonic)
Before you start
Before creating an ongoing campaign, make sure you have the following:- The channel you want to use is connected and configured in WotNot.
- If you are using WhatsApp, the required WhatsApp template is approved and available in your account.
- Your source system can make an outbound HTTP request to the WotNot webhook URL.
Depending on the channel, you may also need the corresponding messaging API.
WotNot’s existing ongoing campaign documentation lists Email, SMS, MMS, and
WhatsApp API requirements by channel.
WotNot’s existing ongoing campaign documentation lists Email, SMS, MMS, and
WhatsApp API requirements by channel.
Step 1: Creating an ongoing campaign
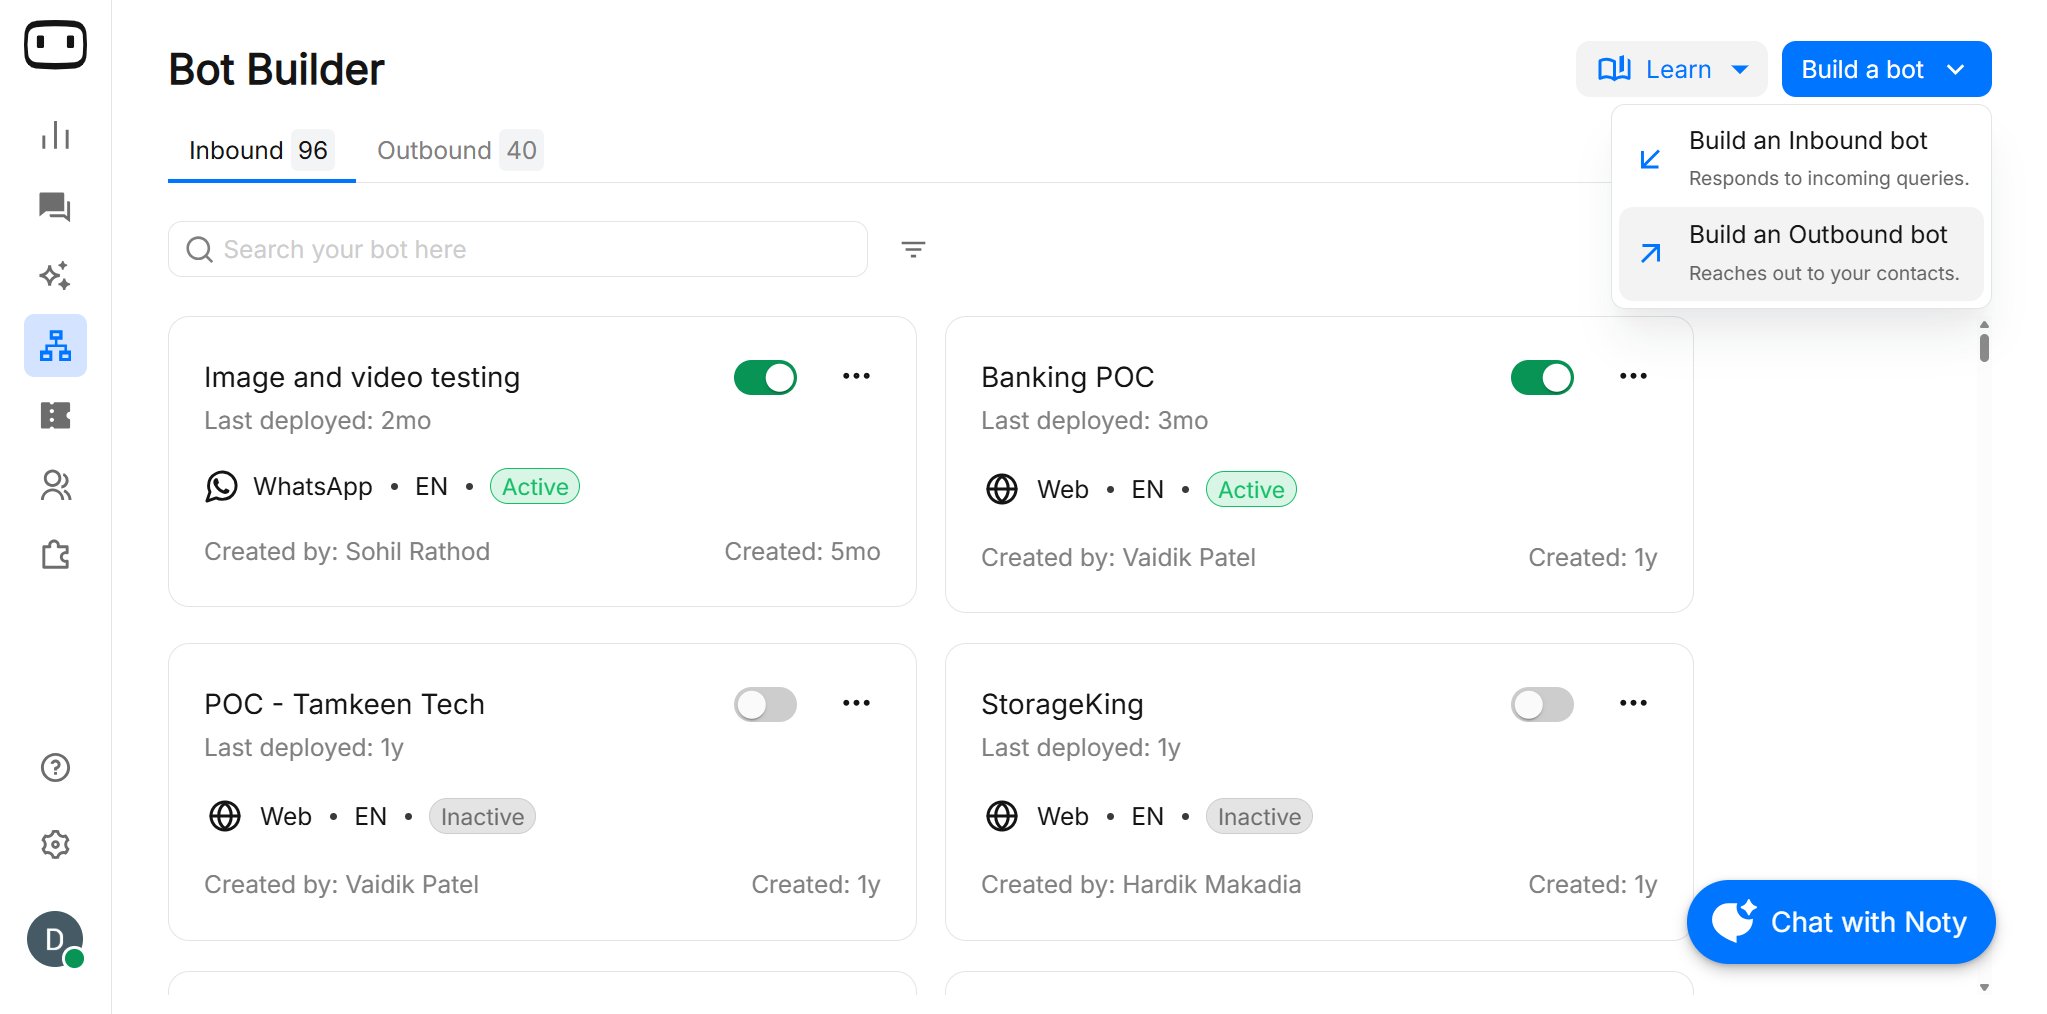
- Go to Bot Builder.
- Select Build a bot.
- Choose Build an outbound bot.
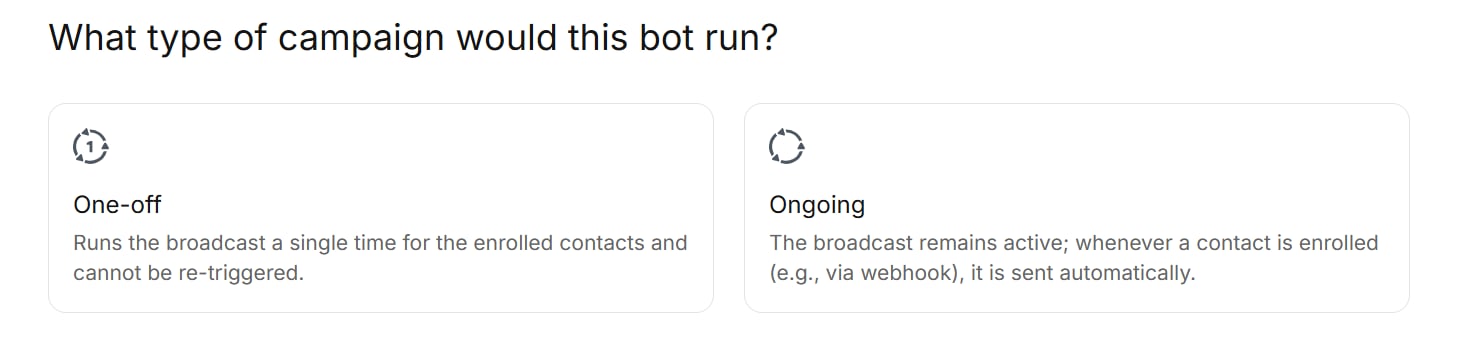
- Select Ongoing as the campaign type.
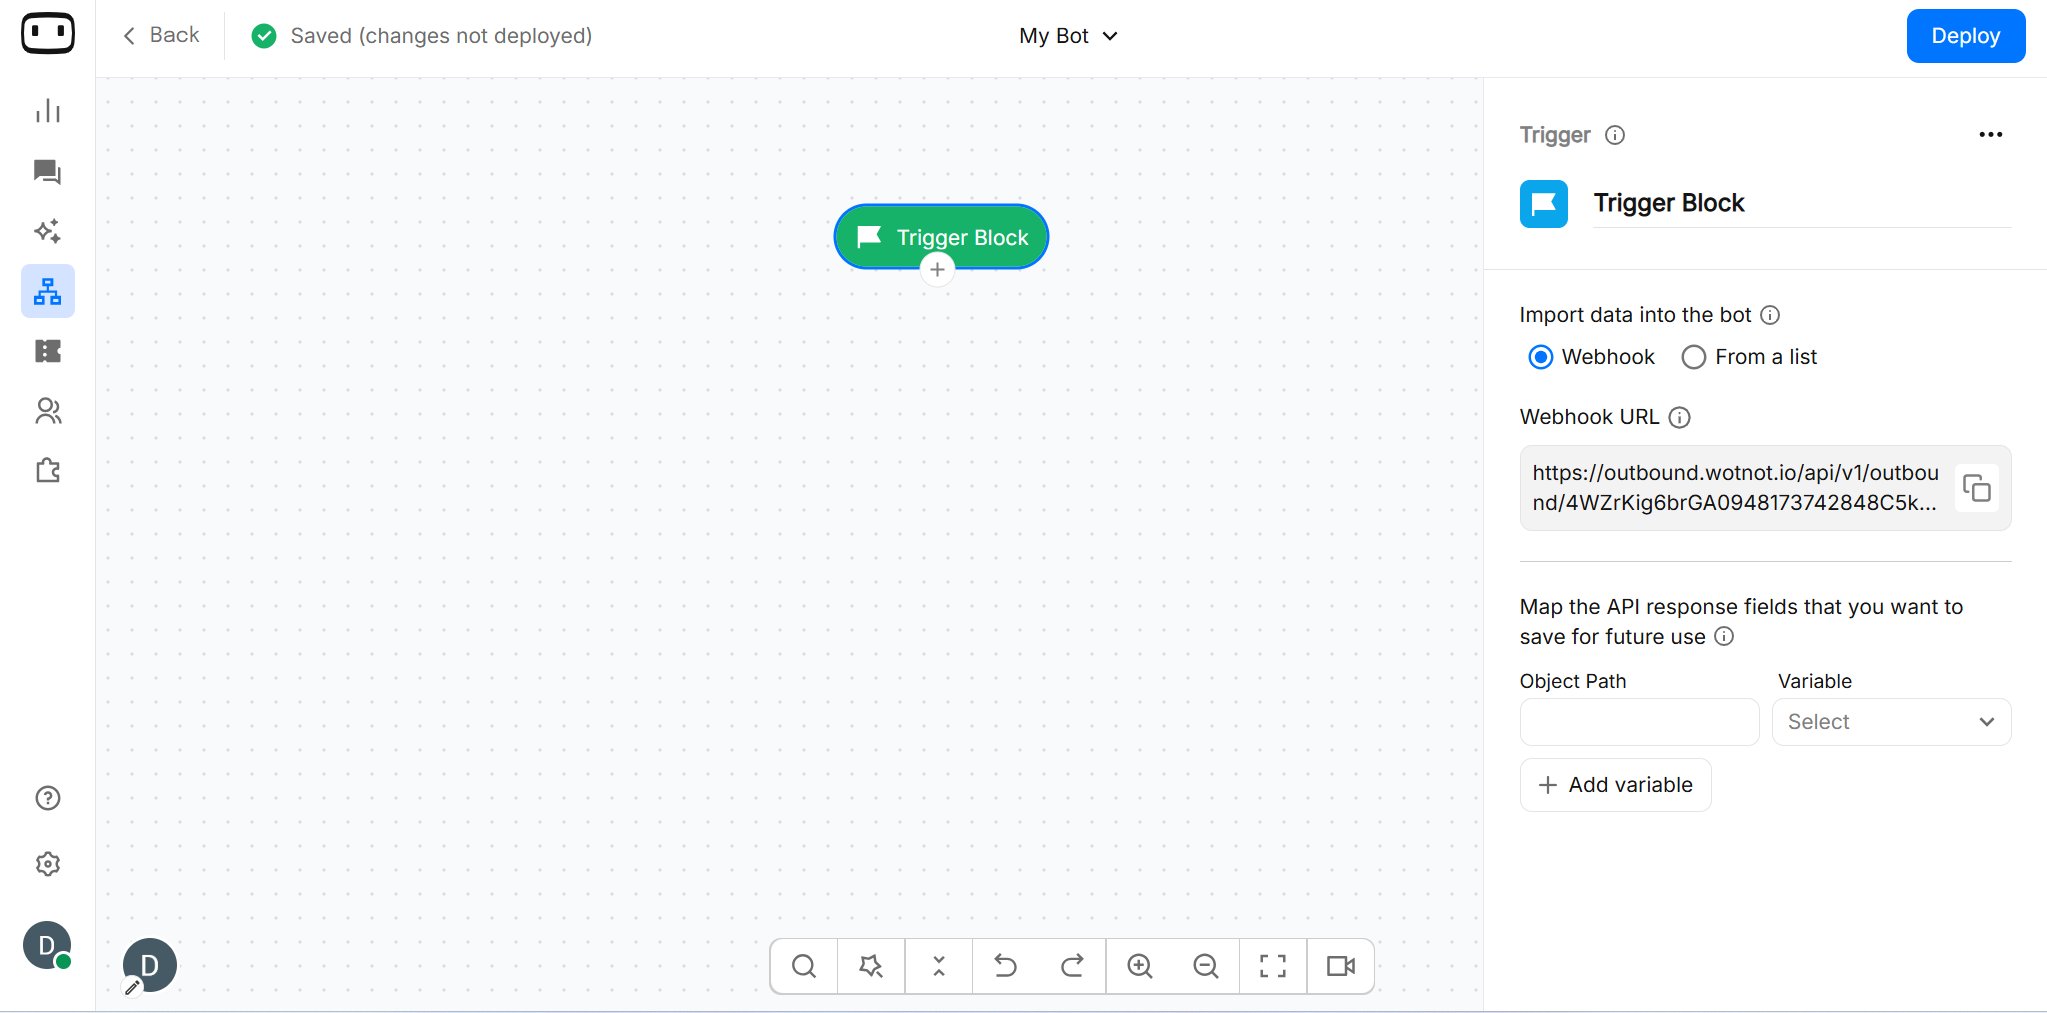
- Configure the campaign’s Trigger block.
- Select Webhook as the contact import source.
- Copy the webhook URL displayed in the Trigger block.
- Configure the campaign flow by adding the required message and action blocks.
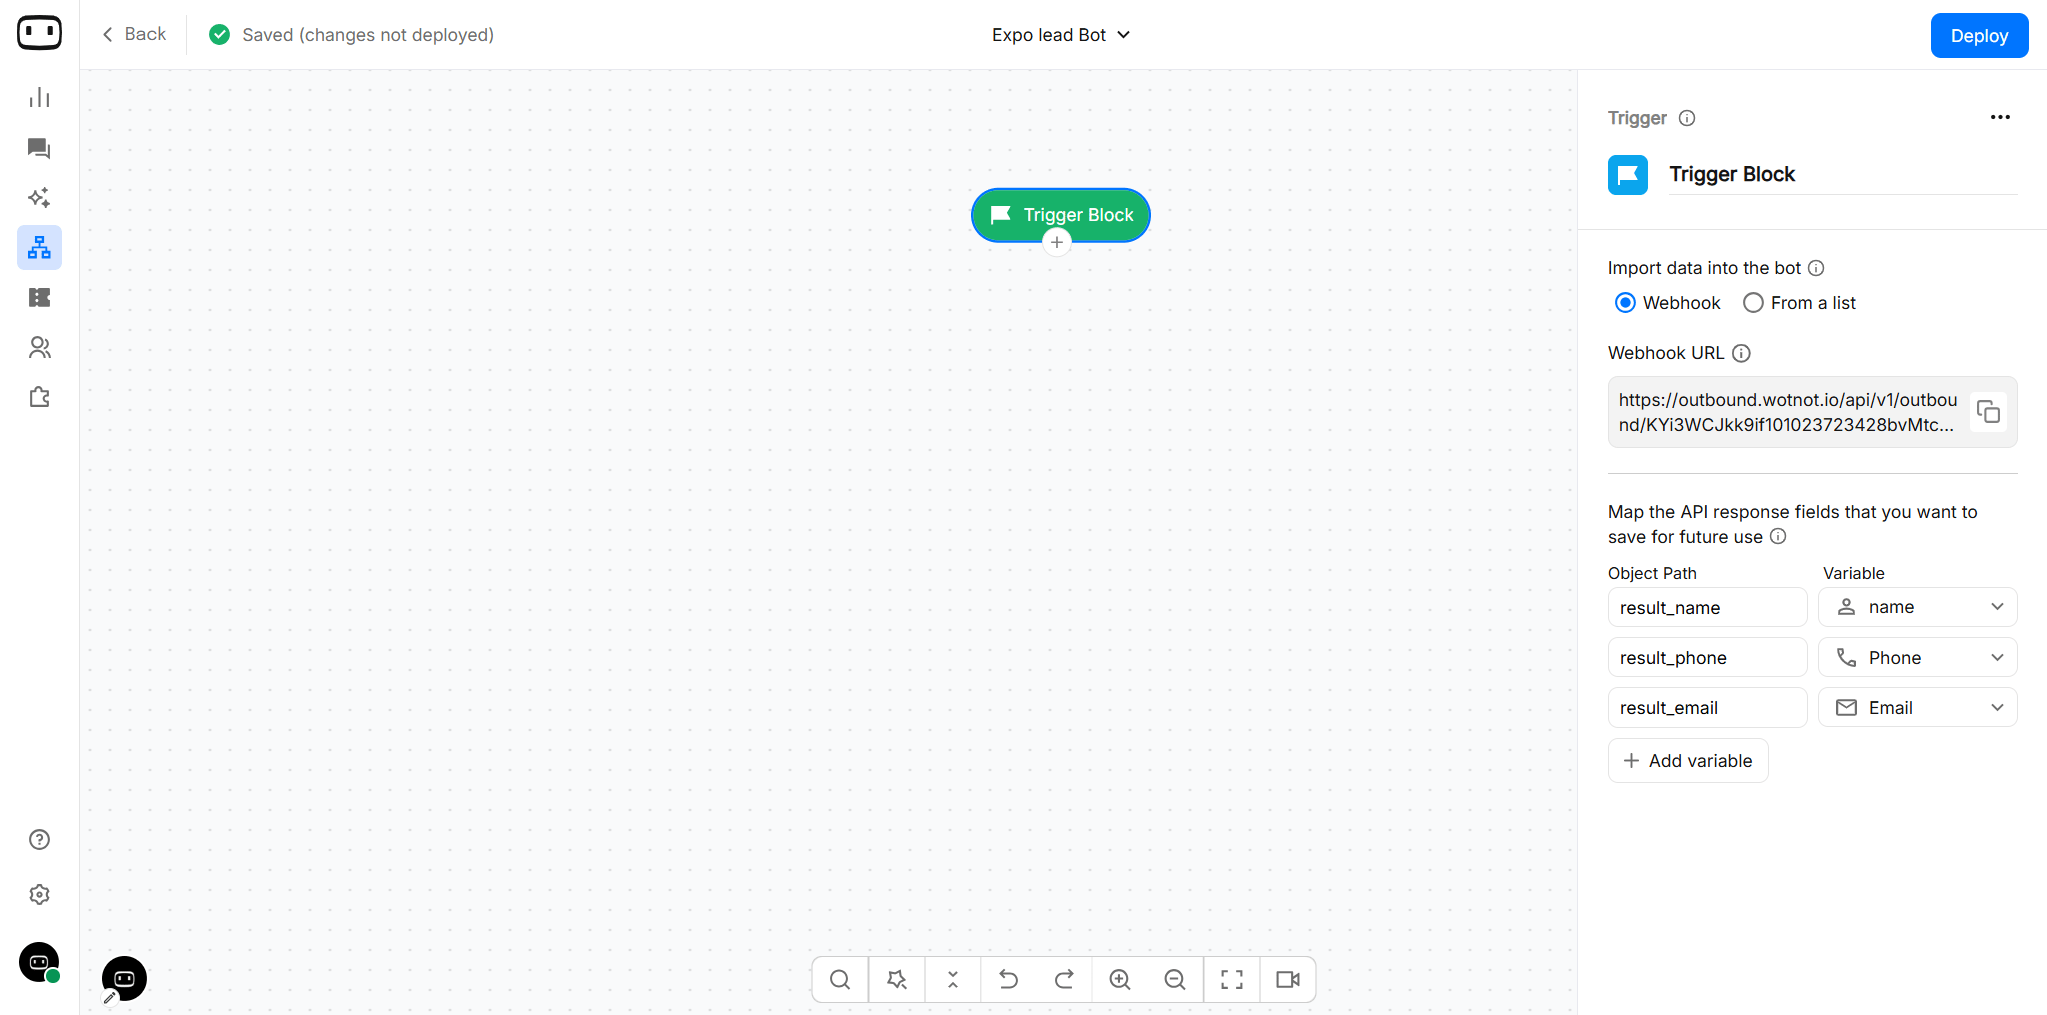
- Map the incoming contact fields to the variables you want to use in your campaign.
- Configure the message for your selected channel.
- Review the complete flow and click Deploy to activate the campaign.
Step 2: Sending contact data to the webhook
Click on the ‘Trigger’ block and choose Webhook as the import source. Your system should invoke our webhook with the required contact payload to trigger them into this broadcast.To trigger this webhook, you will need:
- Webhook URL - Found on the trigger block
- Authorization token - Go to Settings > Account Settings > Developer
- Payload - The contacts data you want to send the broadcast to
Adding contacts to campaign
POST https://outbound.wotnot.io/api/v1/outbound/… You can find your webhook URL on the trigger block of your outbound bot.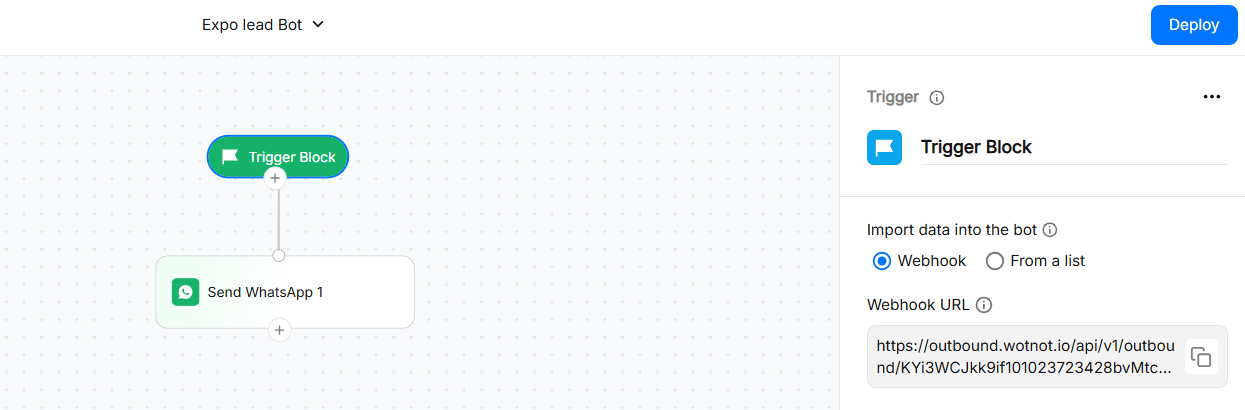
Token - You can get your account token by going to Settings > Account
Settings > Developer > and copy your “API Access Token”
Settings > Developer > and copy your “API Access Token”
Headers
Body
- Single Contact
- Multiple Contact
A maximum of 10,000 contacts can be sent in single request
Response
- 200
- 400
Mapping payload data to variables
When a new contact is received through the campaign trigger, the data in the incoming payload can be mapped to variables. These variables will be used to personalize the template message content.- Open the Ongoing Campaign setup.
- Configure the campaign trigger to receive the incoming payload.
- Review the fields available in the payload.
- Map each payload field to the corresponding contact variable.
- Save the mapping.
- Use the mapped variables when composing your message.
For example, if the incoming payload contains
name: "John", the contact_name variable is populated with John. You can then use {{contact_name}} in your message to personalize it automatically.
Create your campaign flow
Create your desired flow by adding blocks like Send SMS or Send WhatsApp and configure its fields on the right panel. The configuration fields would differ based on the channel you use.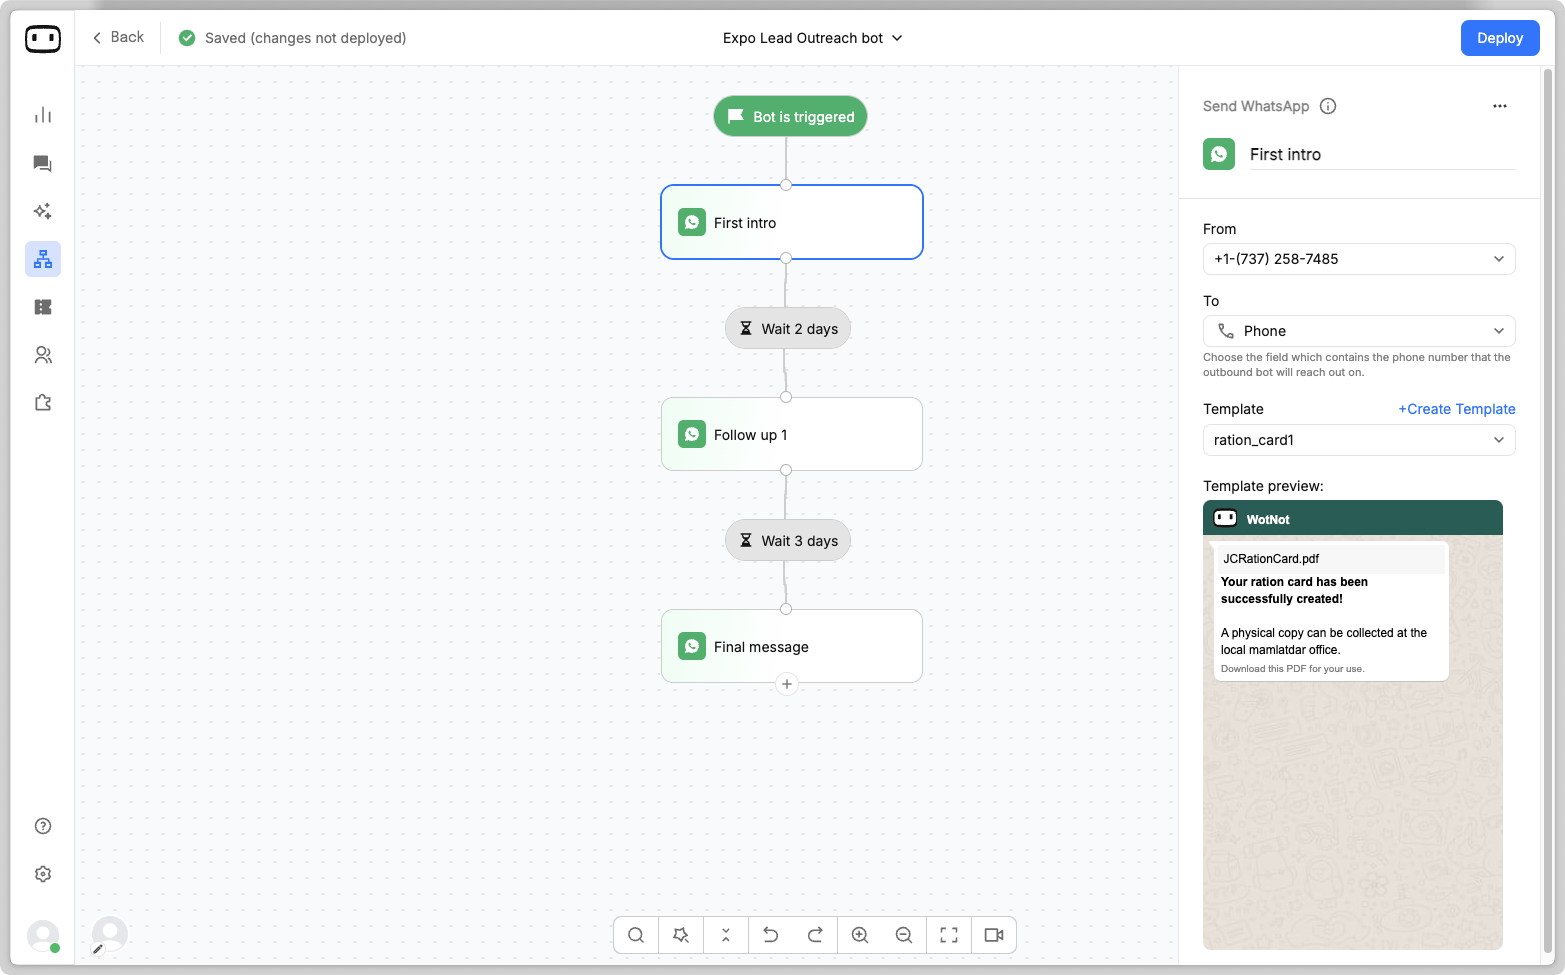
Composing the message
- WhatsApp
- SMS
- Email
- Select WhatsApp as the campaign channel.
- Select the approved WhatsApp template you want to use.
- Map the template variables to the variables populated from the incoming payload.
- Review the message and confirm that the mapped values are displayed correctly.
Hi {{contact_name}}, your order {{order_id}} is currently {{order_status}}.The values are populated automatically from the incoming payload for each contact.Personalizing with conditions
You can use the Send Status block to control what happens after a campaign message is sent. This allows you to create different follow-up paths based on the incoming data or the delivery outcome.- Add a Send Status block after the message.
- Select the status or condition you want to evaluate.
- Configure the appropriate branches for each outcome.
- Connect each branch to the required follow-up action.
- Save and test the campaign flow.
Testing the trigger
Before activating the campaign, send a test request using your own contact details. This helps verify that the payload is received correctly, the contact is created or updated as expected, and the mapped variables are populated.- Save your campaign configuration.
- Copy the campaign trigger endpoint.
- Replace the sample contact details with your own details.
- Send a test request to the endpoint.
- Check whether the contact was created or updated.
- Verify that the payload fields were mapped to the expected variables.
- Check the campaign log to confirm that the payload was received and processed correctly.
YOUR_CAMPAIGN_TRIGGER_URL with the trigger URL generated for your campaign.
Activating and monitoring
Once you have tested the trigger and confirmed that the campaign works as expected, you can activate it.- Review the campaign configuration.
- Confirm the trigger, variable mappings, message, and conditions.
- Activate the campaign to start processing incoming contact data.
- Monitor the campaign to make sure messages are being sent as expected.
- Pause the campaign if you need to temporarily stop new messages from being triggered.
- Resume the campaign when you are ready to continue sending.
You can turn off your outbound bot, if you do not want to accept any new requests.
Viewing campaign reports
Once the bot is deployed, it may take a few minutes for the bot to finish sending all the messages to the recipients. This delay may vary based on the contact list and the API provider you have used. Wait for a few mins and then visit Analytics > Outbound to see the reports. Learn more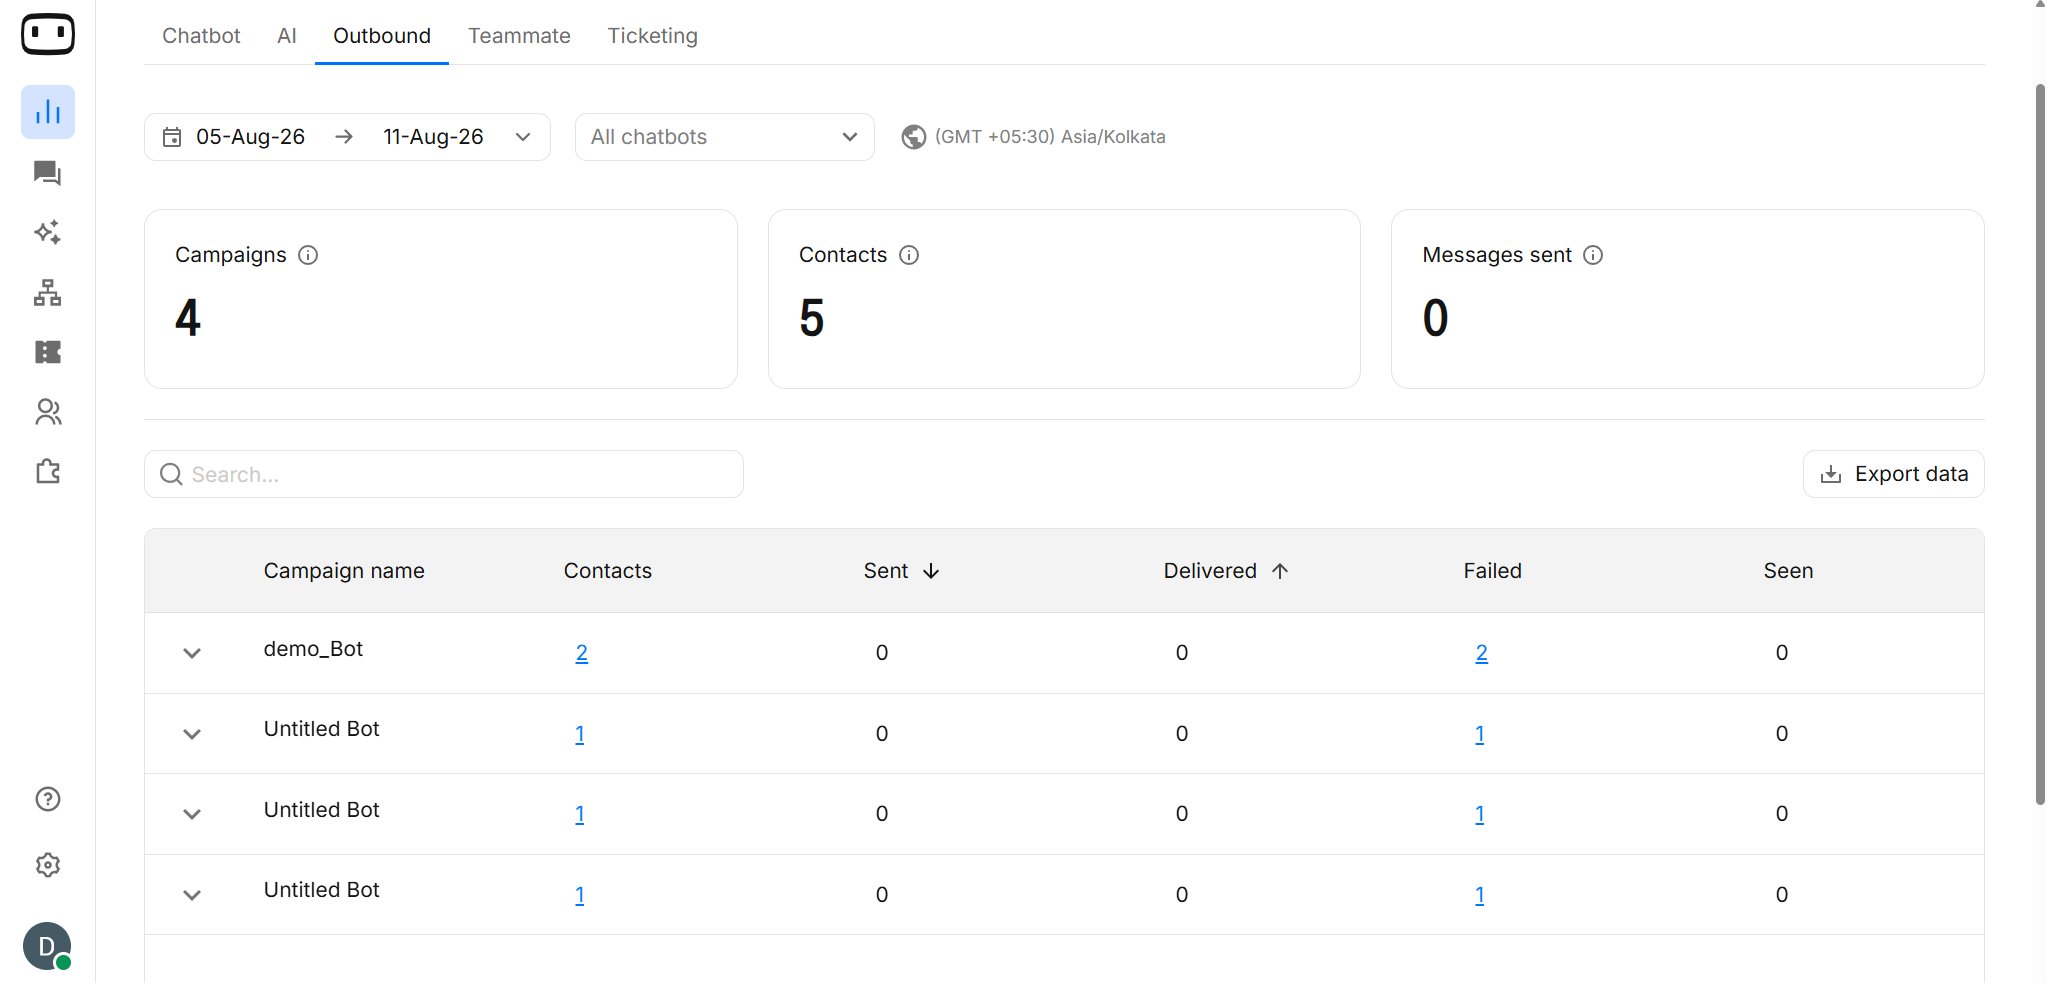
Troubleshooting
Webhook returns success but nothing sends
Webhook returns success but nothing sends
A successful webhook response does not always mean that the message was sent. Check the campaign log to confirm that the payload was received and parsed correctly.Verify that:
- The campaign is active.
- The payload contains all required fields.
- The contact has a valid phone number or email address.
- The selected WhatsApp template is approved, if applicable.
- The contact is not opted out or blocked.
- The message passed the configured conditions.
Contact created without the expected attributes
Contact created without the expected attributes
If the contact is created but some attributes are missing, check the payload-to-variable mapping.Make sure that:
- The payload field name matches the configured mapping.
- The field is included in the incoming request.
- The payload uses the expected data format.
- The mapped variable is configured with the correct type.
Variables rendering empty in the message
Variables rendering empty in the message
If a variable appears empty when the message is sent, verify that the corresponding payload field was received and mapped correctly.Check the campaign log first to confirm that the value exists in the incoming payload. Then verify that the variable used in the message matches the mapped variable.
Duplicate messages are sent to the same contact
Duplicate messages are sent to the same contact
Duplicate messages can occur when the same contact data triggers the campaign more than once.Check whether:
- The same payload is being submitted multiple times.
- Your integration retries requests after a successful response.
- Multiple campaign triggers are configured for the same event.
- The same contact is being added more than once.
Campaign paused unexpectedly
Campaign paused unexpectedly
Check the campaign status and review recent campaign activity in the logs.If the campaign was paused automatically or by another user, verify the campaign configuration and any account-level restrictions.Once the cause is resolved, activate the campaign again and send a test request to confirm that it is processing new payloads correctly.