

- Targets contacts selected at the time of sending.
- It is suitable for announcements, promotions, or one-time messages.
Available on the STARTER plan onwards.
Ongoing or One-Off?
Before you start
Make sure the following are ready before creating your campaign:- The channel you want to use — WhatsApp, SMS, or email - is connected to your account.
- For WhatsApp, the message template has been submitted and approved by Meta.
- Your contacts are available in the account.
- Contacts have valid phone numbers for WhatsApp or SMS, or valid email addresses for email.
- Required contact attributes are available if you plan to personalize the message.
A campaign can only be sent to contacts who meet the channel’s requirements and have not opted out or been blocked.
Step 1: Creating a campaign
1
Create a outbound bot using one-off campaign
Go to the bot builder page, and choose to create an outbound bot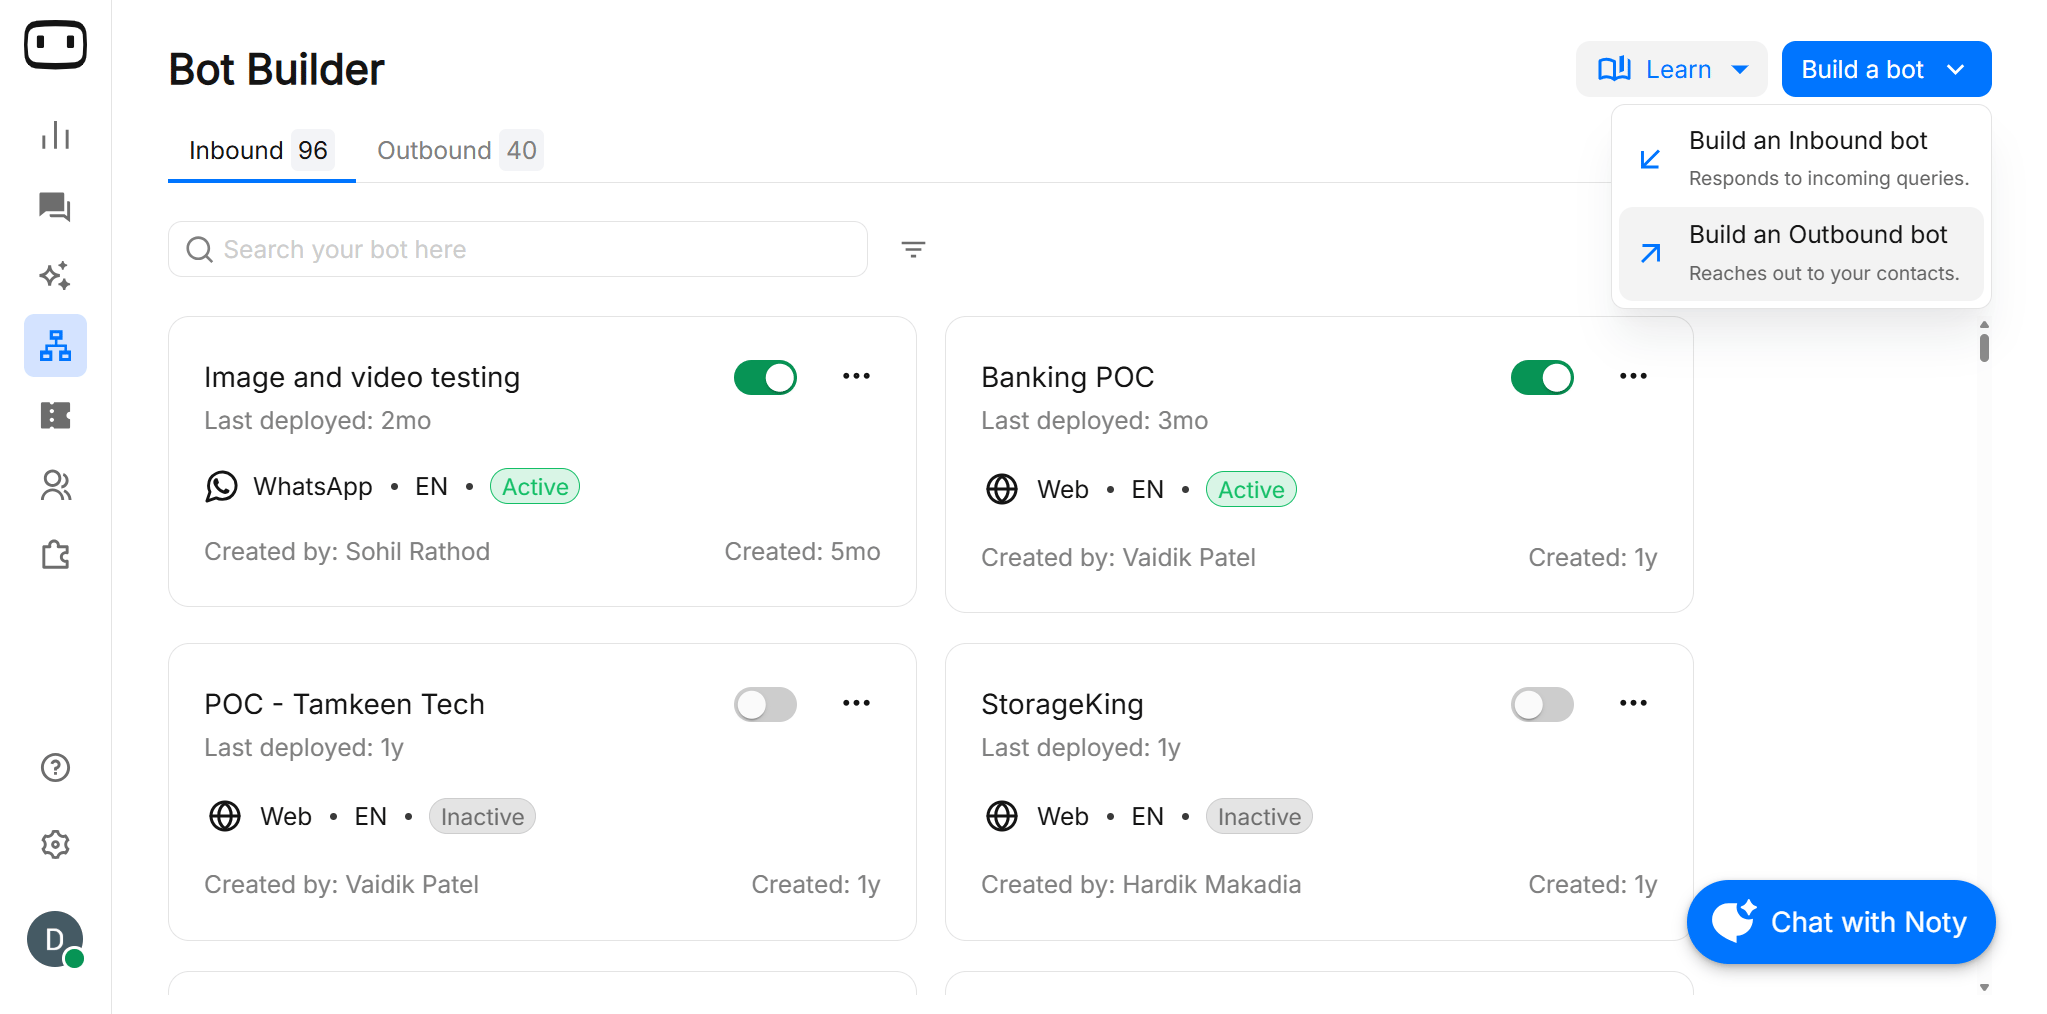
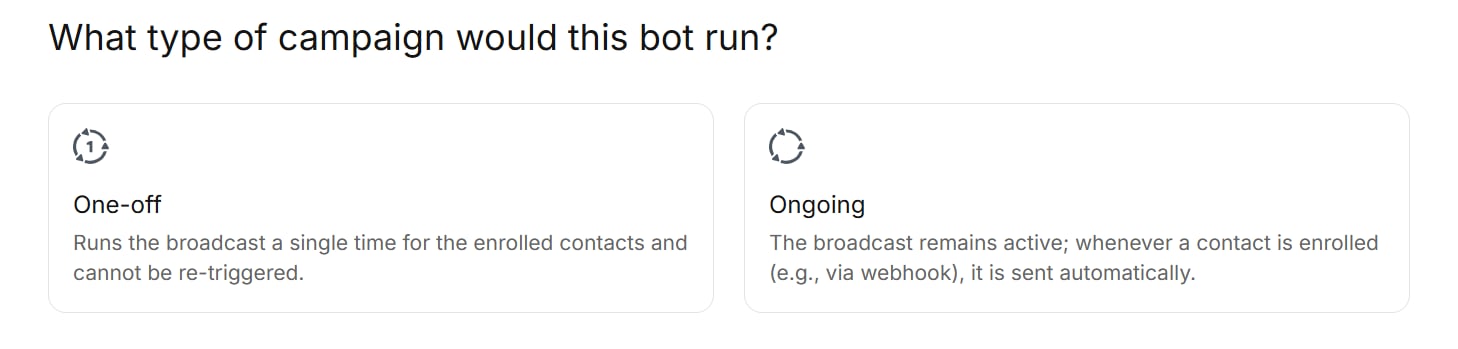
- Select one-off as your campaign preference.
2
Upload your contacts
Click on the ‘Trigger’ action block and upload a ‘CSV’ file which contains the contacts you want to reach out to.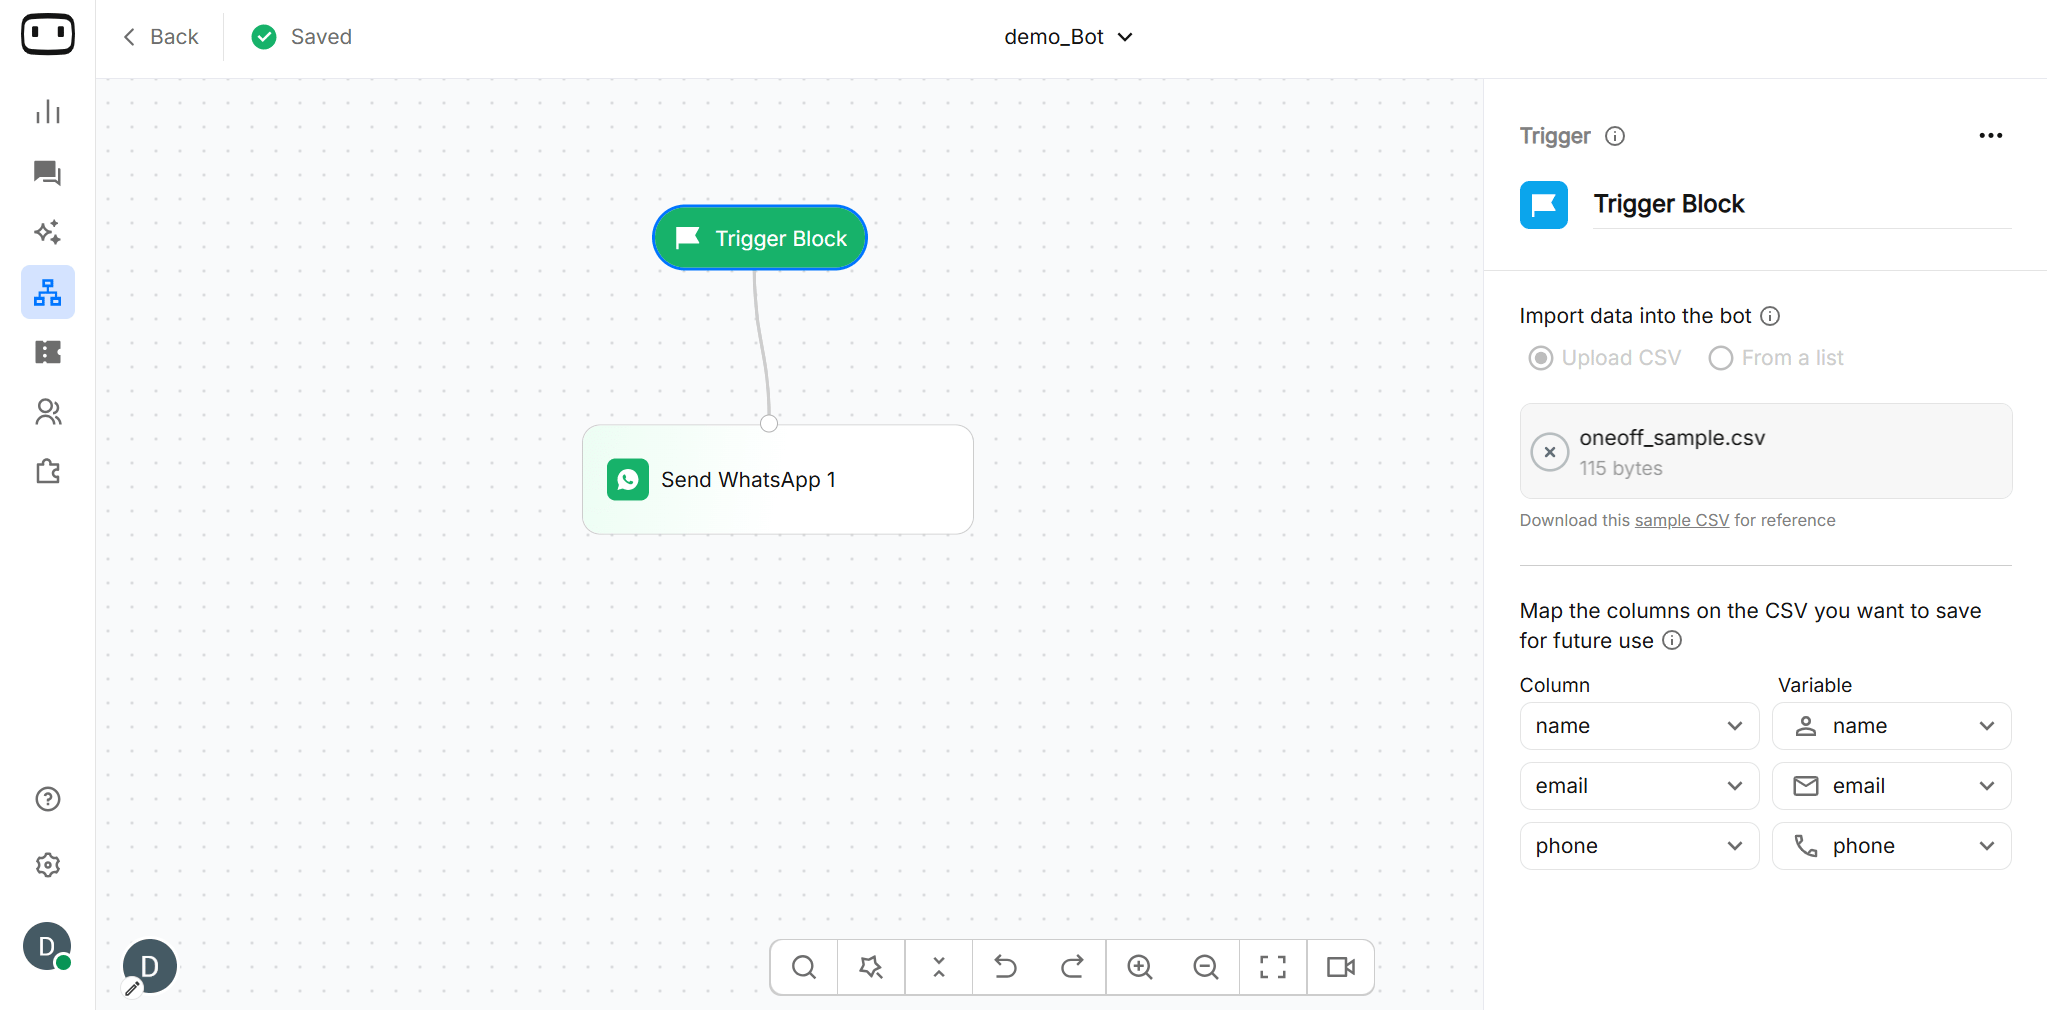
We consider the first row of the ‘CSV’ file as the column heading, these headings will be shown in the mapping of variables.
3
Create your outbound flow
Add a outbound block like Send SMS or Send WhatsApp and configure its fields on the right panel.The configuration fields would differ based on the channel you use.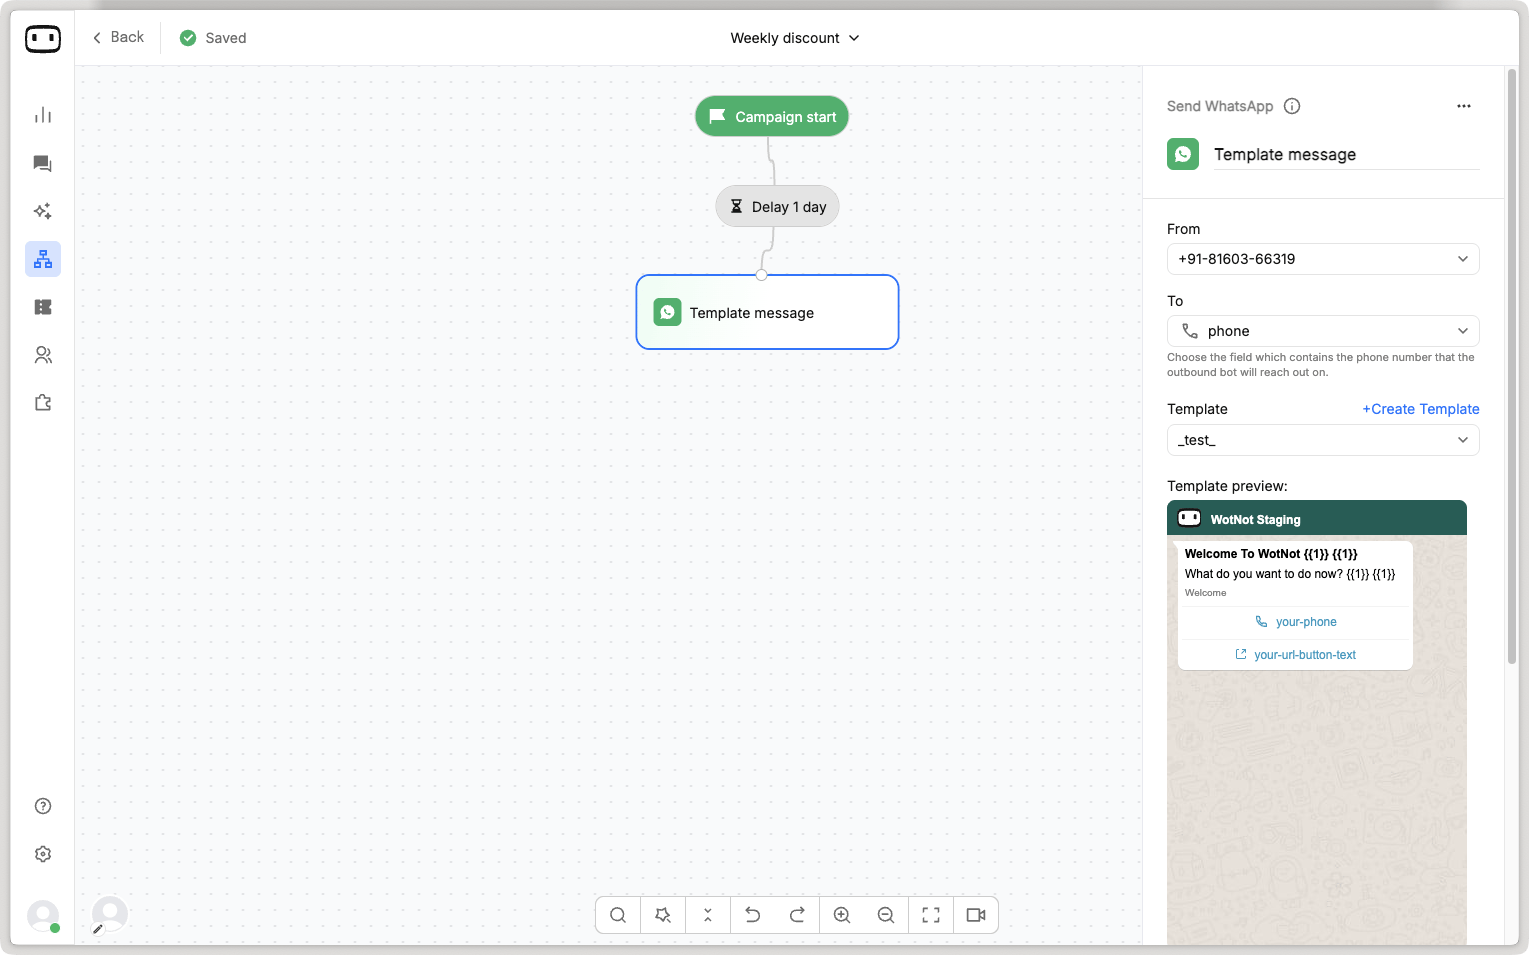
4
Deploy your bot to run your campaign
Once your flow has been created, double-check all the messages for typos or any other mistakes and hit Deploy.
A confirmation prompt will be shown to you for final approval before launching the campaign
A confirmation prompt will be shown to you for final approval before launching the campaign
Once the bot is deployed, it cannot be stopped. All contacts will start getting the messages that you have defined
5
See the results
Once the bot is deployed, it may take a few minutes for the bot to finish sending all the messages to the recipients. This delay may vary based on the contact list and the API provider you have used.Post that you can see the results of the campaign. Click on the numbers to go to a deeper view and be able to download a CSV which will contain the results of the campaign on a per contact basis.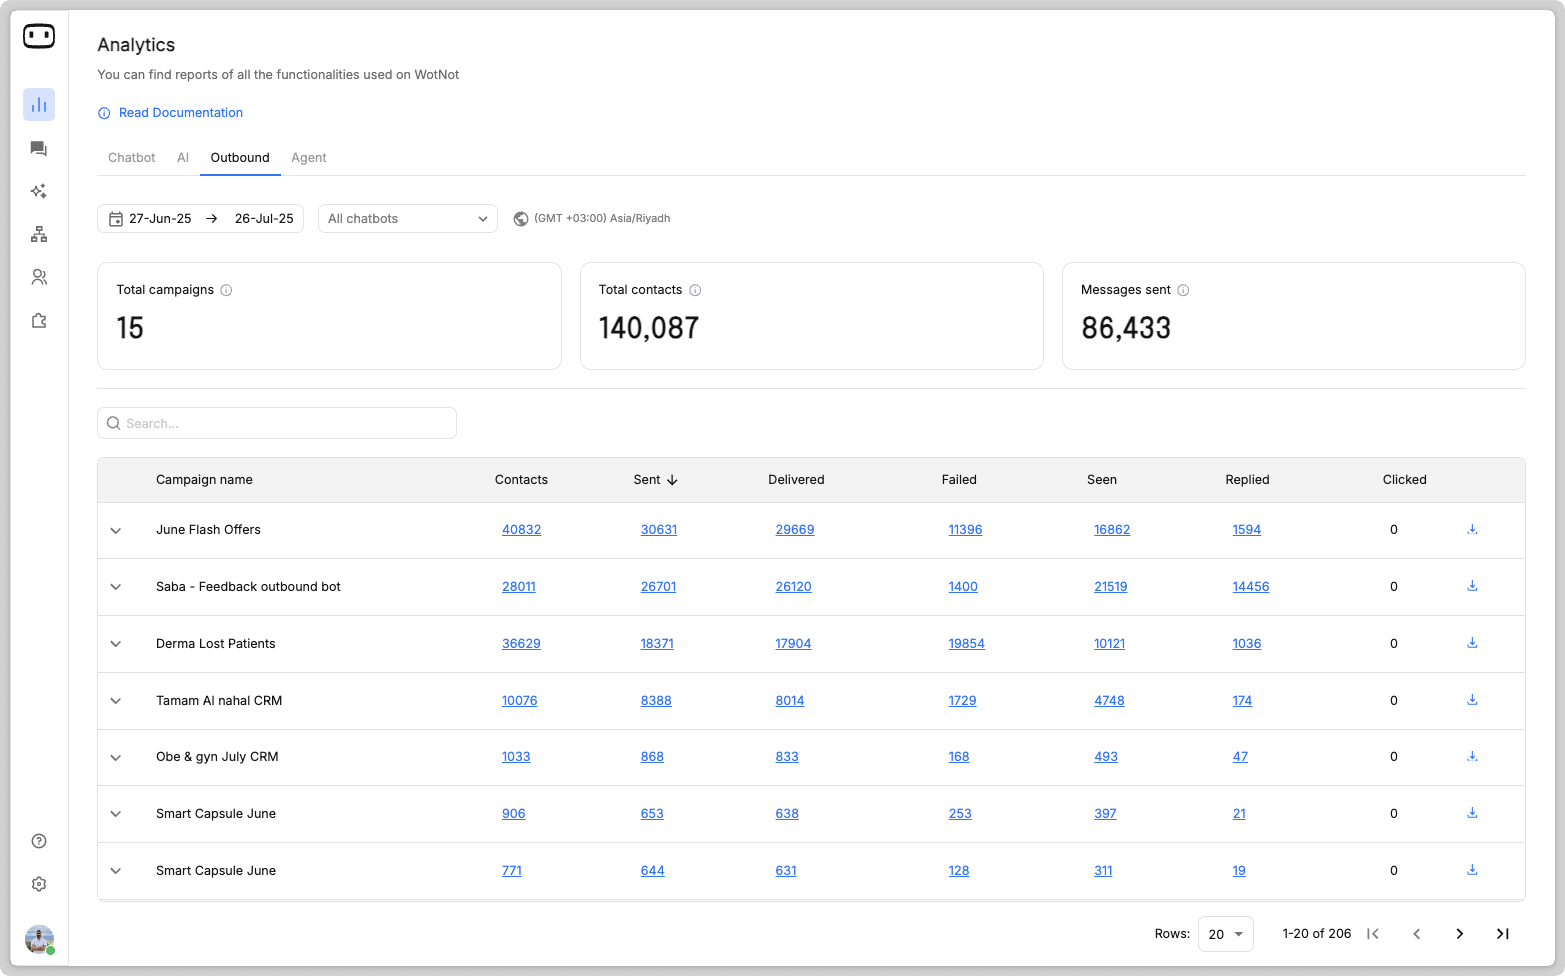
Choosing the audience
- Select your contacts — Choose an existing contact list for the campaign.
- Apply filters — Filter contacts based on available attributes to create a targeted audience.
- Review the recipient count — Confirm the number of eligible recipients before sending. This helps you confirm that the selected audience is correct.
- Check exclusions — Opted-out or blocked contacts are automatically excluded.
Build and manage contact lists
Go to Contacts to create, import, edit, and organize the contacts you want to use in your campaigns.
Composing the message
- WhatsApp
- SMS
- Email
- Select an approved WhatsApp template.
- Fill in the variables required by the template.
- Use contact attributes to personalise the message for each recipient.
- Review the message and make sure all variables are populated correctly.
Hi {{name}}, your order {{order_id}} is ready for delivery.Here, {{name}} and {{order_id}} can be populated using the corresponding contact attributes.Scheduling and sending
- Choose whether you want to Send now or Schedule the campaign.
- If you choose Schedule, select the date and time when the campaign should be sent.
- Review the audience, message, recipient count, and scheduled time.
- Confirm the campaign to send it immediately or schedule it for the selected time.
Monitoring Results
After sending the campaign, you can monitor its performance using the available campaign metrics.Compliance and opt-outs
When a contact submits an opt-out request, WotNot records the opt-out and automatically honors it for future outbound campaigns. Opted-out contacts are excluded from eligible recipients. For WhatsApp, consistently sending unwanted or poor-quality messages can affect your phone number’s quality rating and may impact your messaging limits.Opt-out management
Learn how contact opt-outs are captured and managed for future campaigns.
Messaging limits
Learn how WhatsApp messaging limits and quality ratings affect outbound messaging.
Stopping campaigns
To stop an active campaign, open the bot and click “Stop Campaign.” Once stopped, all contacts currently in the queue will no longer receive any future messages.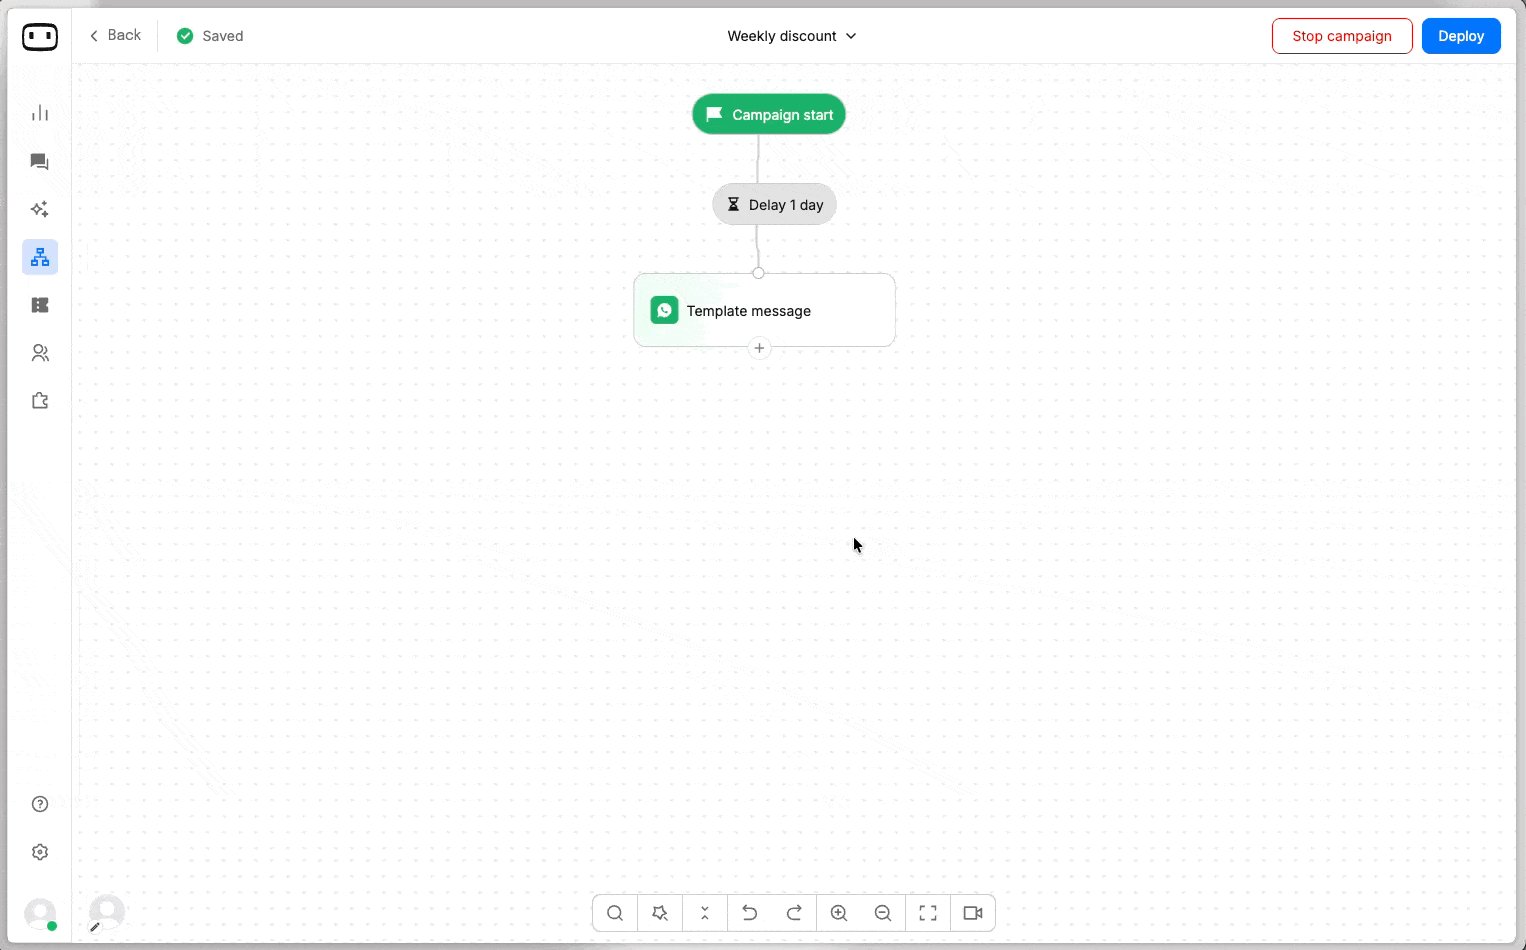
Pre-requisites
Depending on the channel you want to run your campaigns on, you would need,
Depending on the channel you want to run your campaigns on, you would need,
- Email API (Supported partner: Gmail, Microsoft, TechAlpha, Other)
- SMS API (Supported partner: Twilio, TechAlpha)
- MMS API (Supported partner: TechAlpha)
- WhatsApp API (Supported partner: Meta, 360dialog, Twilio, GupShup)